How to Make Cheddar Cheese - Easy Recipe!
Learn how to make homemade cheddar cheese at home using simple ingredients like fresh milk, rennet and starter cultures. This step-by-step guide is perfect for beginners. Get tips on aging, pressing, and adding flavors to create your own delicious cheddar at home!
This cheddar is my most reliable cheese recipe. I’ve tweaked and adjusted this process over and over until it became the one I use every single time. This recipe has been tested with both raw and store-bought milk, and every batch turns out beautifully. It’s simple enough for beginners but trusted by hundreds of thousands of home cheesemakers. It’s been saved, shared, and recreated countless times on Instagram, where it’s become a fan favorite. If you want a recipe that just works, this is it. Ready? Let me show you how to make cheddar cheese!
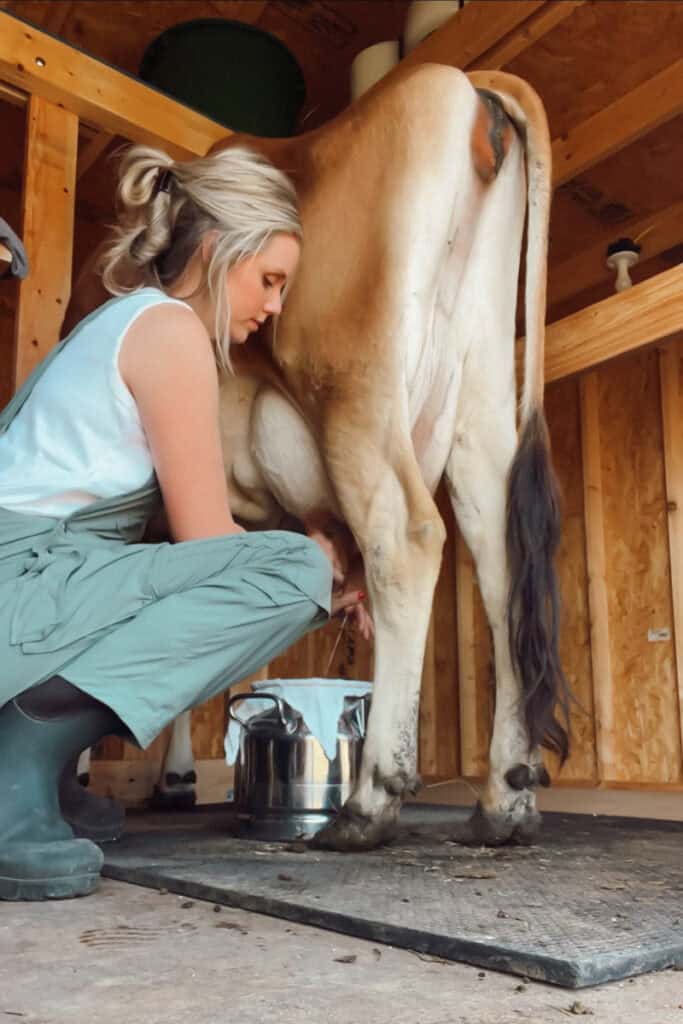
I’m Meg, a fifth-generation farmer and homesteader on our 20-acre farm in Kansas. I’ve spent years milking cows and experimenting with turning that milk into cheese—testing, tweaking and perfecting recipes that your family will actually be excited to eat!
As an amazon associate, this post contains affiliate links, which means I make a small commission at no extra cost to you. See my full disclosure here.
Jump to:
- Cheesemaking Supplies
- Cheddar Ingredients
- How to Make Homemade Cheddar Cheese
- Cut the Curds
- Cheddaring & Pressing
- Aging/Storage
- Troubleshooting Tips
- How to Make Cheddar Cheese Curds
- Watch the Youtube Video!
- How to Make Homemade Cheddar Cheese Sauce
- Adding Inclusions
- Frequently Asked Questions
- Helpful Tips to Make Cheddar Cheese
- That's a Wrap!
- Recipe
- Comments
Cheesemaking Supplies
- Cheesecloth or butter muslin – This is what you’ll line your mold with and use to drain the whey. This set is the best quality and value I've found.
- Over-the-sink strainer -- This isn't a must, but boy will it make your life easier! When you aren't using it for straining cheese and yogurt, it's great for washing produce.
- A cheese press – Pressing is what gives your cheddar that dense, sliceable texture. There are several tutorials for making your own homemade cheese press, but there are also several models available online. The press I have is called a Dutch Press and I after using it for three years, I highly recommend it.
- A mold for shaping – A cheese mold holds your curds in place while pressing and gives you that perfect wheel shape for hard cheese.
- Bamboo mat - The cheese will need a breathable and mold resistant mat (or wire rack) for drying. I've found that while repurposing my stainless steel cooling racks for drying cheese wheels is handy, my damp wheels eventually cause the wire to rust, leaving unappetizing brown spots on my cheeses. I can remedy this by layering a dry paper towel to prevent the rack from directly touching the bottom of my wheel, but the bamboo just works better in my opinion.
- Thermometer or thermopen - It is important to get a fast an accurate temperature reading throughout the cheesemaking process.
- Long spoon & knife -- Stainless steel won’t absorb flavors or bacteria the way a wooden spoon might, and it can handle the heat of the milk without warping.
- Large stock pot -- If you are making cheeses 2 gallons or larger, you'll need a pot that's up to the task!
You can read more in depth details about helpful tools (and what NOT to waste your money on!) in my post: Cheesemaking Supplies for Beginners.
Cheddar Ingredients
- 2 gallons of raw milk – Fresh milk is best, and it absolutely matters where it comes from. I use milk from our own family milk cow. If raw milk isn’t an option, pasteurized (but not ultra-pasteurized) milk will work, just be sure to add the calcium chloride. You can learn more about the different types of milk for cheesemaking in my post: Raw Milk vs. Pasteurized Milk for Cheesemaking (Flavor, Yield + Results).
- Mesophilic starter culture – This is the “good bacteria” that gets your milk moving in the right direction. I stick with freeze-dried cultures (the brand I like is MilkMan) because they’re easy to store and measure. Each packet makes several cheese wheels, so it's not as expensive as it seems!
- Liquid rennet – You can get either animal or vegetable rennet. I prefer animal rennet because I find it gives me a better set and cleaner flavor, but it’s totally up to you.
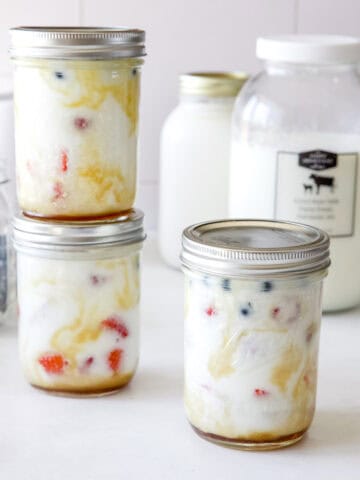
- Annatto – Optional, but if you want that classic orange cheddar look, a half teaspoon per gallon will do it. I'm opting for a natural white cheddar and skipping the annatto today. You can also get creative and make marble cheddar by only adding annatto to part of your curds (here's an example or see the image below).
- Calcium chloride – This is optional if using fresh raw milk. If your milk has been cooled (like store-bought pasteurized milk), calcium chloride will help your curds set up nice and firm. I skip the calcium chloride when I’m using fresh, warm milk straight from the cow.
- Cheese salt – Non-iodized is a must. Regular table salt with iodine can mess with the cultures, so stick to cheese salt or kosher salt without additives.
Can You Use Clabber Instead of Freeze-Dried Mesophilic Culture?
Yes, if you keep a healthy clabber culture, you can use it in place of freeze-dried mesophilic starter culture when making cheddar cheese or cheddar cheese curds. This is actually one of the oldest traditional methods of culturing milk for cheesemaking. I will warn you, it's more of an advanced method.
For this cheddar recipe, I use about ½ pint of active clabber culture per 2 gallons of milk. If I’m making a larger 4 gallon wheel, I use roughly 1 pint.
Your clabber should smell clean and mildly fermented, similar to thin yogurt or cultured buttermilk. The culture needs to be well established, not brand new. It should be slightly thickened but still smooth and pourable. If it smells sharp, unpleasant, very tangy, fizzy, or has heavily separated into curds and whey, it has fermented too far and can throw off the flavor and texture of your cheese.
To use clabber, simply add it at the same stage you would normally add mesophilic starter culture. Stir gently into the warm milk and allow the milk to ripen for about 1 hour before adding rennet.
One thing I’ve noticed after making many wheels this way is that clabber-cultured cheddar can develop a slightly more complex farmhouse flavor compared to freeze-dried cultures. The process feels a little less “manufactured” and more connected to old-fashioned cheesemaking traditions, which I personally love.
If you want to learn how I maintain and use my clabber culture, you can read my full guide here: How to Make a Clabber Culture.
How to Make Homemade Cheddar Cheese
- Pour 2 gallons of milk into a large stainless steel pot and slowly heat it to 85°F (29°C). If you’re using fresh raw milk, skip the heating and just filter it straight in from the cow — it’s already the perfect temp. Stir gently as it warms so the heat distributes evenly.
- Once the milk is at temperature, sprinkle ⅛ teaspoon of mesophilic starter over the surface. Let it sit for 3 minutes to rehydrate, then give it a gentle 30-second stir. Keep the milk at 85°F and let it ripen for 1 hour.
- Dilute ½ teaspoon liquid rennet and annatto (if you want orange colored cheese), plus calcium chloride(you only need this if you’re using refrigerated or pasteurized milk) in ½ cup of cool, non-chlorinated water. Pour it into the milk while stirring gently in an up & down motion for about 30 seconds so it’s evenly mixed. Now let it rest, undisturbed, for 45 minutes to 1 hour until it sets. Check for a clean break, then slip a knife in and if the curd separates neatly, you’re ready for the next step.
Cut the Curds
- Take a long knife and cut the curds into ½-inch cubes. Let them sit for about 10 minutes so they can firm up a bit before heating.
- Over the next 30 minutes, slowly heat the curds to 100°F (39°C), stirring gently to keep the warm curds from clumping. Once you hit 100°F, hold that temp for another 10 minutes with occasional stirring. You’ll notice the curds shrinking and firming up and they'll begin to sink to the bottom of the pot, and that’s exactly what you want.
- When the curds are firm and springy, pour off the whey. I like to line a mesh strainer or colander with cheesecloth and dump the curds in, saving the whey in case I need it later. Let them strain for about 20 minutes.
Pictured below: Checking for a clean break, cutting the curds, pouring the curds into a strainer, straining the curds.


Cheddaring & Pressing
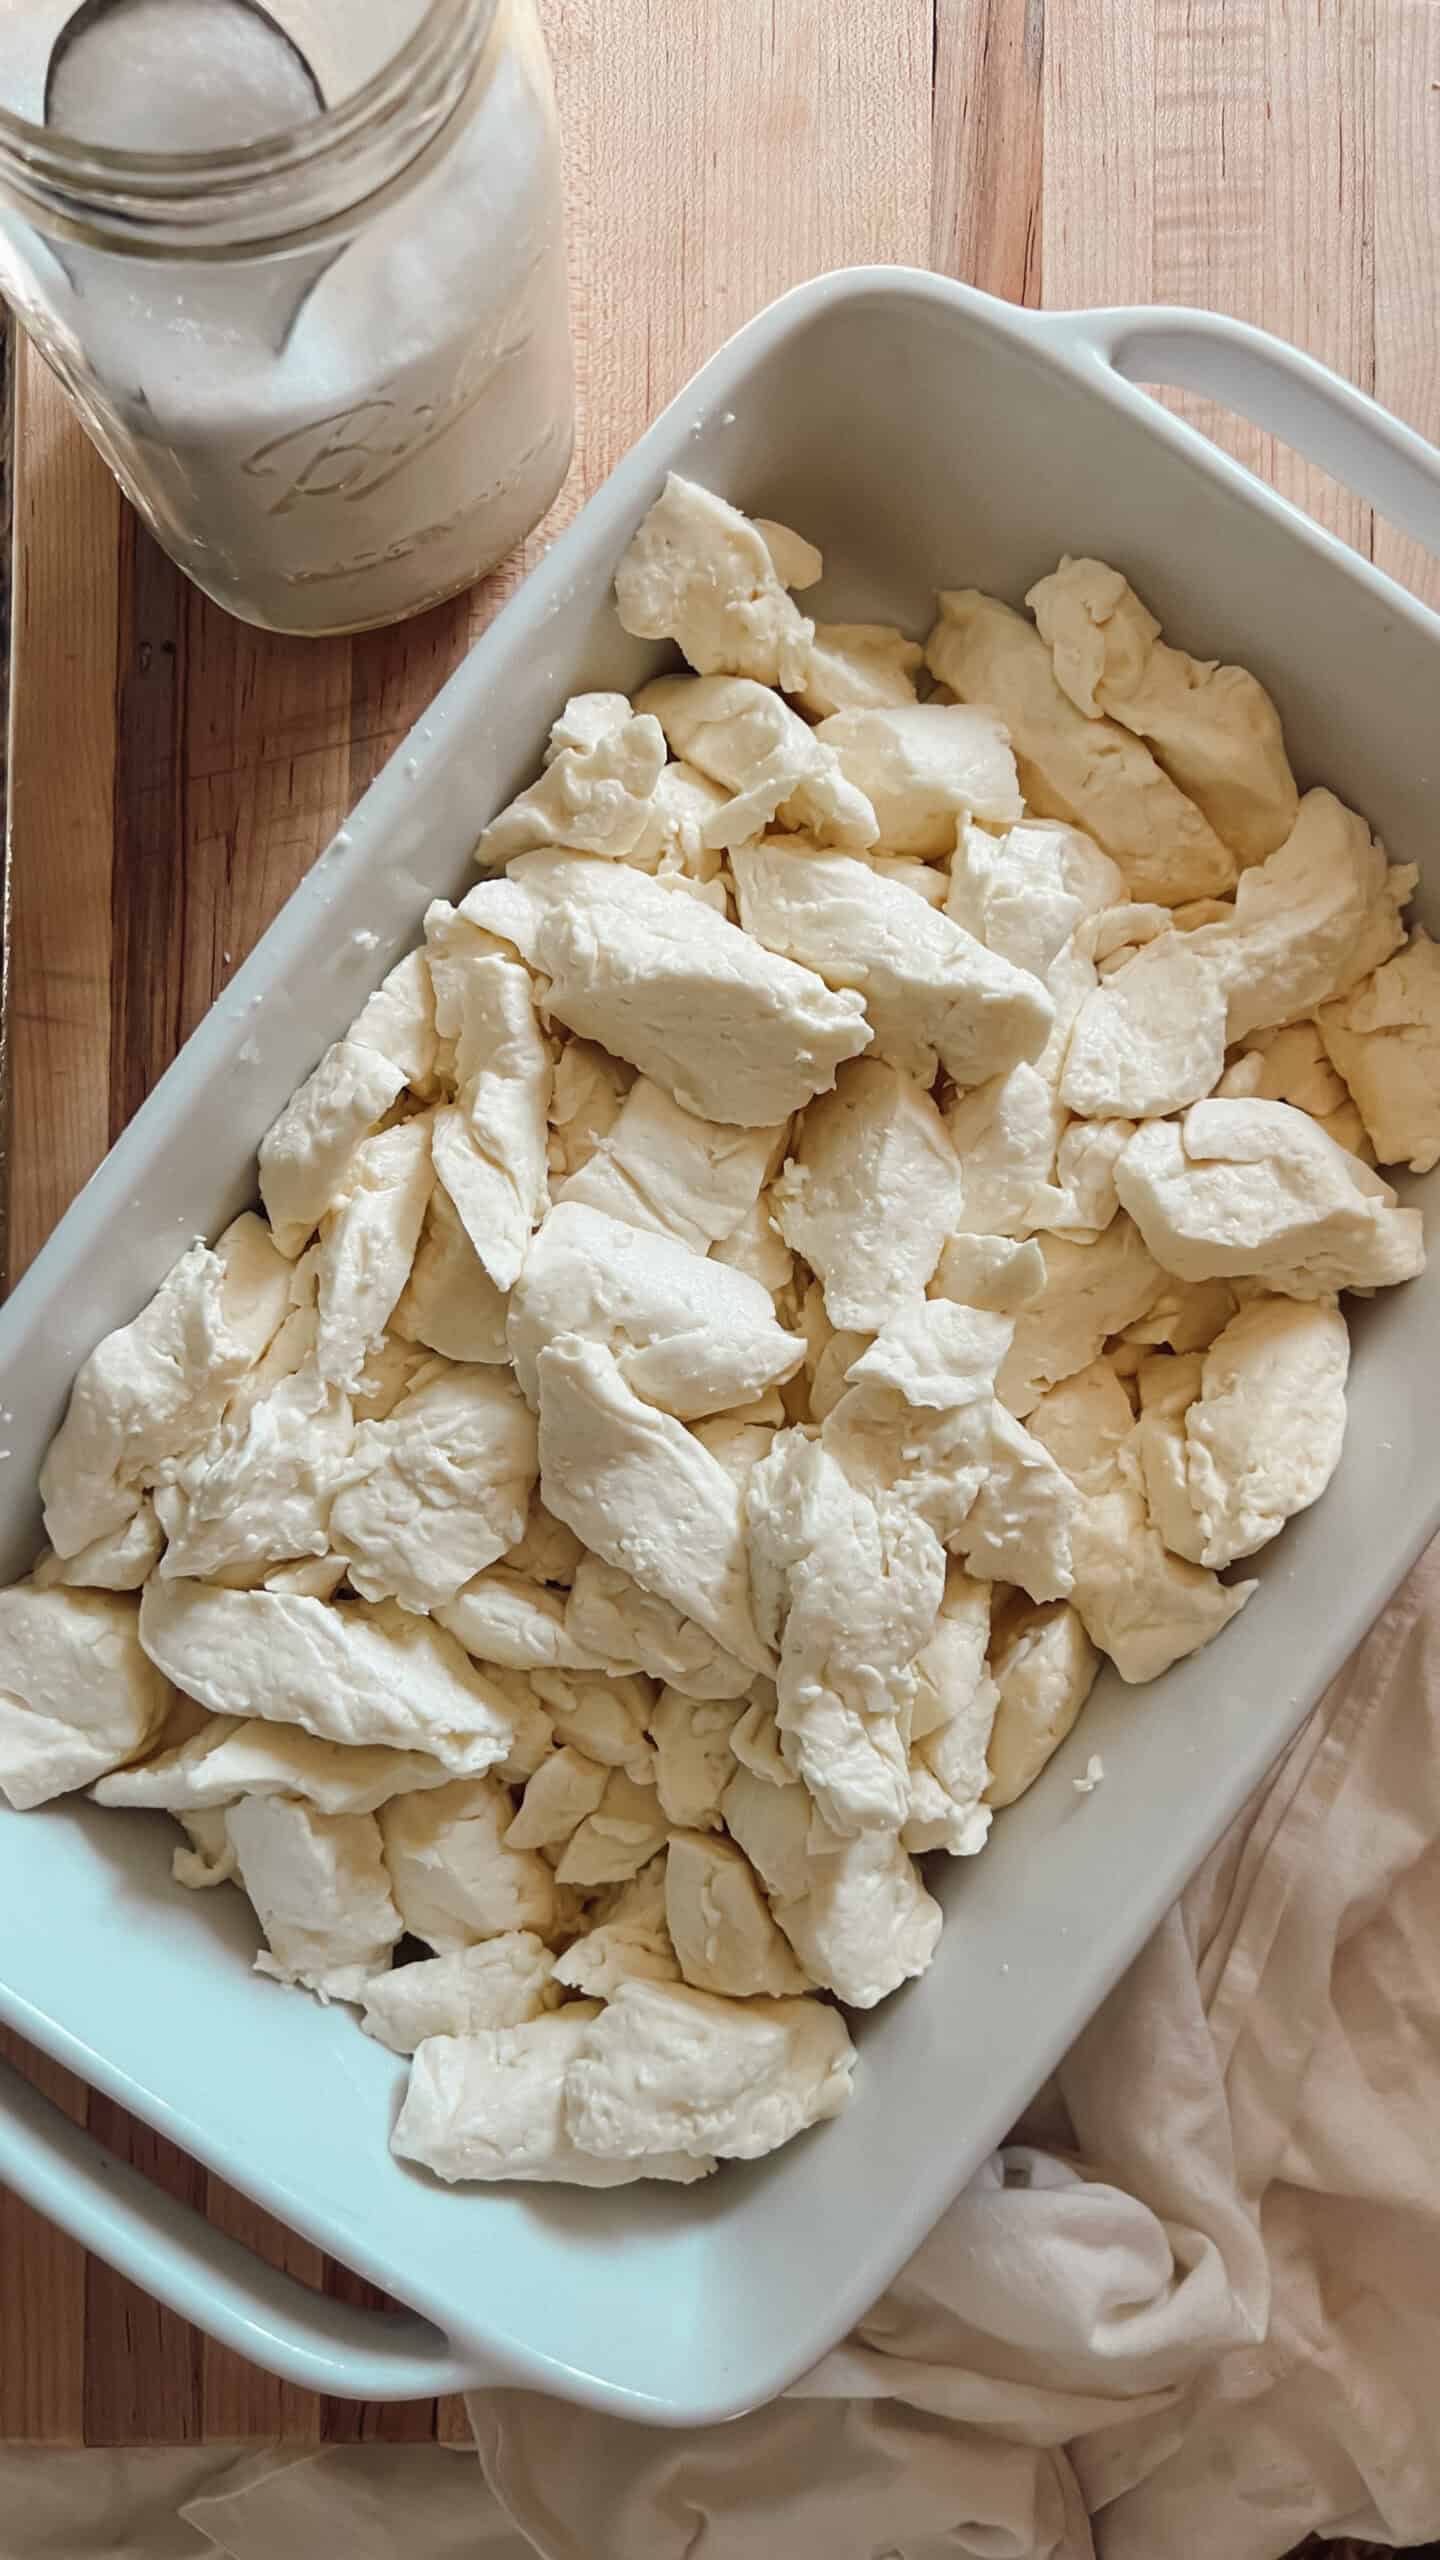
- This the beginning of the cheddaring phase, aka what that makes cheddar, well… cheddar. Take your drained curd mass and slice it into slabs. Stack them in your pot or on a board, then flip the stack every 20 minutes for about 2 hours. The texture will change as you go — the curds will get firmer, smoother, and more firm.
- Once cheddaring process is done, cut those slabs into ½ inch-sized pieces. Sprinkle on 2 tablespoons of cheese salt and toss to coat evenly. At this point, you have made cheddar cheese curds! I'll put a note below for how to age your curds if you want to stop here.
- Line your mold with cheesecloth and pack the salted curds in. Fold the cloth over and press at 10 lbs for 10 minutes. Take it out, rewrap in fresh cheesecloth, and press again at 20 lbs for 1 hour. Then flip, rewrap, and press at 50 lbs for 12 hours.
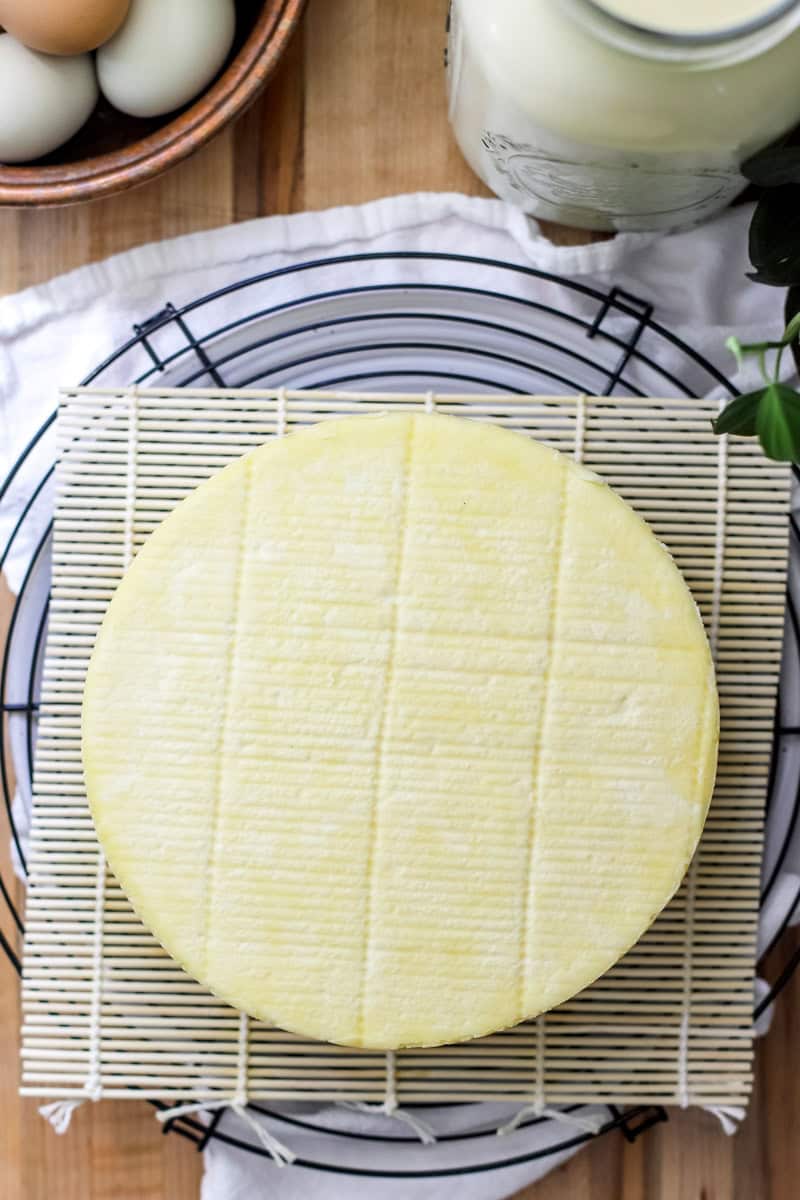
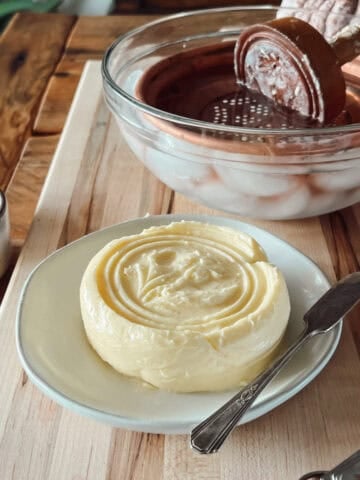
- After pressing, remove from the mold and let the cheese air-dry at room temp for 2-5 days, flipping now and then until the surface is dry to the touch. I like to set mine on a bamboo mat over a plate or bowl to catch any extra whey. In my kitchen, 3 days is perfect for developing a natural rind. You might hear a home cheese maker say it is ready when it feels like a clammy handshake, but I think that's pretty subjective.
Pictured below: cheese curds wrapped in cheese cloth and placed in a large mold, pressing the cheese wheel, finished cheddar cheese wheel.


Aging/Storage
Once dry, apply cheese wax or vacuum seal it and age in a cheese cave at 55°F (13°C) or in your refrigerator. I age our vacuum sealed cheddar in the back of our refrigerator at 38°F for 4-6 weeks before taste testing. Traditional cheesemakers will tell you this is the wrong way, but in all of the cheesemaking groups I'm in online, refrigeration is how home cheese makers are having the most success. People are rarely waxing cheeses anymore due to the convenience of vac sealing!
A month is the minimum amount of time for aging cheddar, but 3-12 months will give you the best sharp cheddar. The longer it sits, the sharper it gets.
Troubleshooting Tips
Okay, are you confused yet or are we still good? I've made a list of the errors I've made, as well as the most common questions I get over on instagram whenever I share about making cheddar cheese. And if you still have questions, please leave me a comment and I'll reply as soon as I can!
- Milk won’t coagulate or no clean break?
That means something’s off with your milk, rennet, or temperature. Make sure your milk was not ultra‑pasteurized, your rennet is fresh and has been stored in the fridge, and everything’s warmed just right. Let it sit another 15 minutes and test again. - Curds disintegrate while stirring?
If curds fall apart, the rennet might be too weak—or mixed too wildly. Be gentle, use a spoon (not a whisk), and try increasing the rennet slightly next time. - Your cheese is rubbery?
Too much rennet or overworking the curds can do this. Use less rennet or shorten your cheddar-style stacking. The cheese is still consumable. - Curds too soft?
If they collapse, you might need more rennet—or your milk was ultra‑pasteurized. Try warmer temps or a stronger rennet dose early in the process.
How to Make Cheddar Cheese Curds
To make cheese curds instead of pressing a cheddar wheel, follow the recipe through cutting, cooking, draining, and salting the curds. After salting, spread them on a cheesecloth-lined mesh rack and let them rest at room temperature for about 24 hours. This helps them firm up and develop a little more flavor.
After that, you can refrigerate them in an airtight container, or get creative and brine them—pickle juice is a fun option! They’re best eaten fresh but will keep for a few weeks in the fridge (just know they lose their squeak as they chill). Here's an instagram reel to give you a better look at the process and you can find the full instructions & recipe on my post: Fresh Cheddar Cheese Curds.
Watch the Youtube Video!

How to Make Homemade Cheddar Cheese Sauce
Can this cheddar be used to make your own cheddar cheese sauce? Yes! Homemade cheddar melts beautifully if it’s aged at least a month. Because it’s not processed, it may separate a bit more than store-bought shredded cheese, but you can keep it creamy by making a roux first (melt butter, whisk in flour, then slowly add milk) and then stirring in the grated cheddar off the heat. The starch in the roux keeps the cheese smooth and prevents oiliness.
Adding Inclusions
Once you get this recipe down, it's time to start having fun! You can make your own cheddar cheese recipes by adding inclusions (like dried peppers, herbs, or fruit).
You’ll add inclusions right after salting the curds but before pressing. At this point, the curds are drained, salted, and still loose, so it’s easy to gently fold in your ingredients without breaking the curds. Make sure everything you add is completely dried (no moisture!!) and chopped small, which keeps your cheese safe during aging.
Here are instagram reels that show a few inclusions I've made (pictures below!): Cranberry Jalapeño Cheddar, Zesty Dill Pickle Cheddar, White Cheddar Cranberry (also pictured below).


Frequently Asked Questions
Yep! Just skip ultra‑pasteurized. Whole or non‑homogenized milk works best. Cold milk will need calcium chloride to help it set right.
Cheesemaking takes patience—curd won’t always look perfect the first time. Keep practicing! The more you do it, the more you’ll trust the feel of the curd.
Not at all. It just takes time, practice, and a little patience. Treat it more like a hobby and less like a chore. You’ll get the hang of it fast.
Helpful Tips to Make Cheddar Cheese
- Use a reliable thermometer—temps matter more than you’d think. Even two degrees can make a difference in curd texture.
- Drain curds well, especially for hard cheeses—moisture messes with texture and aging and will make your cheese taste rancid or 'cow-like.'
- Keep your rennet cool and dry between batches—heat and light will kill your rennet over time, and then nothing sets up right.
That's a Wrap!
If you love this cheddar cheese recipe, you need to try my Colby Cheese next! It is a mild flavored cheese made using a washed curd method, similar to Gouda Cheese. It will be your next favorite! I also have a guides for making Homemade Yogurt and Homemade Butter with detailed step-by-step instructions so you can make it the best way! And remember to print, save or pin this post so you can easily find your favorite cheddar recipe the next time you need it!
Thanks for reading and I can't wait to hear all about your cheesemaking journey!
- Meg


Recipe

Cheddar Cheese
Equipment
- cheese press
- cheese cloth
- large cheese mold
- large stock pot
- slotted spoon
- bamboo mat
- thermometer
Ingredients
- 2 gallons milk raw or pasteurized (NOT ultra pasteurized)
- ⅛ teaspoon mesophilic starter culture
- ½ cup water cool and filtered
- ½ teaspoon Rennet liquid veal rennet is preferred
- ½ teaspoon annatto optional for orange color
- ½ teaspoon calcium chloride only necessary if using refrigerated or pasteurized milk
- 2 tablespoons cheese salt
Instructions
How to Make Homemade Cheddar Cheese
- Pour 2 gallons of milk into a large stainless steel pot and slowly heat it to 85°F (29°C). If you’re using fresh raw milk, skip the heating and just filter it straight in from the cow — it’s already the perfect temp. Stir gently as it warms so the heat distributes evenly.
- Once the milk is at temperature, sprinkle ⅛ teaspoon of mesophilic starter over the surface. Let it sit for 3 minutes to rehydrate, then give it a gentle 30-second stir. Keep the milk at 85°F and let it ripen for 1 hour.
- Dilute ½ teaspoon liquid rennet and annatto (if you want orange colored cheese), plus calcium chloride(you only need this if you’re using refrigerated or pasteurized milk) in ½ cup of cool, non-chlorinated water. Pour it into the milk while stirring gently in an up & down motion for about 30 seconds so it’s evenly mixed. Now let it rest, undisturbed, for 45 minutes to 1 hour until it sets. Check for a clean break, then slip a knife in and if the curd separates neatly, you’re ready for the next step.
Cut, Heat & Strain the Curds
- Take a long knife and cut the curds into ½-inch cubes. Let them sit for about 10 minutes so they can firm up a bit before heating.
- Over the next 30 minutes, slowly heat the curds to 100°F (39°C), stirring gently to keep the warm curds from clumping. Once you hit 100°F, hold that temp for another 10 minutes with occasional stirring. You’ll notice the curds shrinking and firming up and they'll begin to sink to the bottom of the pot, and that’s exactly what you want.
- When the curds are firm and springy, pour off the whey. I like to line a mesh strainer or colander with cheesecloth and dump the curds in, saving the whey in case I need it later. Let them strain for about 20 minutes.
Cheddaring & Pressing
- This the beginning of the cheddaring phase, aka what that makes cheddar, well… cheddar. Take your drained curd mass and slice it into slabs. Stack them in your pot or on a board, then flip the stack every 20 minutes for about 2 hours. The texture will change as you go — the curds will get firmer, smoother, and a little more elastic.
- Once cheddaring process is done, cut those slabs into ½ inch-sized pieces. Sprinkle on 2 tablespoons of cheese salt and toss to coat evenly. *At this point, you have made cheddar cheese curds! I'll put a note below for how to age your curds if you want to stop here.
- Line your mold with cheesecloth and pack the salted curds in. Fold the cloth over and press at 10 lbs for 10 minutes. Take it out, rewrap in fresh cheesecloth, and press again at 20 lbs for 1 hour. Then flip, rewrap, and press at 50 lbs for 12 hours.
- After pressing, remove from the mold and let the cheese air-dry at room temp for 2-5 days, flipping now and then until the surface is dry to the touch. I like to set mine on a bamboo mat over a plate or bowl to catch any extra whey. In my kitchen, 3 days is perfect for developing a natural rind. You might hear a home cheese maker say it is ready when it feels like a clammy handshake, but I think that's pretty subjective.
Aging/Storage
- Once dry, apply cheese wax or vacuum seal it and age in a cheese cave at 55°F (13°C) or in your refrigerator. I age our vacuum sealed cheddar in the back of our refrigerator at 38°F for 4-6 weeks before taste testing, then build flavor by aging 3+ months. Traditional cheesemakers will tell you this is the wrong way, but in all of the cheesemaking groups I'm in online, refrigeration is how home cheese makers are having the most success. People are rarely waxing cheeses anymore due to the convenience of vac sealing!

Curious to know if you have ever done or thought about making the cheese in a smaller size?
Like say maybe split this recipe into 4 smaller molds to give as gifts or just to make it easier to keep in the fridge during aging?
Also would a wine/beverage fridge, that can be set to higher temperature than a home refrigerator, be something that would work for aging?
And lastly what are your thoughts on adding horseradish to the cheese, my Mom loves horseradish cheese, since you say add-ins must be dry, how would that work?
I can't wait to get started!!
Hi Tina,
I have a mold that holds the curds from one gallon of milk. It's about six inches wide and works really well for smaller wheels. I don't use it much these days because my cows are both producing and I have tons of milk to process, but it's always an option! As far as gifting cheese, I just cut the wheels into quarters or sixths and place them individually in vacuum seal bags. It's a nice size! If you have a wine fridge, that works great for aging. I have a wine fridge that I am using for Brie and Camberbet, but I've found I prefer my hard cheeses to age in the refrigerator. I know it's not technically the recommended way, but the flavor is so much better in my opinion. Fresh horseradish is full of water and enzymes that can interfere with the curd’s pH and aging process. If you want to use fresh, grate it finely, then press it between paper towels or squeeze it in cheesecloth to remove as much moisture as possible. Let it air dry for about 30–60 minutes before adding. Let me know how it turns out!
Hey so curious if I can do this with our fresh raw goat milk?? Do you have any info or experience with that?
Hi Sally, I just consulted with my friend who makes cheddar cheese from her goat's milk, and she said the process is exactly the same.
Meg
will lactose free milk work ? for this cheese. Is this going to taste like hoop cheese ?
Hi Paul, I have not tried making this recipe with anything other than regular whole milk (both raw and pasteurized).
Hello!
How would I sub clabber for the culture? Is it a 1:1 sub?
Thanks for all the information you share!
Hi Asheley,
I use 1/2 cup of very active clabber for 2 gallons of milk. The first two wheels I made with clabber developed yeast contamination and blew (puffed up and smelled bad) during the drying step because my clabber was new and not strong enough. Once I figured that out, my cheese turned out like normal. Make sure your clabber is well established and you've been feeding it daily for several weeks on the counter (not storing it in the fridge). Let me know how yours turns out!
Meg