Homemade Dill Pickle Canning Recipe
Learn how to make delicious homemade pickles with this easy dill pickle canning recipe! I'm sharing my expert tips for pickling cucumbers for long term storage, achieving the perfect crunch, using a water bath canner, and much more. Impress your taste buds (and friends!) when you pop open a jar of your very own dill pickles!
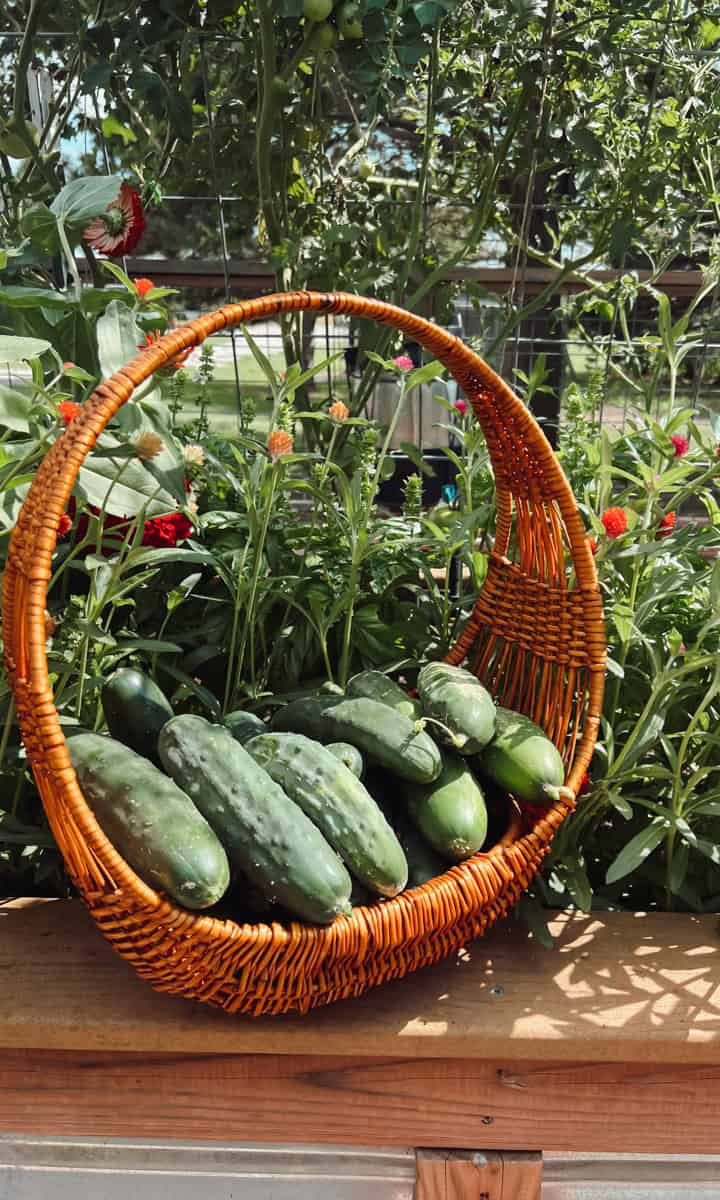
Some summers our garden suddenly produces more cucumbers than we can eat fresh overnight, and this dill pickle recipes has become one of my favorite ways to preserve them before they go soft. If your garden is overflowing with cucumbers, you need this recipe!

This is a simple water bath canning recipe that we use on repeat during cucumber season, which is from mid June through early August for us in zone 6B.
I always say that I'm going to give myself permission to sell or give away our abundance of cucumbers once I've made enough jars of pickles for our family, but ever since I learned how to make homemade dill pickles, it's been game on!
If you have more cucumbers than you know what to do with, I know you'll love my Tomato Cucumber Feta Salad and Easy Cucumber Salad (cucumbers onion vinegar sugar recipe).
Jump to:
- Why This Dill Pickle Canning Recipe Works
- Why Homemade Pickles are Better Than Store-Bought
- My favorite cucumbers for canning pickles
- Tips From Meg
- Helpful tools for canning dill pickles
- Tips for Crunchy Pickles: What causes mushy pickles?
- Ingredients for making pickles
- How to Make Cucumber Pickle (Step-by-Step)
- How to Water Bath Can Pickles
- Recipe
- Processing Times Chart
- Variations for this Dill Pickle Recipe
- How Long do Homemade Pickles Last?
- FAQ about Making Pickles
- More Recipes You'll Love
- If you are a beginner gardener, I wrote these guides just for you!
- Comments
In this easy-to-follow guide, I'll walk you through the simple steps to create delicious pickles right in your own kitchen. Use the jump-to button above to find what you need, fast!
Making really good homemade pickles is totally worth the effort, I promise! I'll cover everything from selecting the perfect cucumbers and essential ingredients for the pickling brine to using the right equipment, like jars and water bath canners.
If you have any questions about making homemade pickles, check out the frequently asked questions section for quick answers or ask me in the comments!
Why This Dill Pickle Canning Recipe Works
If you're looking for crisp, classic dill pickles that stay shelf stable for months, this recipe delivers. It's the same recipe my family has used for years, and every summer we make batch after batch as the cucumbers start taking over the garden.
Here's why it works:
- The vinegar brine creates classic dill pickle flavor while preserving the cucumbers for long-term pantry storage.
- Fresh, just-picked cucumbers produce the crunchiest pickles. Whenever possible, I can cucumbers the same day they're harvested.
- Garlic, dill, and mustard seed create an old-fashioned dill pickle flavor without being overpowering.
- A simple water bath canning method makes this recipe beginner-friendly while still producing dependable results.
- The pickles continue to improve after canning. While they're safe to eat once the jars have sealed and cooled, I think they're at their best after resting for 6 to 8 weeks.
This recipe has another advantage that means a lot to me. It came from my grandma's kitchen. Her well-loved recipe card is covered with years of handwritten notes, little adjustments, and tiny tweaks that turned a good pickle recipe into a great one. Every summer, opening another jar feels like carrying on a family tradition.
Other recipes from my grandma's kitchen include her Sweet Cream Sugar Cookies, Peanut Butter Cake, Breakfast Casserole, Rhubarb Crisp and Old Fashioned Italian Cream Cake.
Why Homemade Pickles are Better Than Store-Bought
Homemade dill pickles simply taste fresher than most store-bought pickles because you're starting with fresh cucumbers and can adjust the garlic, dill, and spice level to your family's taste. I also love knowing exactly what goes into every jar. Best of all, one afternoon of canning preserves an entire cucumber harvest for months to come.

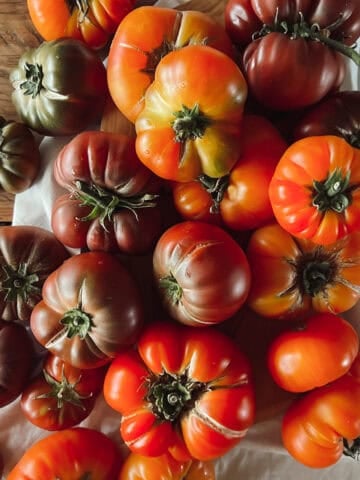
I’ve found that the freshest cucumbers always make the best homemade pickles. Cucumbers picked fresh from the garden or bought from local farm stands and farmer’s markets tend to stay much crunchier than grocery store cucumbers that may have spent days in storage or shipping. For the best flavor and texture, I try to can cucumbers the same day they’re picked whenever possible.
My favorite cucumbers for canning pickles
I grow several cucumber varieties every year, and after making hundreds of jars of pickles over the years, these are the ones I reach for first.
| Cucumber Variety | Good for Pickling? | My Recommendation |
|---|---|---|
| Chicago Pickler | ⭐⭐⭐⭐⭐ | My favorite for canning. |
| Marketmore 76 | ⭐⭐⭐⭐☆ | Great if picked young. |
| Regular slicing cucumbers | ⭐⭐⭐☆☆ | Good in a pinch. |
| English cucumbers | ⭐⭐☆☆☆ | Better eaten fresh. |
| Burpless cucumbers | ⭐⭐⭐☆☆ | Softer texture after canning. |
Chicago Pickler
⭐ My top choice. These were bred specifically for pickling and stay crisp after canning. Their smaller size makes them perfect for pickle spears and whole pickles.
Marketmore 76
Even though Marketmore 76 is considered a slicing cucumber, I've had excellent luck canning the smaller fruits before the seeds become large. They're one of my favorite dual-purpose varieties because we enjoy them fresh all summer and still make plenty of pickles.
Regular slicing cucumbers
Yes, you can make pickles from regular garden cucumbers. Choose smaller fruits while they're still firm and before the seeds become large. The finished pickles may not be quite as crisp as those made from true pickling varieties, but they'll still taste great.
English cucumbers
These have very thin skins and high water content. They'll pickle, but I don't recommend them for water bath canning if you have better options available.
Burpless cucumbers
These also work, but they tend to have thinner skins and softer flesh than traditional pickling cucumbers. I'd choose a dedicated pickling variety whenever possible.
Tips From Meg
I've grown Chicago Pickler, Marketmore 76, Tendergreen Burpless, and several others in my own garden. The biggest tip I can give you is to choose younger cucumbers before the seeds become large and tough. Once a cucumber gets big, I skip the pickle jar and opt for a fresh Creamy Cucumbers & Onions Salad instead (on repeat, all summer long).
I've canned cucumbers picked the same morning and cucumbers that sat in the refrigerator for several days. Freshly harvested cucumbers almost always produce noticeably crunchier pickles in my experience.
As an amazon associate, this post contains affiliate links, which means I make a small commission at no extra cost to you. See my full disclosure here.
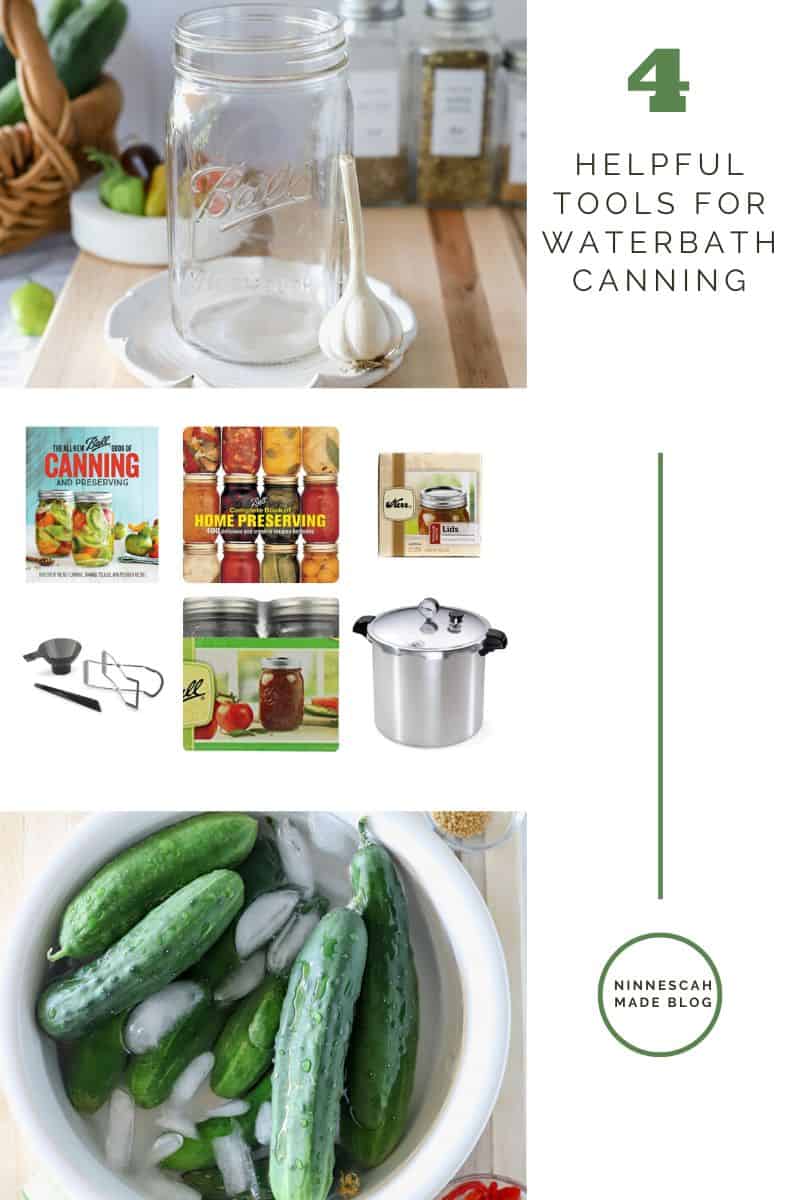
Helpful tools for canning dill pickles
When it comes to canning cucumber pickles, having the right tools at hand can make the process a breeze.
- A reliable water bath canner: This will ensure the right temperature and water level for safe preservation. I'm linking my Presto canner, which is compatible with my induction range. I use it for both pressure canning and water bath canning. Ideally, the pot should be at least 3 inches deeper than the height of the jar you are canning. This allows the jar to be covered by at least an inch of water without boiling over!
- Jar lifter: This comes in handy for lifting hot jars out of the canner as easily as possible. I've linked a jar lifter that includes a funnel, magnetic lid lifter, and a bubble popper at a reasonable price with good reviews.
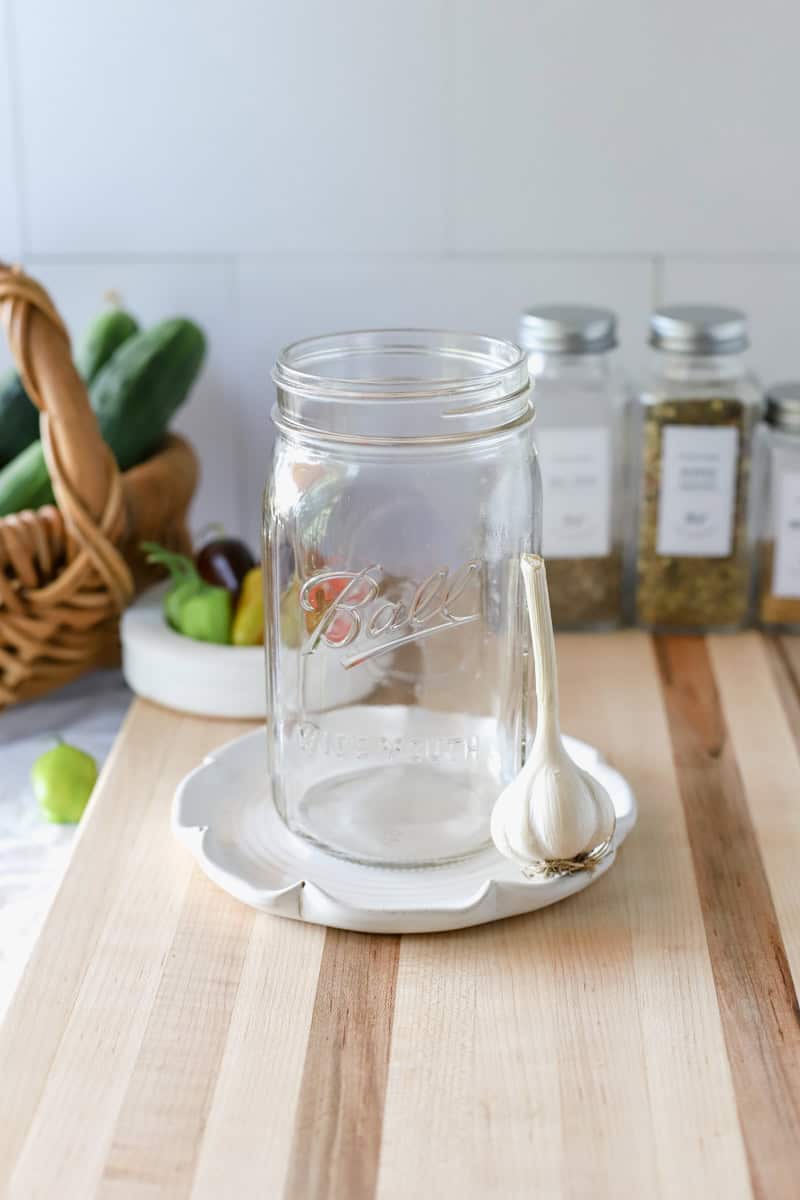
- Canning jars, canning lids & rings: I'm linking to amazon to show you canning jars, but I recommend buying locally for a lower price. Pickles are most often canned in wide-mouth quart jars. Use a new lid every time you can, but the jars and rings can be used over and over again.
- Ball Complete Book of Home Preserving: Once you learn how to preserve pickles, odds are you'll want to can even more! This is my go-to book, and you'll find tried and true recipes for all kinds of foods!
- If you’re especially concerned about keeping homemade pickles extra crunchy, many home canners like to add calcium chloride (often sold as Pickle Crisp) to each jar before processing. I personally don’t usually use it because very fresh cucumbers and proper canning methods have always given me great results, but I have several friends who swear by it for crunchy dill pickles. Most brands recommend adding about ⅛ teaspoon per pint jar or ¼ teaspoon per quart jar directly into the jar before sealing and processing.
Tips for Crunchy Pickles: What causes mushy pickles?
There's nothing quite as disappointing as a jar of soft cucumber pickles. So what causes this? There are 6 main reasons your homemade pickles might have a crunch problem. These are where I begin when I'm troubleshooting less than appealing pickles.
- I’ve found that overripe cucumbers with large seeds almost always lead to softer pickles after processing, even when the brine recipe is exactly the same. Even tiny differences in cucumber freshness can completely change the final texture of homemade pickles.
- Leaving the blossom end: Before packing the cucumbers into jars, trim a thin slice off the blossom end of each cucumber. The blossom end contains enzymes that can cause homemade pickles to soften over time. It’s a simple extra step, but it helps create crunchier dill pickles after canning. I used to skip trimming the blossom ends when I first started canning, but I’ve noticed my pickles stay noticeably firmer when I take the extra minute to do it.
- The brine might not have had enough salt: It takes the proper ratio of salt in the brine to properly penetrate the cucumbers and preserve them.
- Cucumbers not fully submerged: Cucumbers exposed to air or resting out of the brine will become soft.
- Too hot for too long: When processing a batch of cucumbers, it is super important to follow the recipe for using the water bath canner. Remove the jars as soon as your timer goes off.
- Poor-quality cucumbers: Cucumbers that were picked days ago, overripe, or overly large tend to produce softer homemade pickles after processing.
Ingredients for making pickles
The basic ingredients for pickling include cucumbers, vinegar, water, salt, and sugar. These ingredients form the foundation of the pickling brine that adds flavor and preserves the cucumbers.
- 5% Acidity Distilled White Vinegar
- Filtered Water
- Canning Salt
- Cucumbers
- Garlic
- Dill Seeds or Fresh Dill
- Mustard Seeds
- (optional) Jalapeños or other garden peppers
See recipe card for quantities.
How to Make Cucumber Pickle (Step-by-Step)
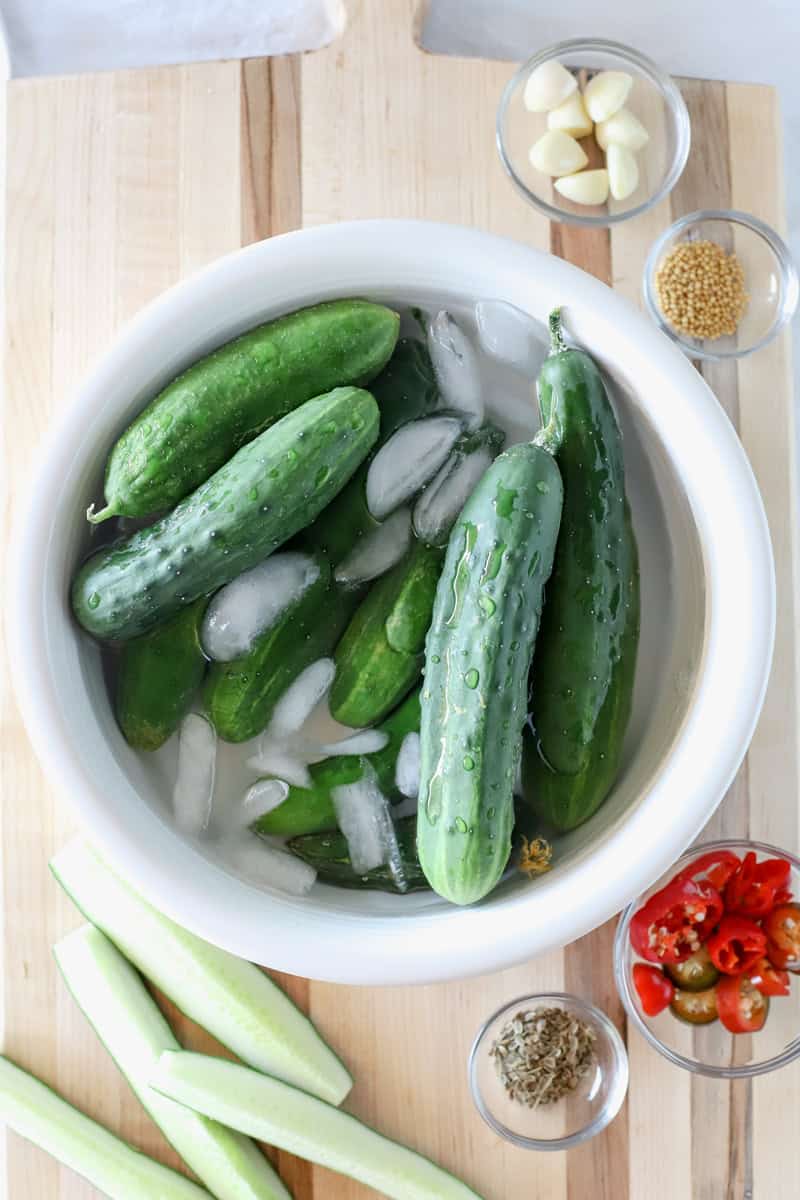
1. Prepare the cucumbers by washing them thoroughly under cool running water. Trim a thin slice from the blossom end of each cucumber. I recommend soaking the pickles for thirty minutes in a sink or bucket filled with ice water before starting this recipe.

2. Next, decide whether you prefer sliced pickles or pickle spears. Trim off both ends and any flawed areas. For slices, use a sharp knife or a mandolin slicer to cut the cucumbers into evenly sized rounds. If you prefer spears, slice the cucumbers lengthwise into quarters or eighths.
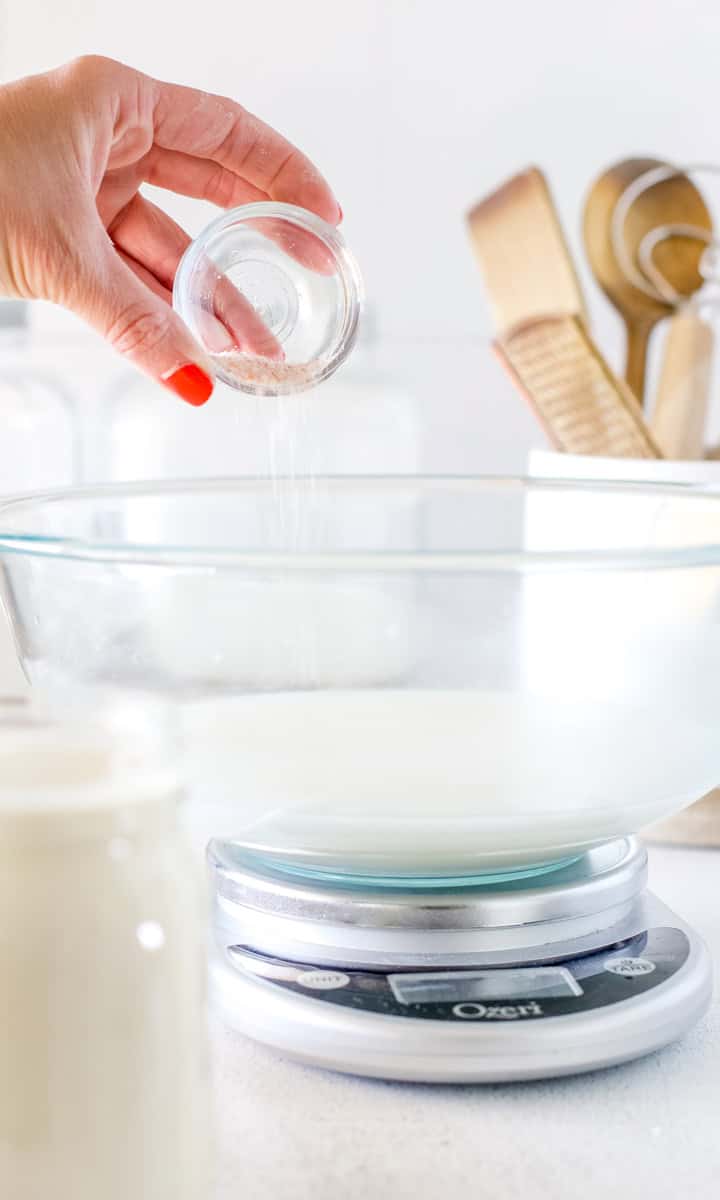
3. In a non-reactive pot, bring the vinegar, water and canning salt to a boil. This is creating the brine. Heat until the brine simmers and the salt has dissolved, about 2 minutes.
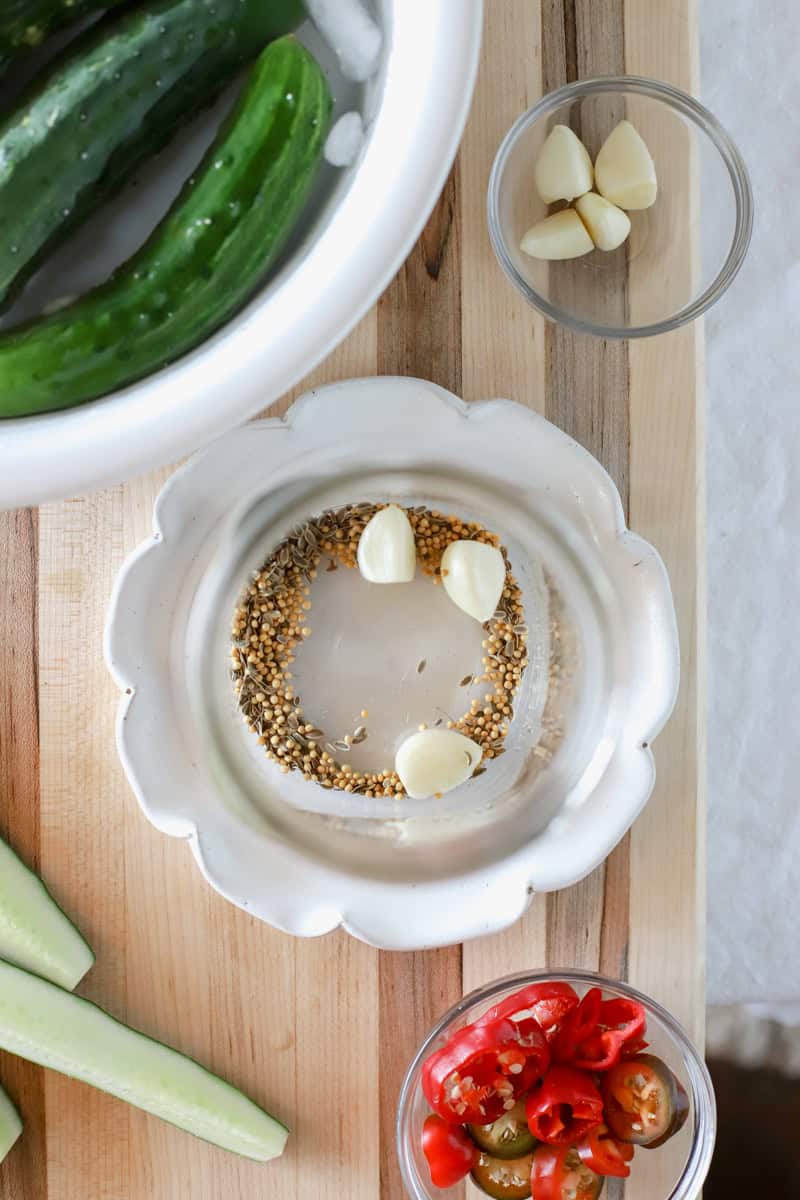
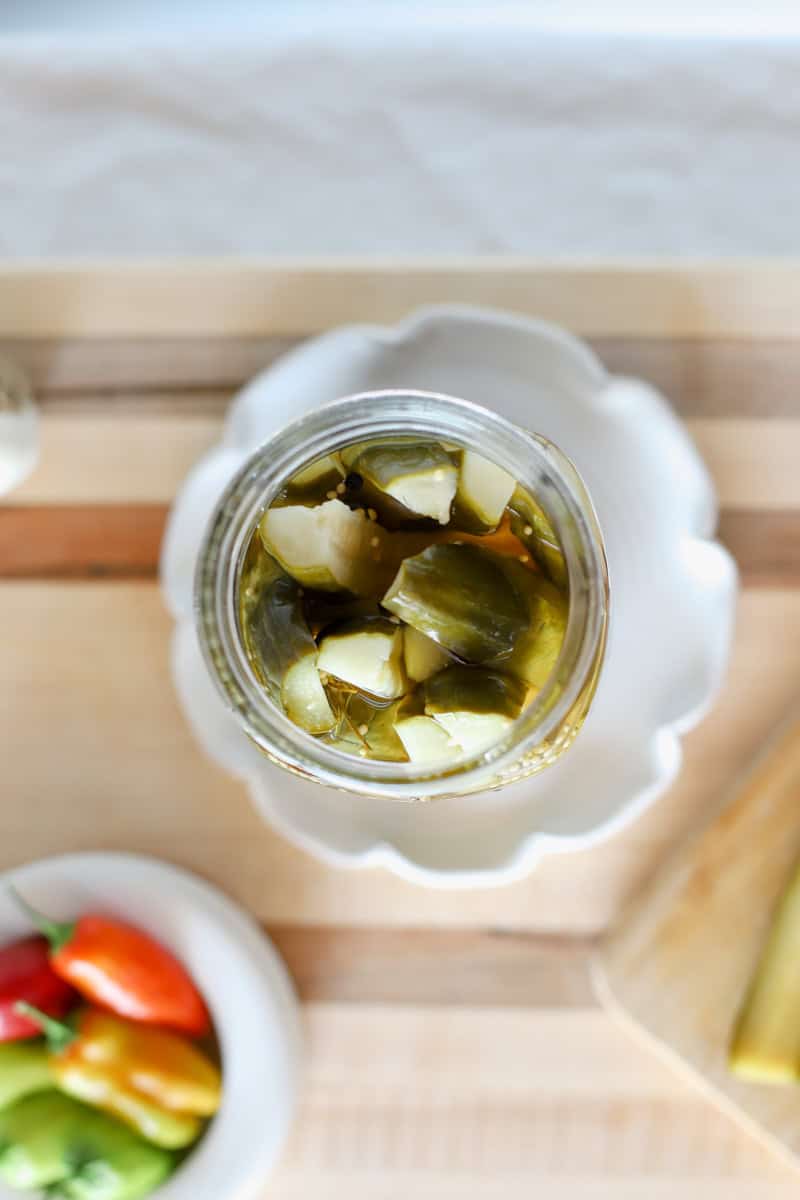
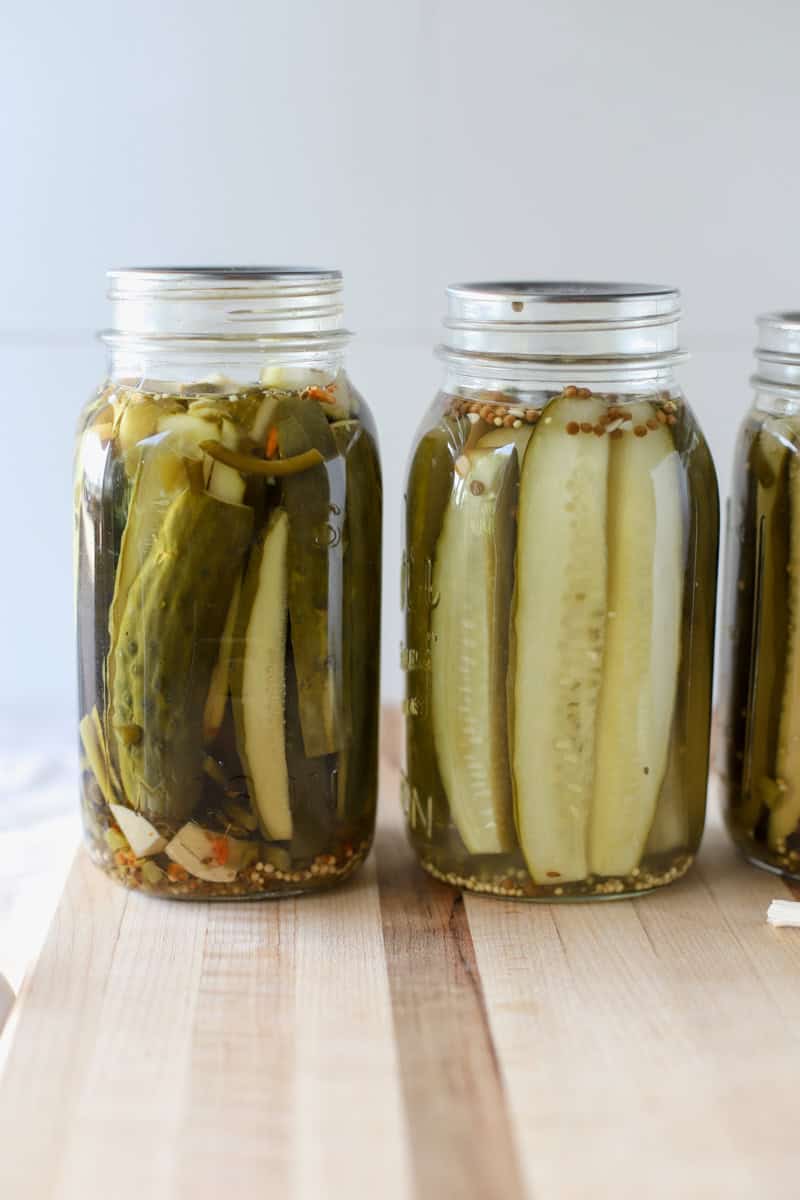
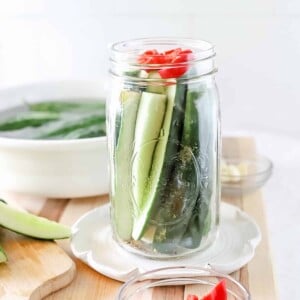
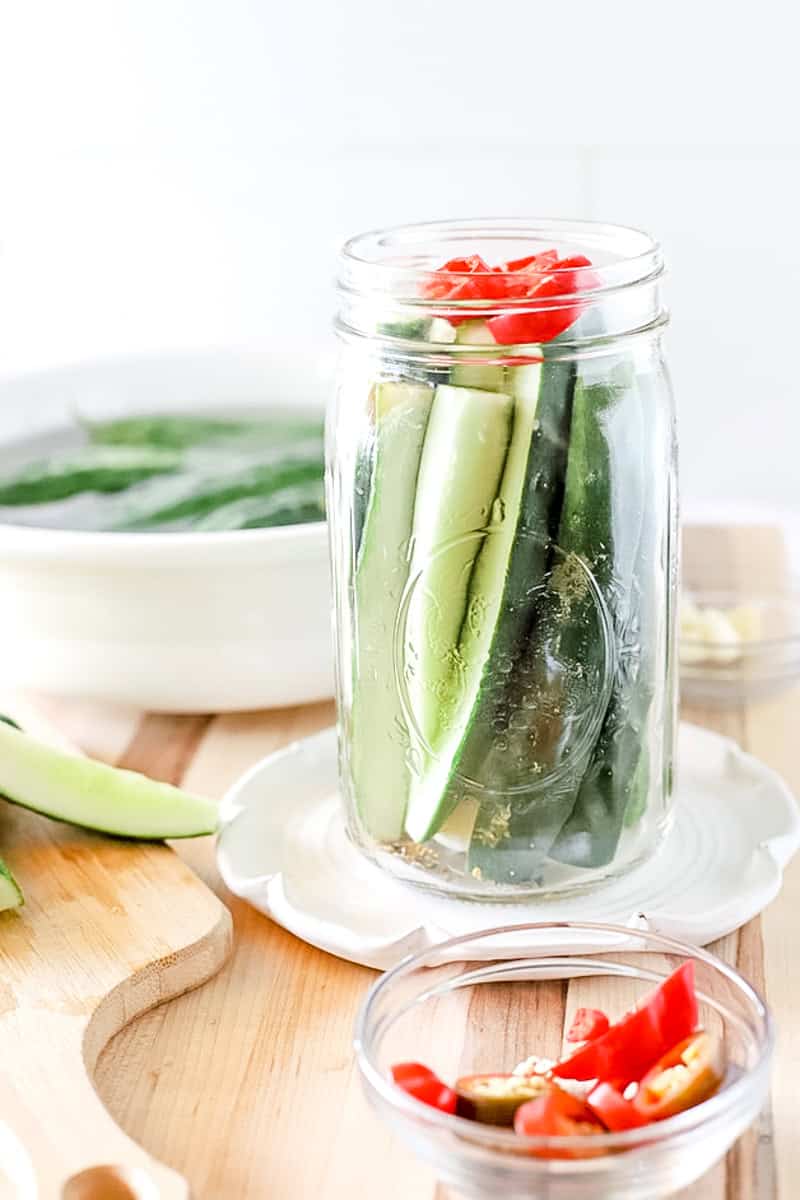
4. Divide the dill, garlic, mustard, and jalapeños or banana peppers evenly between the jars. Add the cucumbers to the quart jars, fitting them snugly together. Each jar should be packed nice and tight!
How to Water Bath Can Pickles
5. Ladle the hot brine into the quart jars using a funnel. Leave ½ inch of headspace. Use a chopstick or knife to release any air pockets in the jars. Wipe the rim with a paper towel and place the lid on the jar. Finger tighten the ring and use a jar lifter to lower the jar into the water bath canner. Cover the jars with at least 1 inch of water.
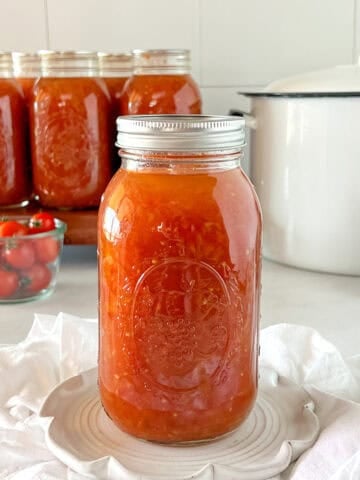
6. Bring the water bath canner to a rolling boil and start a timer for 15 minutes. Remove the jars from the canner and transfer them to a heat-safe surface, like a baking sheet lined with a towel. Leave them alone for 12 hours (or even 24 hours). Remove the rings and test the lid seals before labeling and storing.
7. The dill pickles will taste best if they sit for 6-8 weeks before opening to taste. Store opened jars in the refrigerator.
If you make this recipe, please leave a comment below! This provides helpful feedback to both me and other readers. For more delicious recipes from scratch and homesteading tips, follow me on instagram @NinnescahHomestead
Recipe
Dill Pickle Canning Recipe
Equipment
- water bath canner
- jar lifter
- 6 quart mason jars, lids & rings
Ingredients
- 8 cups 5% distilled white vinegar
- 8 cups filtered water
- ¾ cups canning salt
- 12 cucumbers or ¼ bushel
- 2 bulbs garlic
- 6 teaspoons dill seeds
- 6 teaspoons mustard seeds
- 1-2 jalapeños optional
Instructions
- Prepare the cucumbers by washing them thoroughly under cool running water and trim off the ends if desired. I recommend soaking the pickles for thirty minutes in a sink or bucket filled with ice water before starting this recipe.
- Next, decide whether you prefer sliced pickles or pickle spears. Trim off both ends and any flawed areas. For slices, use a sharp knife or a mandolin slicer to cut the cucumbers into evenly sized rounds. If you prefer spears, slice the cucumbers lengthwise into quarters or eighths, depending on your desired thickness.
- In a non-reactive pot, bring the vinegar, water and canning salt to a boil. This is creating the brine. Heat until the brine and simmer until the salt has dissolved, about 2 minutes.
- Divide the dill, garlic, mustard, and jalapeños or banana peppers evenly between the quart jars. Add the cucumbers to the jar, fitting them snugly together. Your jar should be packed nice and tight!
- Ladle the hot brine into the jars using a funnel. Leave ½ inch of headspace. Use a chopstick or knife to release any air pockets in the jars. Wipe the rim with a paper towel and place the lid on the jar. Finger tighten the ring and use a jar lifter to lower the jar into the water bath canner. The jars need to be covered by at least one inch of water.
- Bring the water bath canner to a rolling boil and start a timer for 15 minutes for quart jars, or 10 minutes for pints*. Remove the jars from the canner and transfer them to a heat-safe surface, like a baking sheet lined with a towel. Leave them alone for 12 hours (or even 24 hours). Remove the rings and test the lid seals before labeling and storing.
- The dill pickles will taste best if they sit for 6-8 weeks before opening to taste. Once the jar has been opened, store the pickles in the refrigerator.
Notes
Processing Times Chart
| Jar size | 0–1,000 feet | 1,001–6,000 feet | Above 6,000 feet |
|---|---|---|---|
| Pints | 10 minutes | 15 minutes | 20 minutes |
| Quarts | 15 minutes | 20 minutes | 25 minutes |
Nutrition
Variations for this Dill Pickle Recipe
For those looking to experiment with flavors, there are various optional ingredients and variations to consider. You can enhance the taste of your pickles by adding herbs like dill, garlic cloves, mustard seeds, black peppercorns, red onions, or red pepper flakes.
We love to make spicy pickles by adding garden jalapeños and other hot peppers. I add the pepper seeds for a really hot batch!
Feel free to adjust the herbs and dried spices to suit your taste, but don't reduce the vinegar or change the vinegar-to-water ratio.
How Long do Homemade Pickles Last?
What determines the shelf-life of a canned pickle is the canning lid. Nearly all canning lids guarantee their seal for 18 months. In my experience, canned pickles won't last a long time in the pantry once your family finds them!
Store the canned pickles out of direct sunlight, such as in a pantry or shelf in a storage room. Remember to rotate your stock, using the oldest jars first.
FAQ about Making Pickles
Yes! Even though this is a cucumber pickle recipe made with a vinegar brine, it still needs to be refrigerated after the jar is opened. As long as the jar seal is unbroken, they are shelf stable.
No, pickles in a vinegar brine are an acidic food, and do not need to be pressure canned. Today we are using a simple water bath canner while we learn how to make cucumber pickle.
Crunchy pickles, in my experience, are more likely due to the variety of cucumber and the length of heat processing.
- grape leaves
- maple leaves
- bay leaves
- black tea leaves
Canning vinegar must be 5% acidity. If you want to experiment with the varieties of vinegar used in the recipe, for example rice vinegar, apple cider vinegar, white wine vinegar or red wine vinegar, I would suggest following a recipe for refrigerator pickles instead of this canning recipe.
Just search for quick pickle recipe or use the quick pickled cucumber recipe in my blog post about perfect venison burgers.
More Recipes You'll Love
Looking for more recipes and tips about preserving food? Try these:

If you are a beginner gardener, I wrote these guides just for you!
When you are just learning to grow fruits and vegetables, it can feel overwhelming. Here are a few of my favorite grow guides for common veggies that will help you!


Best pickles on the planet
Can you use the same brine to can jalapeno peppers and habanero peppers? ....I have leftover brine...
Yes! This brine would be great for peppers. I've also used it (with plenty of dill!) to make marinated cheddar cheese curds. I just keep them in the fridge and try to eat them within a few weeks.
Easy and delicious.
First time making pickles. Vey easy to follow recipe and they look great so far. The process and instructions were perfect. I can't wait to try them in 6 weeks.
Just made these today! Can't wait to try them in 6 weeks
I just found your blog as I was searching for a dill pickle recipe to use up all these cukes from our garden this year! You had me at your blog name — the Ninnescah River is near me! (Sumner County, KS) and then I saw you’re a Kansas girl! Awesome! This recipe was easy to follow and I can hardly wait to eat my pickles in a few weeks!
Hi Shelly! What a small world! You might just be the first person to randomly stumble upon my site and actually know what the Ninnescah river is LOL. I'm so glad you found me! I can't wait to hear how your pickles turn out.
- Meg
I used this recipe for my first time water-bathing and they turned out so well! I used pint jars because I thought I saw that somewhere but now I can’t find it. I have a lot of cucumbers to use and only quart jars currently. I just wanted to confirm that I can use quart size and still follow the recipe with 1/2 inch headspace and everything? I was doing a canning class and it said to make sure because headspace can change when you move up in size.
Hi! Great question. The USDA recommends leaving 1/2" head space for all water bath pickle canning recipes. That measurement is for both pints and quarts. Happy canning!
- Meg
Hello,
I just made this recipe and have a ton of brine left over. Six mason jars makes less than 16 cups (your 8 cups vinegar and 8 cups filtered water) Are you supposed to boil it down to less? I boiled mine for about a half hour. The instructions don’t say how long to boil/ simmer. Could you add that to the recipe?
Hello! There is brine left over after this recipe. 16 cups of brine will be enough for approximately 6 quart jars of dill pickles, depending on how tightly the cucumbers are packed in the jars. There's nothing worse than running out of brine, so I always make extra! If you happen to have more cucumbers available, you can always make a few more jars of pickles with the extra! The brine needs to be brought to a simmer long enough for the salt to dissolve. Once the simmer starts, the salt will dissolve in just a few minutes. It's pretty fast!
Thanks for asking and happy canning!
Meg
Hi,
I'm excited to try to make these. I have made pickles before (not this recipe) and they didn't come out very well. I have a few questions to be sure I'm preparing them correctly.
1) Can I use pink himalayan salt in this recipe?
2) Do I start to time the pickles once I put them in the water bath? Or once the water starts to boil? The pickles I made before were super soft so I'm wondering if they were boiled too long.
3) Does the timing stay the same for pickle chips and pickle spears?
Thanks for any help.
I made these and they’re almost too sour for me. Can I reduce the vinegar a bit or will that affect the picking process??
Have you ever experimented with adding unconventional ingredients like sriracha or ginger to your cucumber pickle recipe for a unique twist on this classic condiment? Share your experiences and any tips for those looking to spice up their pickle game!
I have not tried sriracha or ginger, but it sounds delicious! One of our favorite inclusions are fresh garlic scapes. Thanks for sharing your tips!
Can I use pint-sized mason jars of this recipe? If so, should I follow the amount exact of this recipe?
You can use pint jars! The standard timing for water bath canning dill pickles in pint jars is 10 minutes (at sea level).