How to Render Lard (Easy Step-by-Step Method for Clean, White Lard)
Learn how to render lard at home using a simple, traditional method. This step-by-step guide shows how to render pork fat into clean, white lard for cooking and baking.
Rendering lard at home is simple, economical, and one of the easiest ways to turn a basic cut of pork fat into a high-quality traditional cooking fat. When done slowly and correctly, homemade lard is clean-tasting, shelf-stable when stored properly, and far superior to store-bought versions.
This method focuses on accuracy, ease, and consistency, whether you're brand new to rendering or you've done it a dozen times already.
Jump to:
- What is lard?
- Best Pig Breeds for Lard
- Best Fat to Use for Rendering lard
- Why Freeze the Fat First?
- How to Render Lard (Stovetop)
- How to Render Lard (Slow Cooker)
- Common Mistakes to Avoid When Rendering Lard
- Health Benefits of Lard
- What Can Lard be Used For?
- FAQ
- Helpful Tools
- Tips for Making Lard
- Troubleshooting
- Recipe
- More Homestead Recipes!
- Comments

What is lard?
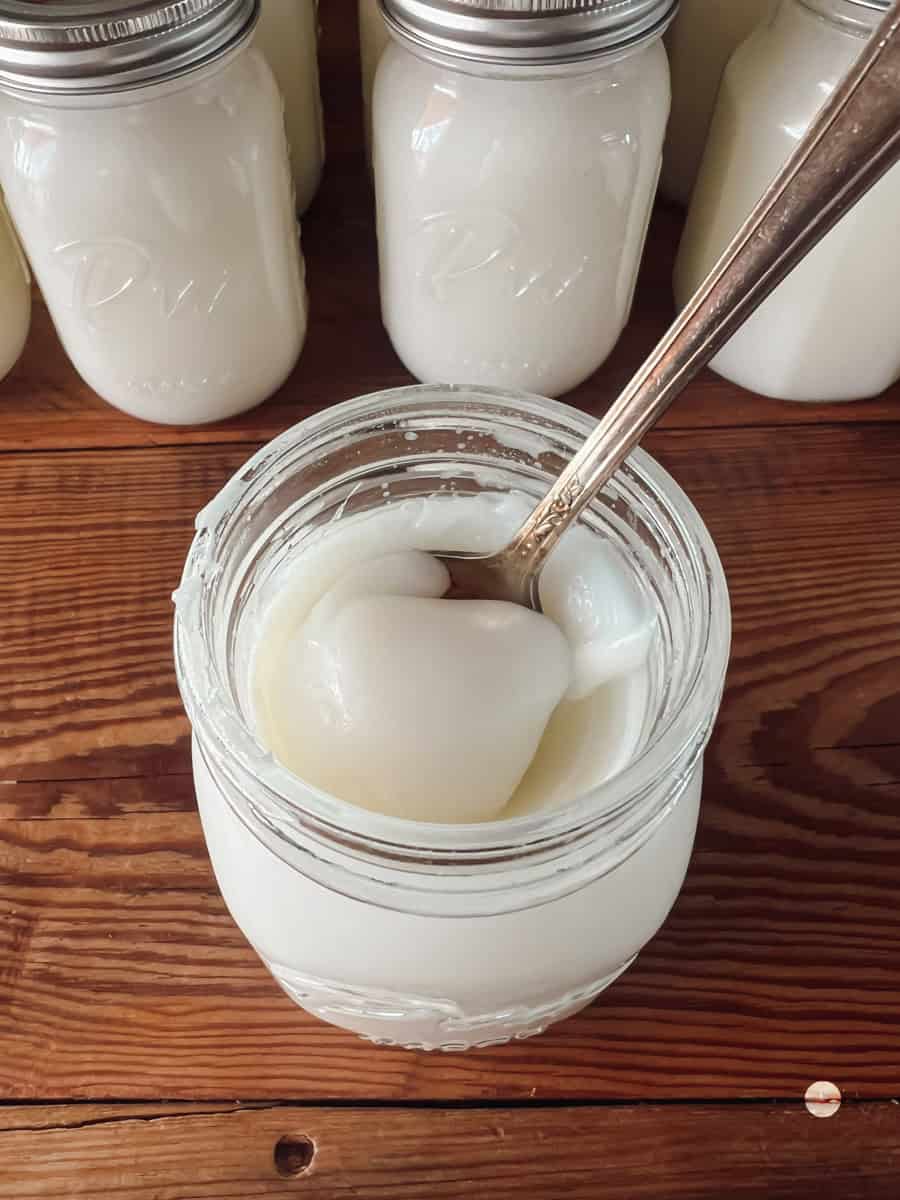
Lard is rendered pork fat. When raw pork fat is gently heated, the fat m elts into a liquid and separates from connective tissues and impurities. Once strained and cooled, it solidifies into a smooth, white fat used for cooking, baking, frying, and traditional food preservation. I use it for baking light and flaky pie crusts, frying chicken, seasoning a cast iron skillet and so much more!
Aaron and I have rendered animal fats from a bear, cattle and pork. If the terminology is a little confusing, just remember tallow comes from sheep or beef fat, lard comes from pig fat.
When we were considering adding pigs to our homestead, we spent several months weighing the pros and cons of various breeds. I knew from my years in 4H and FFA that some pigs were better for pork chops and bacon, while other pasture-raised pork was known for producing a large amount of lard.
We really wanted both meat and fat, so we went with a smaller breed of pig called KuneKunes. They have a friendly personality, thrive on grass pastures, are prized by sausage makers and are overall good lard pigs.
Our little herd currently consists of two barrows (castrated male pigs) that we will butcher later this year, a breeding pair (called a boar and sow) and a litter of 7 piglets.
When pigs are raised grazing a pasture, soaking up sunshine and eating a more ancestral pig diet, the meat will contain many of the benefits listed below.
You can read more about our pigs and raising pigs on a homestead here.
Best Pig Breeds for Lard
Several pig breeds are known for their high-fat content and suitability for lard production. Some of the most notable breeds include:
- Berkshire: Berkshire pigs are known for their marbled meat and high-fat content, making them excellent for both lard and flavorful pork products.
- Mangalitsa: This heritage breed is famous for its curly coat and high-fat content, making it a favorite for lard production and gourmet pork products.
- Tamworth: Tamworth pigs are known for their lean but flavorful meat and are also prized for their lard production, as they have a higher fat content compared to some other commercial breeds.
- Large Black: Large Black pigs are renowned for their docile nature and ability to thrive on pasture. They have a high fat-to-meat ratio, making them well-suited for lard production.
- Kunekune (what we raise!): These pigs are also known as lard pigs due to their ability to produce high-quality fat suitable for rendering into lard. They have a gentle temperament and are well-suited for small-scale and homestead farming.
Best Fat to Use for Rendering lard
- Leaf Fat:
- Fat from around the kidneys. Mild, neutral flavor. Ideal for lard and best choice for baking.
- Fatback:
- Main fat, also referred to as "body fat" or "pork back fat," is the fat found throughout the body of the pig, especially in the back and sides.
- While main fat can also be rendered into lard, it may have a stronger flavor and a slightly grainier texture compared to leaf fat.
- Main fat is often used in cooking and frying where its flavor can complement savory dishes, such as frying pork rinds or seasoning cast iron pans.
Why Freeze the Fat First?
After trimming, freezing the fat overnight is optional but helpful.
Freezing firms the fat and causes ice crystals to form inside the tissue, which weakens the cell membranes. This makes the fat easier to grind or chop and helps it render more efficiently once heated.
How to Render Lard (Stovetop)
- Prepare the Fat:
- Trim any excess meat or skin from the raw fat. Cut the fat into chunks that will fit into your grinder or food processor.
- Freeze the Fat:
- Place the fat pieces in a freezer‑safe bag or container and freeze overnight. This step improves texture and makes grinding much easier.
- Grind the Fat (Optional, but highly recommended):
- We grind the frozen fat using a meat grinder or food processor. Grinding the fat helps increase surface area, speeding up the rendering process. If you don't have a grinder, finely chop the fat with a sharp knife.
- Start Rendering:
- Transfer a small amount of the frozen fat to a large, heavy-bottomed pot or Dutch oven. Place it over low heat to medium heat.
- As the chunks of fat melt, gradually more fat to the rendered fat. We have found that adding too much fat to the dutch oven actually hinders more than helps because it traps moisture and slows the rendering process.
- Melt the Fat:
- Allow the fat to slowly melt, stirring occasionally to prevent sticking or burning. Be patient, as this process can take several hours.
- The ideal temperature for rendering is between 225°F–250°F (107°C–121°C). This range melts the fat gently without scorching, keeping the lard light‑colored and mild‑tasting.
- Skim Off Impurities:
- As the fat renders, you may notice foam or impurities rising to the surface. Skim these off with a spoon and discard.
- Strain the Lard:
- The lard is ready to strain when the liquid is clear, bubbling slows significantly, cracklings (the remaining solids) are lightly golden and no longer releasing fat.
- Line a fine mesh sieve or cheesecloth over a heatproof container and carefully pour the liquid lard through it to remove any remaining solids. There will be some small pieces that do not fully render, this is normal.
- Cool and Store:
- Allow the strained lard to cool to room temperature before transferring it to a clean, dry jar or container. Store the lard in the refrigerator or freezer for long-term storage.
- Lard will last in the refrigerator for 6-12 months or in the freezer for 1-2 years.
How to Render Lard (Slow Cooker)
- Follow steps 1,2 & 3 above. Transfer the fat pieces into the slow cooker, filling it about three-quarters full. You want to leave some space for the fat to melt and for stirring.
- Add a Small Amount of Water: To prevent the fat from sticking to the bottom of the slow cooker and to help regulate the temperature, add a small amount of water to the bottom of the cooker. Just enough to create a thin layer, about ¼ to ½ inch deep.
- Set Slow Cooker to Low: Turn the slow cooker to its lowest setting. This will ensure a gentle heat that slowly melts the fat without burning it.
- Cook for Several Hours: Allow the fat to melt and render in the slow cooker for several hours, typically 6 to 8 hours or overnight. Stir the fat occasionally to ensure even melting and to prevent sticking.
- Continue with steps 7, 8 & 9.
Common Mistakes to Avoid When Rendering Lard
- Too much heat - leads to dark, pork-flavored lard
- Overcrowding the pot - slows rendering
- Not straining well - shortens shelf life
- Using fat with meat attached - Can cause spoilage
Health Benefits of Lard
Lard is a great fat! Modern marketing has misled us into thinking that this formerly traditional fat is unhealthy, while promoting the idea that oils such as canola, corn, and vegetable oils are superior choices.
I'm inclined to disagree, and here are some facts about pork lard (and credible sources!) that show why it may be considered superior to seed oils or vegetable oil.
- High in Monounsaturated Fat: Contrary to popular belief, lard is primarily composed of monounsaturated fats, which are heart-healthy fats. Monounsaturated fats can help reduce bad cholesterol levels and lower the risk of heart disease. (source)
- Natural Source of Vitamin D: Lard from pastured pigs is a good source of vitamin D, which is essential for bone health, immune function, and overall well-being. Vitamin D deficiency is common in many parts of the world, so including lard in the diet can help increase vitamin D intake naturally. (source) Pigs raised on pasture and consuming a traditional hog diet will have higher levels of vitamin D in their meat and fat.
- Rich in Omega-3 Fatty Acids: Lard from pastured pigs contains omega-3 fatty acids, which have anti-inflammatory properties and are important for brain health, heart health, and overall wellness. Omega-3s are often lacking in the modern diet, so consuming lard can help balance omega-3 to omega-6 ratios. (source)
- High Smoke Point: Lard has a high smoke point, making it suitable for high-heat cooking methods like frying and roasting without oxidizing and forming harmful compounds. This makes it a versatile cooking fat for a variety of dishes. (source)
- No Trans Fats: Unlike some vegetable oils and margarines, natural lard contains no trans fats, which are known to increase the risk of heart disease and other health issues. Consuming lard in moderation can contribute to a healthier overall diet. (source).
What Can Lard be Used For?
Lard, with its high smoke point and rich flavor, comes in super handy in the homestead kitchen. I use it for flaky pastries and pies. Lard gives a crispy texture to fried foods, hello fried chicken, and adds a depth of flavor to savory dishes like soups and stews.
Additionally, I use lard to season cast iron cookware, preserve foods through techniques like confit, and even add richness to dishes like refried beans.
And here's one more that might sound a little weird, but in the winter when my skin is super dry I like to use lard as an intense hand lotion. One task that is on my list of goals for this summer is to make lard soap using lard, lye and essential oils or medicinal herbs. I'll let you know how it goes!
FAQ
For rendering your own lard, the ideal temperature range is typically between 225°F to 250°F (107°C to 121°C). This temperature is low enough to gently melt the fat without burning it or causing it to smoke excessively.
When the fat has melted completely, it's a good indication that the lard is fully rendered. You can also look for a clear, golden liquid with no foam or impurities on the surface. Additionally, the cracklings should be crispy and golden brown.
Heat was too high or rendering happened too quickly.
Yes. Use the low setting and leave the lid slightly cracked to allow moisture to escape. See note above.
The crispy bits left behind after rendering. Salt the, and snack or use as a garnish.
As an amazon associate, this post contains affiliate links, which means I make a small commission at no extra cost to you. See my full disclosure here.
Helpful Tools
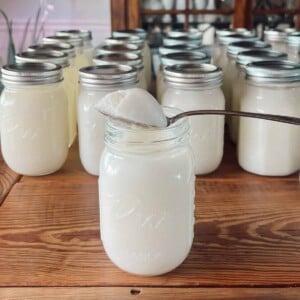
- Mason Jars: These glass jars are perfect for storing your rendered lard once it's cooled.
- Fine Mesh Strainer & Cheese Cloth: I initially strain the rendered fat through a mesh strainer. Then I strain a second time through a cheese cloth for a purer final product.
- Cast Iron Pan or Cast Iron Dutch Oven: A sturdy, heavy-bottomed pot is crucial for maintaining steady heat. It also prevents scorching during the rendering process. These heavy pots are ideal for slow, even cooking of your fat, resulting in perfectly rendered lard.
- Small Knife or Cleaver: Handy for cutting your fat into small pieces or cubes, making it easier to render. We also run our frozen fat chunks through a meat grinder.
- Keep a roll of paper towels handy. Making lard is messier than frying bacon grease indoors. I also fill my sink with hot, soapy water before starting.
Tips for Making Lard
It all begins with the fat. Make sure it's cold – I'm talking freezer cold. This makes it easier to cut or grind into tiny bits. The smaller the pieces, the more thoroughly it will render. Also, it's greasy. Shocker, right? So freezing the fat makes it easier to handle.
- Cut or grind that cold fat into the tiniest bits possible. This allows all those pesky impurities to make their grand exit during the rendering process. Keep the heat low and stir frequently to avoid overcooking and ending up with stronger-tasting lard.
- Speaking of heat, keep it extremely low. We're talking gentle simmer, not rolling boil. Anything too vigorous risks giving you lard that's not quite up to snuff. Stir, stir, and stir some more to ensure even cooking and prevent any sticking.
- Now, if your lard doesn't come out perfectly white, don't fret. It's still perfectly usable for frying – just maybe not as ideal for delicate pastries. Remember, imperfection adds character, right?
- If you're not butchering your own pigs, no worries. Just ask your friendly neighborhood butcher to save you some leaf or kidney fat. Trust me, they'll understand your quest for the perfect lard.
- Oh, and don't forget about those cracklins – the crispy bits left behind after straining. They're like little nuggets of flavor gold. Some folks even like to sprinkle them on salads for a crunchy bacon-like twist.
- And lastly, let's debunk the myth – lard isn't the health villain it's been made out to be. Give me lard over Crisco any day of the week.
Troubleshooting
If you encounter any hiccups along the way, don't worry – I've got you covered. Here are a few common issues and how to solve them:
- If your lard comes out with a strong, porky taste, it may be due to bits of meat or connective tissue left in the fat. Make sure to trim your fat well before rendering, and strain it thoroughly to remove any remaining meat bits.
- For that coveted snowy white lard, it's essential to keep the cooking temperature low and avoid overcooking. If your lard turns brown, try lowering the heat and stirring more frequently to prevent it from getting too hot.
- If you notice any impurities or solids in your rendered lard, simply strain it again. Use a fine mesh strainer or coffee filter to remove them.
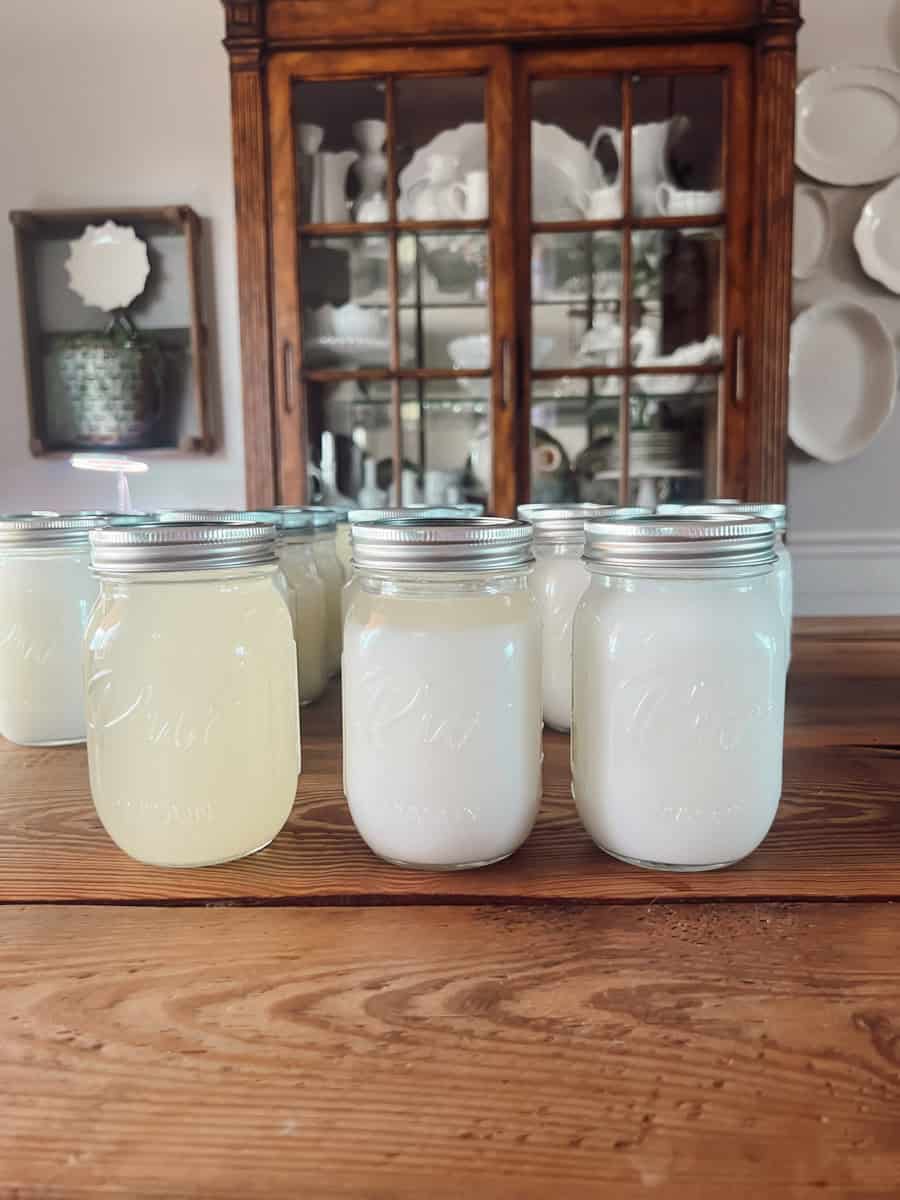
The picture below shows how lard changes as it cools. The jar on the left is in a liquid state and is still very warm from rendering. The middle jar has begun to cool and the jar on the right is in it's room temperature semi-solid state.
Recipe
How to Render Lard
Equipment
- large dutch oven, stainless steel pot or slow cooker
- wooden spoon
- mesh strainer
- cheese cloth
Ingredients
- 10 pounds Pork fat trimmed
Instructions
- Trim any excess meat or skin from the raw fat. Cut the fat into chunks.
- Place the fat pieces in a freezer-safe container or bag and freeze overnight. Freezing firms up the fat, making it easier to grind and helping it render more evenly and efficiently.
- Grind the frozen fat using a meat grinder or food processor. Grinding the fat helps increase surface area, speeding up the rendering process. You can also chop it with a knife into small pieces.
- Transfer a small amount of the frozen fat to a large, heavy-bottomed pot or Dutch oven. Place it over low heat to medium heat. As the chunks of fat melt, begin adding more fat to the rendered fat. We have found that adding too much fat to the dutch oven actually hinders more than helps.
- Allow the fat to slowly melt, stirring occasionally to prevent sticking or burning. Be patient, as this process can take several hours.
- Keep an eye on the temperature of the fat. Ideally, you want to maintain a temperature between 225°F to 250°F (107°C to 121°C) to gently melt liquid fat without burning it.
- As the fat renders, you may notice foam or impurities rising to the surface. Use a spoon or ladle to skim off these impurities and discard them.
- Once the fat has completely melted to a liquid state and there are no more impurities rising to the surface, it's time to strain the lard. Line a fine mesh sieve or cheesecloth over a heatproof container and carefully pour the liquid lard through it to remove any remaining solids. There will be many small pieces that do not fully render.
- Allow the strained lard to cool to room temperature before transferring it to a clean, dry jar or container. Store the lard in the refrigerator or freezer for long-term storage.
Notes
- Follow steps 1,2 & 3 above. Transfer the fat pieces into the slow cooker, filling it about three-quarters full. You want to leave some space for the fat to melt and for stirring.
- Add a Small Amount of Water: To prevent the fat from sticking to the bottom of the slow cooker and to help regulate the temperature, add a small amount of water to the bottom of the cooker. Just enough to create a thin layer, about ¼ to ½ inch deep.
- Set Slow Cooker to Low: Turn the slow cooker to its lowest setting. This will ensure a gentle heat that slowly melts the fat without burning it.
- Cook for Several Hours: Allow the fat to melt and render in the slow cooker for several hours, typically 6 to 8 hours or overnight. Stir the fat occasionally to ensure even melting and to prevent sticking.
- Continue with steps 7, 8 & 9.
Nutrition
Rendering lard may seem like a daunting task, but trust me, it's worth it. The satisfaction of producing your own homemade lard, pure and snowy white, is unbeatable. Whether you're using it for flaky pie crusts, sourdough tortillas, crispy french fries, or the softest biscuits you've ever tasted, lard is truly the best thing since sliced bread.
With a little time, patience, and the right tools, you'll be enjoying the benefits and delicious flavor of homemade lard in no time. Happy rendering, and good luck on your lard adventures!
- Meg


I have been rendering lard for years, but never thought to run it through my grinder first! Thank you for the idea! I am going to do this next time to speed the process up.
Mia, yay! I'm excited to meet another Lard Lady (lol... that came out wayyy worse than I thought it would!).
Easiest tutorial I've found! We made 20 pounds last weekend and I made my first lard pie crust today. Never going back to crisco! Thank you!!!!
Thank you for posting a very easy recipe!
I saw your recipe after I’ve already ground my fat from my pork butt… So, it’s rendering slowly and looking forward to it completely melting! I imagine the little bits left behind are the cracklings… A favorite for my dog… & Likely my husband!
Haven't made yet, so don't know what to rate.
I'm going to be rendering in my crockpot. I am wondering how the water works out after the fat is all melted. Will it have evaporated by the time it's melted? Or will it separate? A little confused about this point.
Hi Julie,
The bottom of your crock pot needs a tiny amount of water added in the beginning (about 1/4-1/2 inch) to keep the fat pieces from sticking to the bottom during the beginning of the process. The heat from the crock pot will make the water evaporate as it cooks down. The only time people get into trouble with this is when they add too much water and the processing time is short enough that it doesn't have a chance to evaporate. As long as your fat is fully rendered and you just use a small splash at the beginning, you'll be okay! I also don't recommend stirring the fat in the crock pot until it's visibly beginning to render.
Thank you so much!
Could I use this same method for rendering beef and making tallow?
Hi Sarah! It's the same method, but tallow has a higher melting point than lard. You'll still want to go low and slow, but it may take a (slightly) higher heat to get to the liquid fat stage. Keep an eye on it so that things don't get too hot and move it off the burner for a while if it starts to, then lower the heat a bit and continue.