Fluffy Blueberry Sourdough Scones with Lemon Glaze
Make these fluffy, buttery blueberry sourdough scones with sourdough discard for a perfect breakfast treat! Bursting with juicy blueberries and a hint of lemon, these scones are easy to whip up and include a simple lemon glaze for extra flavor. Perfect for using up sourdough starter and ready in under 30 minutes—your kitchen will smell amazing!

Scones are one of those foods—you either love ‘em or leave ‘em. I used to be firmly on team “leave ‘em,", skipping past scones for muffins or banana bread.
Honestly, most scones I’d tried were dry and crumbly, like chewing on a triangle of cardboard. Hard pass. But let me tell you, these blueberry scones? Game changer. Bold claim? Sure. But once you try this sourdough discard scone recipe, you’ll see what I mean.
Scones are perfect pretty much any time of day, but they really shine with morning coffee or as part of an afternoon tea spread. Whether you’re hosting friends or just taking a little bit of time for yourself, a fresh, warm scone feels like a treat.
They’re great for breakfast, brunch, or even a mid-day pick-me-up when you need something cozy and satisfying. I like to make a double batch and freeze the extras for easy grab-and-go breakfasts for busy mornings. I'll tell you a little further down in this post!
Jump to:
- Why This Recipe Works
- Helpful Tools
- Optional Lemon Glaze
- Instructions
- Long Fermented Scones
- Variations & Optional Add-Ins
- How to Store Scones
- Guide to Freezing Scones
- Fresh vs. Frozen Blueberries in Scones
- Does the Size of the Blueberry Matter?
- FAQ
- More Recipes You Will Love
- What's New on the Homestead
- Recipe
- Comments
Why This Recipe Works
- Perfect Use for Sourdough Discard: This recipe makes the most of your sourdough starter, adding subtle tang and reducing waste.
- Light, Fluffy Texture: Using cold ingredients and proper techniques ensures tender, bakery-style scones every time.
- Bright Blueberry and Lemon Flavor: The combination of juicy blueberries and fresh lemon zest creates a refreshing, irresistible treat.
- Quick and Easy: Ready in under 30 minutes, these scones are perfect for a busy morning or a last-minute bake.
- Customizable Glaze: The optional lemon glaze takes these classic scones to the next level, but they’re just as delicious without it.
As an amazon associate, this post contains affiliate links, which means I make a small commission at no extra cost to you. See my full disclosure here.
Helpful Tools
- Pastry Cutter or Cheese Grater: For cutting cold butter into the flour quickly and evenly, keeping the dough light and flaky. I also use my food processor when I'm in a hurry.
- Mixing Bowl: A large, chilled bowl works best to keep ingredients cold while mixing. I put my bowl in the freezer for about 10 minutes before I get started.
- Bench Scraper or Sharp Knife: Perfect for cutting the dough into clean, even wedges without squishing the edges.
- Parchment Paper: Prevents sticking and makes cleanup a breeze.
- Pastry Brush: To evenly brush cream on top of the scones for that golden, bakery-style finish.
- Zester: A handy tool for easily adding fresh lemon zest without any hassle.

Ingredient Notes
- All-Purpose Flour: The base for your scone dough, providing structure and texture. For fluffier scones, you can swap in a bit of cake flour.
- Granulated Sugar: Adds a touch of sweetness without overpowering the other flavors. It also helps the scones brown beautifully during baking.
- Baking Powder: The leavening agent that helps the scones rise, giving them that light, airy texture.
- Salt: Enhances the flavor of the scones and balances out the sweetness. Just a pinch is all you need.
- Unsalted Butter (Frozen): Cold butter creates a flaky texture as it melts during baking. Freezing it before cutting ensures the perfect crumb.
- Heavy Whipping Cream: Adds richness and helps bring the dough together. You may need more if the dough feels too dry.
- Lemon Zest: Provides a burst of fresh, citrusy flavor. A little zest goes a long way in brightening up the scones.
- Lemon Juice: Adds a tangy kick and enhances the freshness of the lemon flavor. It also helps activate the baking powder for a better rise.
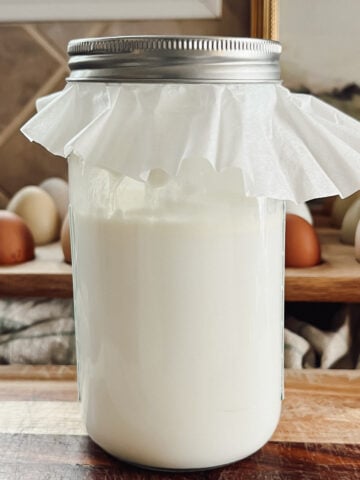
- Sourdough Starter (Discard or Active): Adds a slight tang and depth of flavor, while also helping with the texture. Discarded starter works great, or you can use an active starter for a more pronounced flavor.
- Egg: Binds the dough together and helps give the scones a rich, tender crumb.
- Vanilla Extract: A classic flavor enhancer that adds warmth and depth to the scones. I like to save money by making my own Homemade Vanilla Extract.
- Frozen Blueberries: Frozen blueberries are perfect because they hold their shape better during mixing. Wild blueberries are ideal if you can find them—they pack more flavor into each bite. Do not thaw them, as they may bleed and make the dough soggy.
Optional Lemon Glaze
- 1 cup powdered sugar
- ¼ cup heavy cream
- 1 tablespoon lemon juice plus zest
- ¼ teaspoon vanilla extract

Instructions
- Preheat oven to 400℉ and line a baking sheet with parchment paper.
- In a large mixing bowl, sift together the flour, sugar, baking powder, and salt. Place the bowl in the freezer for 10 minutes. Keeping the ingredients cold helps create flaky, buttery scones.
- Use a pastry cutter, food processor, or cheese grater to cut the cold butter into the dry ingredients. Continue until the mixture resembles coarse sand. If you’re using a food processor, pulse it for 1-2 seconds at a time. If the butter starts warming up, pop the mixture back into the fridge for 10 minutes.
- Add the heavy cream, sourdough starter, egg, lemon zest, lemon juice, frozen blueberries (do not thaw), and vanilla to the bowl. Stir with a fork until just combined.
- Turn the dough out onto the parchment-lined baking sheet and shape it into a disc about 9 inches in diameter. It doesn’t need to be perfect, just keep the thickness even. To avoid smashing the dough, I use my hands instead of a rolling pin. If the dough feels too dry and isn’t holding together, add more cream ½ tablespoon at a time. If it’s too wet, sprinkle in a little flour.
- Use a sharp knife or bench scraper to cut the dough into wedges, then space them about 2 inches apart on the sheet.
- Brush the tops of the scones with a small amount of cream. Bake at 400℉ for 20-25 minutes, depending on your oven. The scones should be lightly golden at the edges, and a toothpick inserted into the center should come out clean. Don’t wait for them to get too brown, or they’ll be dry.
- Let the sourdough blueberry scones cool on a wire rack. While they’re cooling, mix the milk, powdered sugar, and vanilla in a small bowl until smooth. Drizzle the glaze over the cooled scones.
Long Fermented Scones
Long-fermenting sourdough blueberry scones is easy. You can mix up the scones, shape them into a disc, cover with plastic wrap or put it in an airtight glass container and put it in the refrigerator for up to 3 days. The longer they are in the fridge, the more the sourdough starter will long ferment the dough.

Variations & Optional Add-Ins
- Raspberry Almond Scones: Use frozen raspberries instead of blueberries, and fold in ¼ cup of slivered almonds with the wet ingredients. For the glaze, add 1-2 teaspoons of almond extract to enhance the flavor.
- Cinnamon Sugar Scones: Instead of the blueberries, lemon zest and juice, leave those out and add 1 teaspoon of cinnamon to the dry ingredients. Before baking, sprinkle the tops of the scones with a cinnamon-sugar mixture (1 tablespoon sugar + 1 teaspoon cinnamon).
- Maple Pecan Scones: Add ½ cup of chopped pecans to the wet ingredients, and swap the lemon glaze for a drizzle of pure maple syrup after baking. For an extra boost, you can even add a touch of maple extract to the dough.
How to Store Scones
The best way to store sourdough discard blueberry scones is in an air tight container, preferable glass, on the countertop for 1-2 days. Leftover scones are still okay to eat for 3-4 days, but they won't taste as fresh and will lose their flaky texture.
Guide to Freezing Scones
- Unbaked Scones: After cutting the dough into wedges, place them on a parchment-lined baking sheet and freeze scones until solid. Once frozen, transfer to an airtight container or freezer bag. Bake straight from the freezer, adding 3-5 extra minutes to the baking time.
- Baked Scones: Let them cool completely, then wrap individually in plastic wrap and store in a freezer-safe bag. Thaw at room temperature or warm in the oven at 350℉ for 5-10 minutes. Do not glaze the scones before freezing, it's best to add fresh glaze before serving. Your taste buds will thank you!
Fresh vs. Frozen Blueberries in Scones
- Fresh Blueberries: These are less likely to bleed into the dough, keeping the scones visually clean and bright. They’re ideal if you want a slightly firmer bite to the berries and a fresher flavor. However, they can break easily when mixing, so handle with care.
- Frozen Blueberries: Perfect for year-round baking, they hold their shape better during mixing, but they can release more juice as they bake. This may result in purple-streaked dough, but it doesn’t affect the flavor—just the look. Use them straight from the freezer to reduce bleeding. You can see in my photos how the scones will look when made with frozen blueberries.
Does the Size of the Blueberry Matter?
Yes! Smaller blueberries distribute more evenly throughout the dough, giving you a consistent burst of flavor in each bite. Larger berries can make the scones more difficult to shape, and they may create uneven pockets of moisture when baking. If you’re using jumbo berries, consider cutting them in half to keep the texture balanced.
FAQ
Scones can end up dry if the dough is overmixed or baked too long. To avoid this, mix just until combined and keep an eye on them in the oven—pull them out as soon as the edges start to turn golden. Also, make sure your dough isn’t too dry to begin with; adding enough liquid is key.
Absolutely! You can make the dough ahead of time, shape it into wedges, and freeze them unbaked. When you’re ready to bake, pop them straight in the oven and just add a couple of extra minutes to the baking time.
The secret is keeping everything cold! Cold butter and cream create little pockets of steam as the scones bake, which makes them rise and gives them that fluffy texture. Even chilling the mixing bowl can help.
Nope! A sharp knife or bench scraper works perfectly to cut the dough into wedges. Just make sure whatever you use is sharp, so you don’t squish the edges and ruin the rise.
More Recipes You Will Love
If you love this blueberry scone recipe, I've rounded up the best sourdough scones for you to try next! They all follow this same basic sourdough lemon scones dough, but each has it's own tasty twist! Personally, this lemon blueberry sourdough scone recipe is my favorite, but I also love the Cranberry Orange Sourdough Scones.


What's New on the Homestead

Recipe

Fluffy Blueberry Sourdough Scones with Lemon Glaze
Equipment
- pastry blender, cheese grater or food processor
- Mixing bowl
- Parchment paper
- zester
Ingredients
- 2 cups all purpose flour
- ½ cup granulated sugar
- 1 tablespoon baking powder
- ½ teaspoon salt
- ½ cup unsalted butter frozen
- 3 tablespoons heavy cream
- 1 tablespoon lemon zest
- 1 tablespoon lemon juice
- 1 egg
- ½ cup sourdough starter discard or active
- 2 teaspoons vanilla extract
- 1 cup blueberries frozen
Optional Lemon Glaze
- 1 cup powdered sugar
- ¼ cup heavy cream
- 1 tablespoon lemon juice plus zest
- ¼ teaspoon vanilla extract
Instructions
- Preheat oven to 400℉ and line a baking sheet with parchment paper.
- In a large mixing bowl, sift together the flour, sugar, baking powder, and salt. Place the bowl in the freezer for 10 minutes. Keeping the ingredients cold helps create flaky, buttery scones.
- Use a pastry cutter, food processor, or cheese grater to cut the cold butter into the dry ingredients. Continue until the mixture resembles coarse sand. If you’re using a food processor, pulse it for 1-2 seconds at a time. If the butter starts warming up, pop the mixture back into the fridge for 10 minutes.
- Add the heavy cream, sourdough starter, egg, lemon zest, lemon juice, frozen blueberries (do not thaw), and vanilla to the bowl. Stir with a fork until just combined.
- Turn the dough out onto the parchment-lined baking sheet and shape it into a disc about 9 inches in diameter. It doesn’t need to be perfect, just keep the thickness even. To avoid smashing the dough, I use my hands instead of a rolling pin. If the dough feels too dry and isn’t holding together, add more cream ½ tablespoon at a time. If it’s too wet, sprinkle in a little more flour one tablespoon at a time.
- Use a sharp knife or bench scraper to cut the dough into wedges, then space them about 2 inches apart on the sheet.
- Brush the tops of the scones with a small amount of cream. I like to sprinkle the scones with a dusting of sugar! Bake at 400℉ for 20-25 minutes, depending on your oven. The scones should be lightly golden at the edges, and a toothpick inserted into the center should come out clean. Don’t wait for them to get too brown, or they’ll be dry.
- Let the scones cool on a wire rack. While they’re cooling, mix the milk, powdered sugar, and vanilla in a small bowl until smooth. Drizzle the glaze over the cooled scones.

Just a few questions. The ingredients list doesn’t actually list egg or lemon juice for the scones (lemon juice is listed for the optional lemon glaze). How much should I be using and when?The instructions just don’t match up to the ingredients. When I tried the recipe I put the lemon juice in with the wet ingredients and the flavor was great but with the combination of frozen blueberries, it was a little too wet and hard to keep shape when baked. They just melted into blobs. I would love to try this recipe again!
Hi Wendy! There is one tablespoon of lemon juice in the batter, plus an additional tablespoon of lemon juice in the optional glaze. There is one egg in the batter to help hold the dough together. What brand of flour are you using? I've noticed that when I use certain brands of All-Purpose flour from Kroger (like the Simple Truth brand and Hudson Cream), my batters and bread doughs always need more flour to fully absorb the liquids. The juiciness of the frozen berries can also play a part! I have better luck with smaller blueberries rather than the jumbo sizes. Thanks for you feedback and I hope this helps!
Meg
Made these this morning. DELISH! All your recipes - anything I want to make I look for yours first because I can count on them being so good!