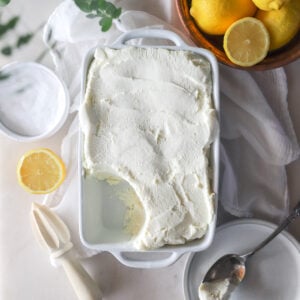
Quick Cream Cheese Recipe
This easy, acid-set cream cheese is made with raw or whole milk + lemon juice (no clabbering, no culture), and it's ready fast.
If you've ever wanted homemade cream cheese but didn't want to babysit a culture for 24 hours... this one's for you. This is a quick, acid-set "cream cheese style" spread that comes together in one pot, strains in minutes, and blends smooth in a food processor.
And yes - it's beginner-friendly! If you can heat milk without scorching it, you can make this.

I'm Meg, a fifth-generation farmer and homesteader on our 20-acre farm in Kansas. I've spent years milking cows and experimenting with turning that milk into cheese - tweaking, testing, and perfecting recipes that my family actually eats every week. Cheesemaking is second nature!
Why This Recipe Works
- Fast: no waiting on clabbering or culturing
- Reliable: acid creates curds quickly and consistently
- Custom texture: drain less for a soft spread, longer for thicker "bagel shop" style cream cheese
- Blends smooth: food processor fixes the "grainy" stage
- Flexible: loosen with whey (or kefir/yogurt) to get exactly the texture you want
What This Is (And What It's Not)
This is an acid-set cream cheese. That means we're using lemon juice or vinegar to curdle the milk instead of a starter culture.
- This IS: fresh, mild, creamy spreadable
- This is NOT: traditional cultured cream cheese with that deeper "fermented" flavor. Because this recipe is acid-set, it’s ready the same day — no culturing or long wait times required.
Most people don't care. They just want something delicious for bagels, dips, and cheesecake, without all of the hassle of traditional fermentation.
Ingredients
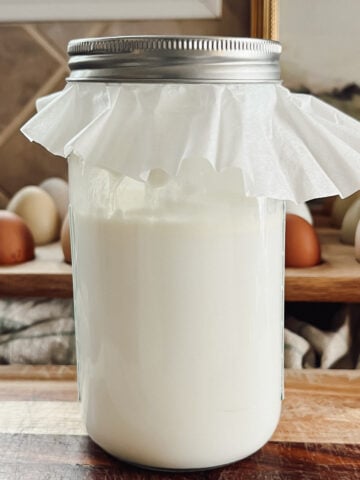
- 1 gallon whole milk – raw or pasteurized both work (not ultra-pasteurized)
- 1-2 cups heavy cream - this gives the cream cheese a richer, more classic texture
- ⅓ cup lemon juice - or substitute white vinegar or use a combination of both
- 1–1½ teaspoons salt - to taste
A Note on Using Raw Milk
I make this recipe with raw milk from my cows, but it is heated during the process to help the milk curdle properly. That means the final cream cheese is not “raw” in the probiotic sense — similar to yogurt or ricotta made from raw milk. I still prefer starting with raw milk because of its freshness, flavor, and fat structure, and because it hasn’t been ultra-pasteurized. If raw milk isn’t available to you, pasteurized whole milk works well too (just avoid ultra-pasteurized milk).
Best acid choice?
- lemon juice: mild, clean flavor
- white vinegar: works great, slightly sharper taste
- mix of both: I love to use a blend for the best of both flavor worlds!
Helpful Equipment
- Heavy-bottomed pot (go bigger than you think you'll need)
- Spoon or spatula for stirring
- Colander + large bowl
- Butter muslin or cheese cloth (this is hands down the best cheese cloth)
- Food processor or blender
- Air tight container for storage

How to Make Cream Cheese (Quick Acid-Set)
- Pour the raw milk and cream into a heavy-bottomed pot.
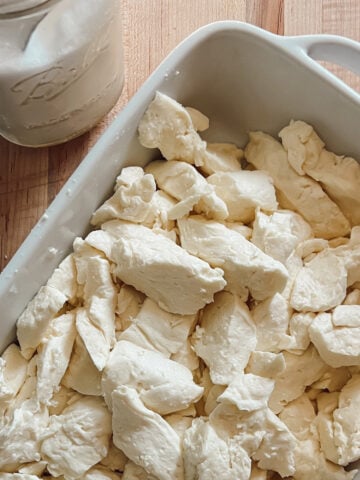
Heat over medium, stirring often, until the milk reaches a strong simmer — steamy with small bubbles around the edges, but not boiling. Tip: If you boil it hard, you’ll still get curds… but the texture will get tougher and the flavor can taste a bit off. - Reduce heat to low. Add the lemon juice or vinegar very slowly and stir well. Stop once thick white curds form and the liquid turns yellowish and clear.
- Turn off the heat and let the pot sit undisturbed for 10 minutes to allow the curds to fully set.
- Line a colander with butter muslin or a double layer of cheesecloth and set it over a bowl.
Carefully pour in the curds and whey. Let drain 15–20 minutes for a softer spread, or up to 45 minutes for a thicker cream cheese. - Transfer the drained curds to a food processor or blender.
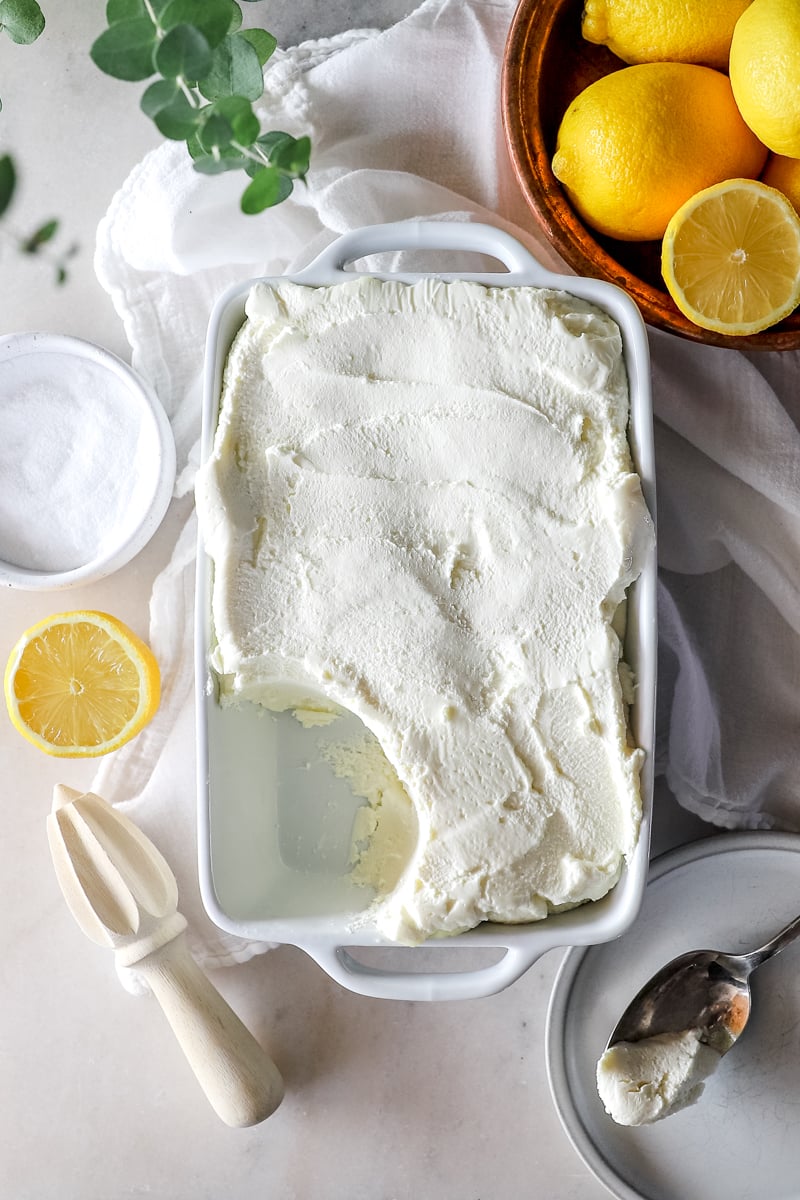
Add salt and blend for 3–4 minutes, scraping down the sides as needed, until smooth and creamy. If the texture is too thick or grainy, add 1–3 tablespoons reserved whey (or clabber, kefir or yogurt) and blend again. - Spoon into a container and refrigerate for at least 1 hour. The texture will firm up as it chills.
Tips for the Best Texture
- Use cream. You can skip it, but cream is what makes it feel like “real cream cheese” instead of a fresh farmer cheese spread.
- Don’t rush the heating step. Slow, steady heat helps the proteins behave nicely.
- Drain based on your plan. If you want it for dips, drain less. If you want it for bagels or frosting, drain longer.
- Blend longer than you think. This is where the magic happens.
Troubleshooting
- "My milk didn't curdle." Most likely: not hot enough, or not enough acid. Bring it back to a strong simmer (not boil), then add a bit more acid slowly.
- "My curds are tiny." Usually from adding the acid too quickly or stirring too aggressively. It will still work, but may take a bit longer to blend smooth.
- "It tastes too lemon/vinegary." Next time, go slower with the acid and stop as soon as you get a clear separation. Also, chilling will help mellow the flavor.
- "It's too thick." Add a tablespoon of whey, kefir, yogurt, or clabber and blend again.
- "It's too thin." Drain longer (easy fix!). You can also stir it and let it chill longer to help thicken up.

How to Use Homemade Cream Cheese
Homemade cream cheese has a way of unlocking a whole list of recipes you may already love. From soft sourdough snacks and rich desserts to quick savory spreads, these are some of my favorite ways to use it — all recipes I make regularly and already have here on the blog.
- Bagels + everything seasoning (obviously)
- Blueberry Lemon Cheesecake Quick Bread or muffins
- Cranberry Cream Cheese Bread
- Sweet Cream Sugar Cookies with Cream Cheese Frosting
- Sourdough Pumpkin Roll
- Sourdough Cranberry Bliss Bars
- Homemade Cinnamon Rolls with silky cream cheese frosting
- The softest, fluffiest Sourdough Cinnamon Rolls with cream cheese frosting
- Pudding desserts like Chocolate Delight or Oreo Icebox Cake
- Sourdough Crepes
- Swirled Pumpkin Cheesecake Bars
- Gluten Free Pumpkin Cheesecake Bars
- Old Fashioned Italian Cream Cake
- Star Bread with cream cheese frosting
- Strawberry Cheesecake Tart or a Blackberry Cheesecake Tart
- Savory dip (add garlic, herbs, homemade ranch seasoning, or chives)
- Stuffed peppers / jalapeño poppers
- Swirled in mashed potatoes (trust me!)

Storage
- Store in an airtight container in the fridge and use within 5-7 days.
- Freezing? I don't love it. The texture can get grainy after thawing. If you do freeze it, plan to use it in baked recipes.
Frequently Asked Questions
Yes. It will still work, but it’ll be a little lighter and less “classic cream cheese.” Still delicious.
Only in flavor. Lemon is a little softer, vinegar is a little sharper. Both curdle the same way. I like to use a 50/50 blend of both!
This is the honest answer: store-bought has a cultured/fermented flavor.
If you want a little more depth without doing a full cultured recipe, add 1–2 tablespoons kefir or yogurt during blending and chill overnight.
Final Thoughts
If you’ve been curious about cheesemaking but felt intimidated by cultures, timing, or getting it “wrong,” this recipe is a great place to start. It’s simple, forgiving, and uses ingredients you probably already have on hand — which is exactly how from-scratch cooking should feel.
This quick cream cheese won’t taste like something shipped across the country in a foil brick… and that’s really the whole point. It’s fresh, lightly tangy, and made right in your own kitchen from milk you can see, smell, and trust. Once you make it a couple times, you’ll start adjusting the texture and flavor without even thinking about it.
If you try this recipe, I’d love to hear how you used it — bagels, dips, frosting, or straight off the spoon (hello, it's me). Homemade cheese has a way of pulling you into the next project… and isn't that half the fun?
More Cheesemaking Recipes
Recipe
Quick Cream Cheese
Equipment
- heavy bottomed pot
- Spoon or spatula for stirring
- Colander + large bowl
- Butter muslin or cheese cloth
- Food processor or blender
- Storage container
Ingredients
- 1 gallon whole milk raw or pasteurized
- 2 cups heavy cream
- ⅓ cup lemon juice
- 1½ teaspoon salt to taste
Instructions
- Pour the raw milk and cream into a heavy-bottomed pot.Heat over medium, stirring often, until the milk reaches a strong simmer — steamy with small bubbles around the edges, but not boiling. Tip: If you boil it hard, you’ll still get curds… but the texture will get tougher and the flavor can taste a bit off.
- Reduce heat to low. Add the lemon juice or vinegar very slowly and stir well. Stop once thick white curds form and the liquid turns yellowish and clear.
- Turn off the heat and let the pot sit undisturbed for 10 minutes to allow the curds to fully set.
- Line a colander with butter muslin or a double layer of cheesecloth and set it over a bowl. Carefully pour in the curds and whey. Let drain 15–20 minutes for a softer spread, or up to 45 minutes for a thicker cream cheese.
- Transfer the drained curds to a food processor or blender.Add salt and blend for 3–4 minutes, scraping down the sides as needed, until smooth and creamy. If the texture is too thick or grainy, add 1–3 tablespoons reserved whey (or clabber, kefir or yogurt) and blend again.
- Spoon into a container and refrigerate for at least 1 hour. The texture will firm up as it chills.
Notes
- "My milk didn't curdle." Most likely: not hot enough, or not enough acid. Bring it back to a strong simmer (not boil), then add a bit more acid slowly.
- "My curds are tiny." Usually from adding the acid too quickly or stirring too aggressively. It will still work, but may take a bit longer to blend smooth.
- "It tastes too lemon/vinegary." Next time, go slower with the acid and stop as soon as you get a clear separation. Also, chilling will help mellow the flavor.
- "It's too thick." Add a tablespoon of whey, kefir, yogurt, or clabber and blend again.
- "It's too thin." Drain longer (easy fix!). You can also stir it and let it chill longer to help thicken up.

Hi Meg! Please help! Can I use ultra pasteurized milk for this recipe? What should I do differently? What temperature should I heat the milk to?
Thank you
Hi Jenn,
Ultra-pasteurized milk has been heated to such a high temperature that curds have a hard time forming. It's generally recommended to avoid using UP milk in cheesemaking recipes. Personally, I'd still try it since that's the milk you like to use and probably already have on hand. Milk that has already been heated and cooled only needs to be warmed to 110-120F. If the curds don't form as expected, my guess (like I said, I haven't tested this with UP) is that once you blend the cream cheese in a food processor the texture would kind of 'work itself out.' It's not like we are talking about making a wheel of hard cheddar, you know? Please report back and let me know if it worked if you decided to try it!
Meg