How to Store Swiss Chard: 5 Methods & Step-by-Step Guide
Learn how to store Swiss chard the best way using one of the 5 most popular methods: refrigerating, freezing, dehydrating, freeze drying, and fermenting. From washing and preparing the bright green leaves to plating up a rainbow of chard, we've got you covered each step of the way. Whether it was grown in your vegetable garden or bought from the grocery store, you can easily learn how to store Swiss chard in this step-by-step tutorial!
Here's the part where I'm brutally honest-- I don't actually love eating fresh Swiss chard. *GASP* I know, I'm embarrassed to admit it.
I've tried preparing it so many different ways, Swiss chard potatoes with sautéed onions in olive oil, fermented in a salty brine that pops in your mouth with every bite, and so much more.
It's just not my favorite flavor, and that's the truth.
BUT I really adore growing rainbow chard in my garden. The oversized outer leaves with their dark green shades, each with a vibrant multicolored stalk, add such an effortless focal point in my raised beds. What can I say, I'm a sucker for vibrant color!
So that's my dilemma. How can I justify growing such large quantities of chard if I don't have a plan for preserving and eating it later? My solution might surprise you. I have learned how to store Swiss chard, no more than my family will actually eat, and the rest is fed to our chickens and Kune Kunes. They go absolutely wild over raw Swiss chard! It's win-win.
I get to grow and harvest chard without guilt, while using any extra to raise well-fed pigs and tasty eggs. Winner winner, chicken dinner... uh, chard dinner.

What is Swiss Chard?
Swiss chard is a leafy vegetable that belongs to the same family as beets and spinach. It's characterized by its large, tender leaves with a colorful stalk, which come in shades of red, yellow, and white. Both the leaves and stems of Swiss chard are edible and offer a mild, slightly earthy flavor.
Swiss chard is packed with nutrients, including vitamin A, vitamin C, and vitamin K, as well as minerals like magnesium and potassium (source). It's a versatile ingredient in the kitchen and the leaves of Swiss chard can be enjoyed raw in salads, sautéed, steamed, or added to soups and stews.
Learn how to plant, grow and harvest Swiss chard here. I wrote this step-by-step guide to make it easy for you!
What You'll Find in This Post:
- Freezing:
- Freezing Swiss chard is a simple and convenient method that helps retain its color, flavor, and nutrients. After blanching the leaves, frozen chard can be frozen in airtight containers or freezer bags for long-term storage.
- Freeze Drying:
- Freeze drying Swiss chard involves freezing the fresh chard and then a process called sublimation removes the moisture from the leaves. Freeze dried Swiss chard can be stored in airtight containers, such as mason jars or mylar bags, and rehydrated as needed for use in soups, stews, and other recipes. Read my Guide to Using a Freeze Dryer to learn more about this method.
- Dehydrating:
- Dehydrating Swiss chard involves removing the moisture from the leaves to create dried flakes or powder. Dried Swiss chard can be stored in airtight containers and rehydrated as needed for use in soups, stews, and other recipes. I've written a Guide to Dehydrating Food plus have shared several recipes here.
- Fermenting:
- Fermenting Swiss chard involves submerging the leaves in a saltwater brine and allowing them to ferment over time. Fermented Swiss chard develops a tangy flavor and can be enjoyed as a condiment or side dish.
- Refrigerating:
- Blanching Swiss chard involves briefly cooking the leaves in boiling water and then plunging them into ice water to stop the cooking process. Once blanched, Swiss chard can be stored in the refrigerator for several days and used as needed.
Jump to:
Which Parts of Swiss Chard Plants are Edible?
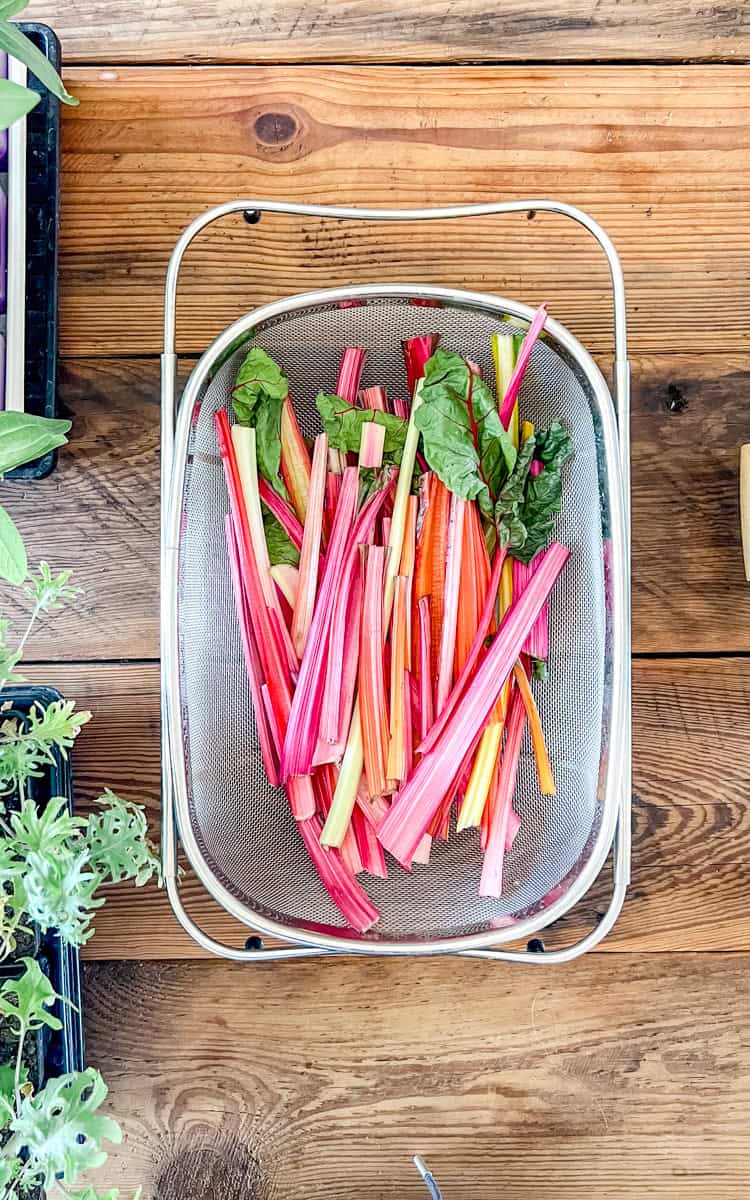
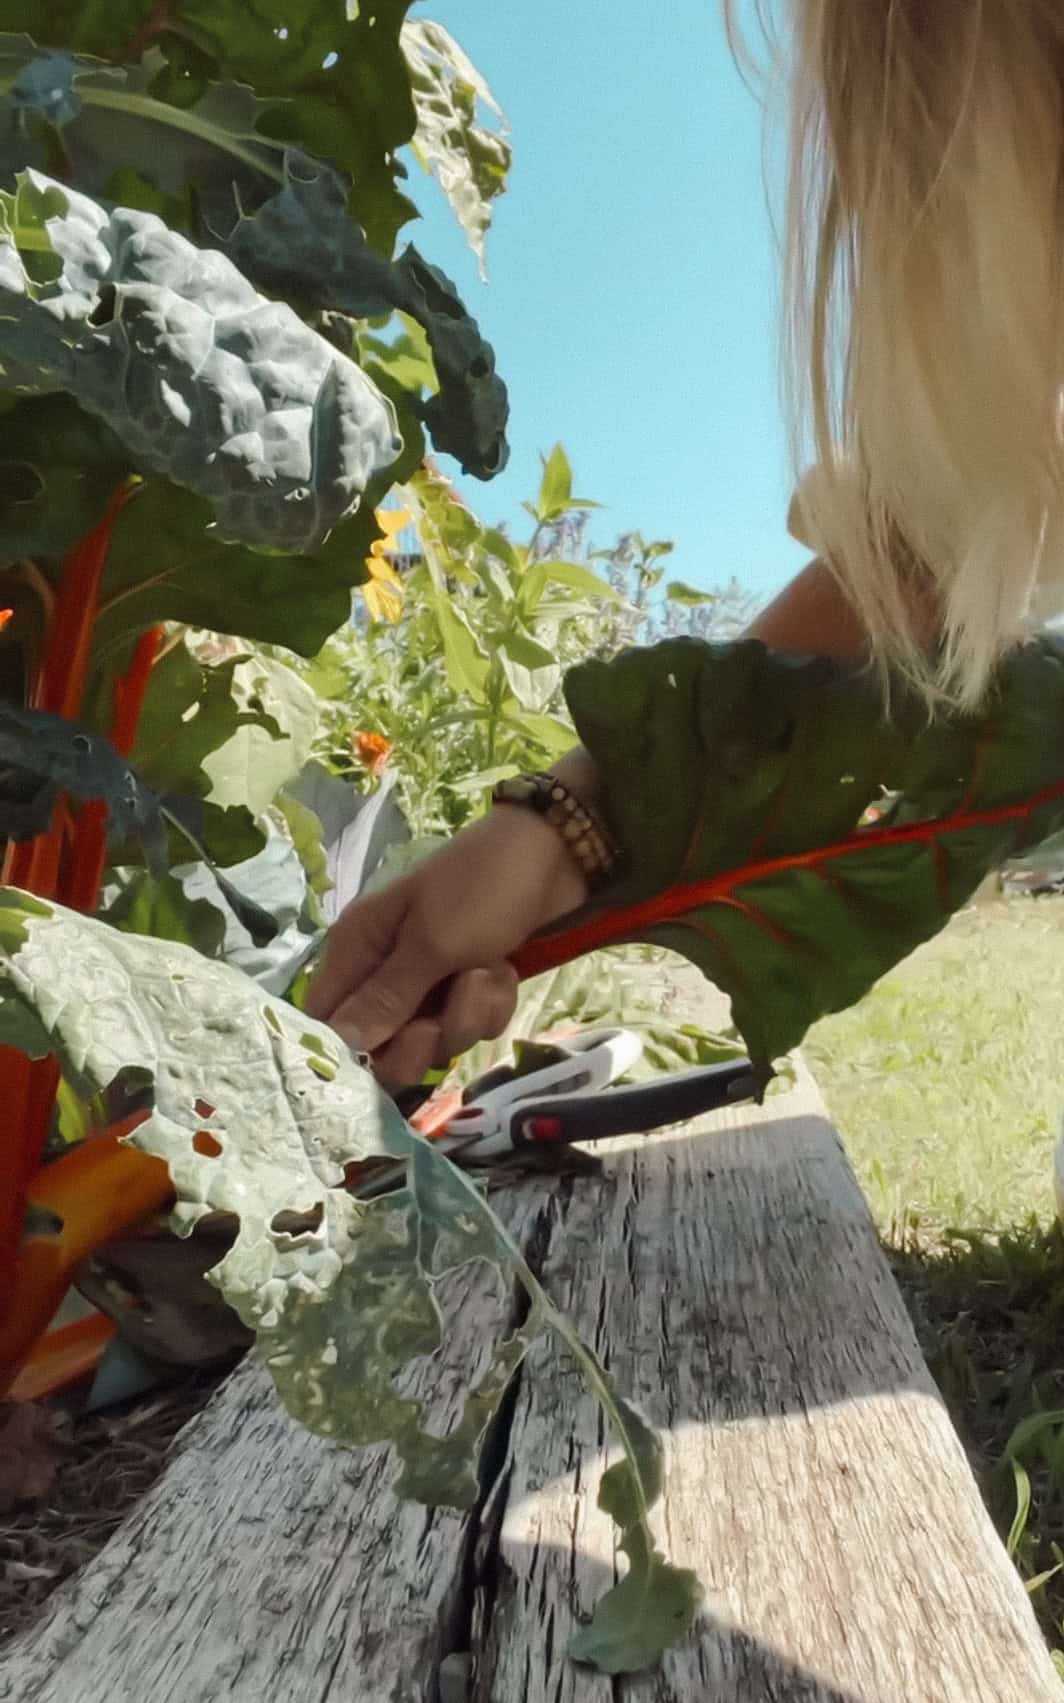
When harvesting Swiss chard, you can eat both the leaves and stems of the plant. Overall, the best time to harvest Swiss chard is when the leaves are young and tender, regardless of whether they are new or mature. Here's a breakdown of what to look for when harvesting:
- New Leaves:
- New leaves are tender and have a milder flavor compared to mature leaves. They are ideal for harvesting when they reach a length of about 6 to 8 inches. Harvesting new leaves encourages the plant to continue producing more foliage throughout the growing season.
- Mature Leaves:
- Mature leaves are larger and have a stronger flavor than new leaves. While they can still be harvested and eaten, they may require longer cooking times to soften their texture. Harvest mature leaves when they reach a length of about 10 to 12 inches or larger.
- Stems:
- Swiss chard stems are also edible and offer a crunchy texture and slightly sweet flavor. Harvest stems when they are firm and crisp, typically around the same time as the leaves. You can cut the stems into smaller pieces and cook them along with the leaves or use them in recipes that call for a crunchy texture, such as stir-fries or salads.
How to Freeze Swiss Chard
If you find yourself with an abundance of Swiss chard, don't let it go to waste! Freezing is a simple way to preserve this leafy green for later use. Start by blanching the leaves in boiling water for 2 minutes, then immediately transfer them to an ice bath to stop the cooking process. Once cooled, drain the leaves thoroughly.
Arrange the leaves in a single layer on a cookie sheet lined with parchment paper, not touching. Flash freeze and then transfer the pieces into airtight freezer bags or containers. Frozen Swiss chard will keep for up to 12 months in the freezer.
How to Freeze Dry Swiss Chard
1. Wash and Prepare the Swiss Chard:
- Start by washing the Swiss chard leaves thoroughly under cold running water to remove any dirt or debris. Trim into small pieces.
2. Blanch the Swiss Chard (Optional):
- Blanching Swiss chard before freeze-drying can help preserve its color and nutrients. To blanch, bring a pot of water to a boil and prepare a bowl of ice water.
- Submerge the Swiss chard leaves in the boiling water for 1 to 2 minutes, then quickly transfer them to the cold water to stop the cooking process.
- Drain the Swiss chard leaves thoroughly and pat them dry with a clean kitchen towel to remove excess water.
4. Freeze Dry the Swiss Chard:
- Once the Swiss chard leaves are prepared, place chard in a single layer on the trays of your freeze dryer machine. Leave some space between the leaves to allow for airflow during the freezing process.
- Place the trays of Swiss chard into the freeze dryer machine and start the freeze-drying process according to the manufacturer's instructions.
- The freeze dryer will gradually lower the temperature, freeze the Swiss chard, and then remove the moisture through a process called sublimation.
- Depending on the size and thickness of the Swiss chard leaves, as well as the capacity of your freeze dryer, the freeze-drying process may take anywhere from 24 to 48 hours or longer.
5. Check for Doneness:
- After the freeze-drying cycle is complete, check the Swiss chard for doneness. The leaves should be crisp and dry, with no moisture remaining.
- If the Swiss chard is not fully dried, you may need to run another freeze-drying cycle until it reaches the desired level of dryness.
7. Store in a Cool, Dry Place:
- Once the Swiss chard is fully freeze-dried, remove it from the trays and transfer to airtight containers. I use vacuum-sealed bags or glass jars. Store the freeze-dried Swiss chard in a cool, dark place, away from direct sunlight and moisture. Properly stored, freeze-dried Swiss chard can last for several years.
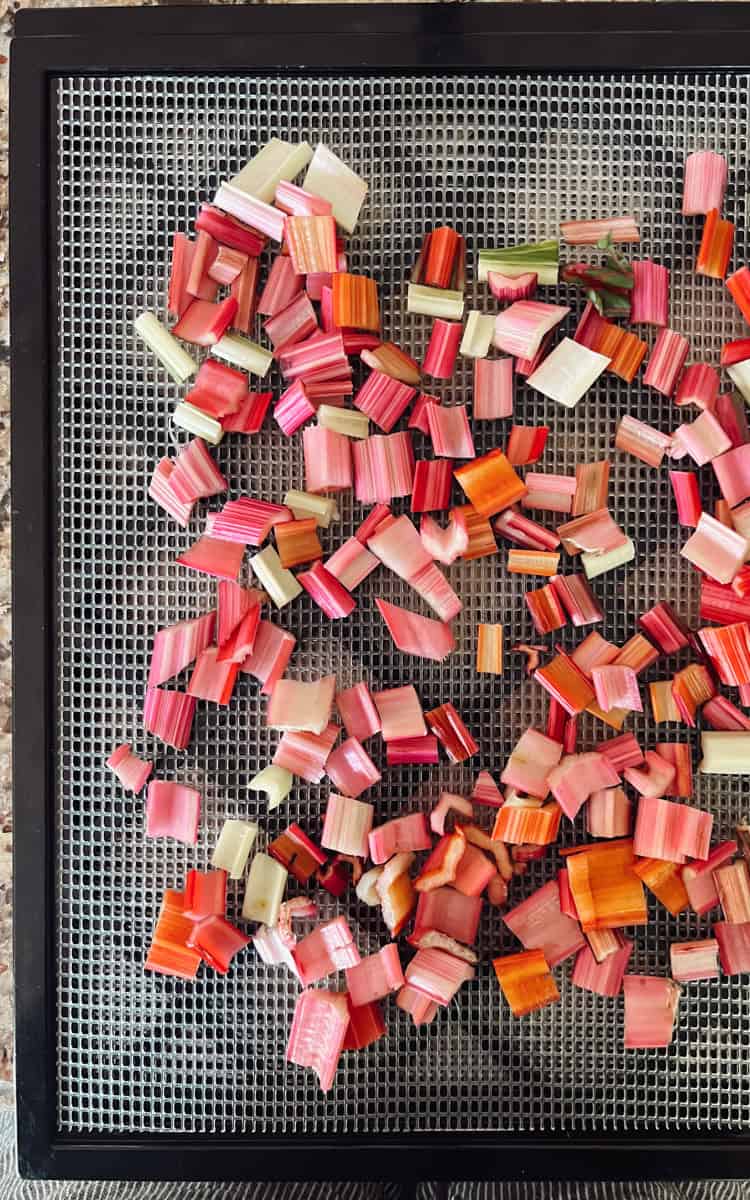
Dehydrating Swiss Chard
1. Wash and Prepare the Swiss Chard:
- Start by washing the Swiss chard leaves thoroughly under cold running water to remove any dirt or debris.
- Trim off any tough or woody stems and discard them. Cut the chard into small pieces.
3. Arrange on Dehydrator Trays:
- Once the Swiss chard leaves are prepared, arrange them in a single layer on the trays of your food dehydrator. Leave some space between the leaves to allow for air circulation.
4. Dehydrate the Swiss Chard:
- Set your food dehydrator to the appropriate temperature for drying leafy greens. Typically, temperatures between 125°F and 135°F (about 52°C to 57°C) work well for dehydrating Swiss chard. Read more about How to Use a Food Dehydrator if you need a refresher course!
- Allow the Swiss chard to dehydrate for 6 to 8 hours, or until the leaves are completely dry and crisp to the touch. The drying time may vary depending on the thickness of the leaves and the humidity level in your environment.
5. Check for Doneness:
- After the initial drying period, check the Swiss chard for doneness. The leaves should be brittle and break easily when crushed between your fingers.
- If any moisture remains, continue dehydrating the Swiss chard in 30-minute increments until fully dried.
6. Cool and Store:
- Store the dried Swiss chard in an airtight container, such as a glass jar or a vacuum-sealed bag, in a cool, dark place. Properly dehydrated Swiss chard can last for several months to a year if stored correctly.
7. Rehydrate Before Use (Optional):
- When you're ready to use the dried Swiss chard, you can rehydrate it by soaking it in warm water for about 15 to 20 minutes. Once rehydrated, use the Swiss chard in soups, stews, casseroles, or other recipes as desired.
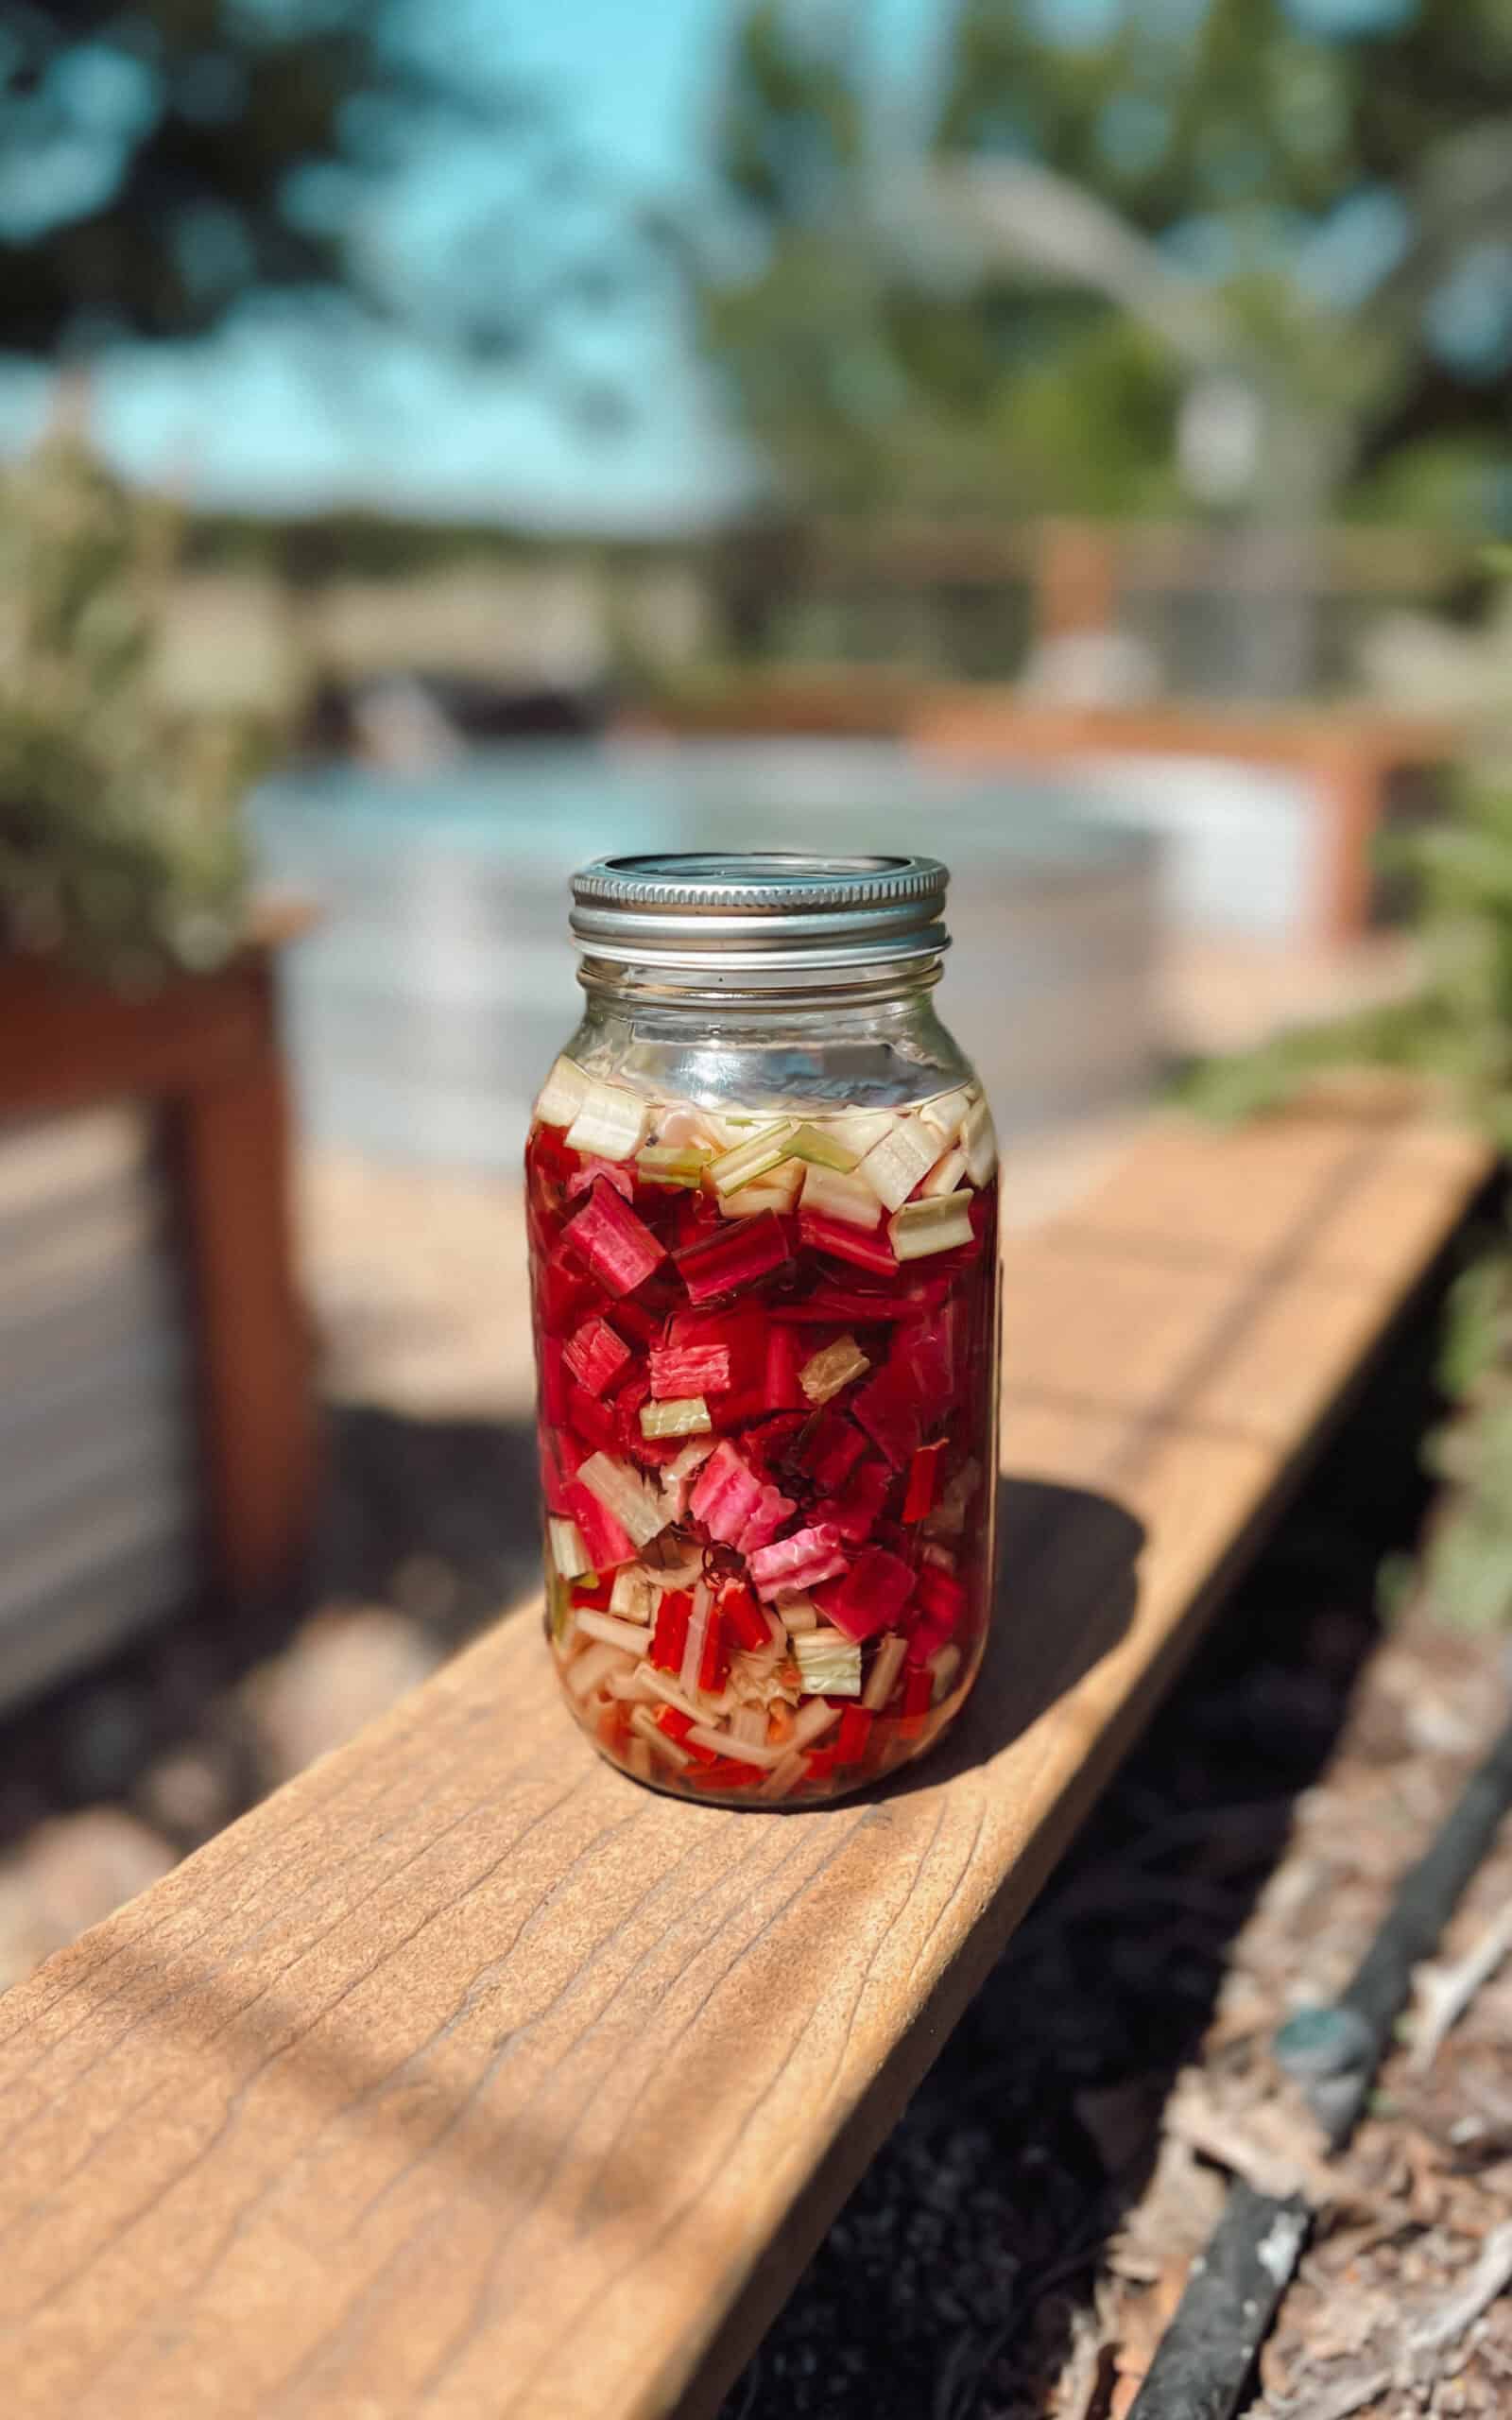
Fermenting Swiss Chard
- Prepare the Swiss Chard & Brine:
- Start by washing the Swiss chard leaves thoroughly under cold running water to remove any dirt or debris. Trim off any tough stems and discard them. Cut or tear the leaves into smaller pieces, if necessary, to fit into your fermentation vessel.
- In a separate container, dissolve 1 to 3 tablespoons of salt per quart of non-chlorinated water to create a brine solution. Stir until the salt is completely dissolved.
- Pack the Fermentation Vessel & Add Brine:
- Pack the Swiss chard leaves tightly into a clean glass jar or fermentation crock, pressing them down to remove any air pockets. Leave about 1 to 2 inches of headspace at the top of the jar.
- Pour the prepared brine over the Swiss chard leaves, ensuring that they are fully submerged.
- Weigh Down the Chard:
- Place a fermentation weight on top of the Swiss chard leaves to keep them submerged under the brine. This helps prevent mold and promotes an anaerobic environment conducive to fermentation.
- Cover and Ferment:
- Cover the jar with a clean cloth or lid to allow gases to escape while preventing contaminants from entering. Place the jar in a cool, dark area away from direct sunlight and let it ferment for about 1 to 2 weeks, depending on your taste preferences.
- Check for Fermentation:
- After a few days, you should start to see bubbles forming in the brine, indicating that fermentation is underway.
- Once the Swiss chard reaches the desired level of fermentation, remove the weight and cloth or lid, and replace it with an airtight lid for storage. Transfer the jar to the refrigerator to slow down the fermentation process and preserve the fermented Swiss chard. Enjoy it as a flavorful condiment, salad topping, or side dish!
Refrigerating Swiss Chard
- Preparation:
- Start by washing the Swiss chard leaves thoroughly under cold running water to remove any dirt or debris. Trim off any tough stems and discard them, or save them for another use if desired. You can also cut or tear the leaves into smaller, more manageable pieces if necessary.
- Drying:
- After washing, gently pat the Swiss chard leaves dry with a clean kitchen towel or use a salad spinner to remove excess moisture. Removing excess moisture helps prevent the leaves from becoming soggy while stored in the refrigerator.
- Layering:
- If you have a large quantity of Swiss chard, you can layer the leaves between sheets of paper towels in the storage container to help absorb moisture and prevent them from wilting. Be sure to leave some space at the top of the container to avoid compressing the leaves.
- Storage:
- Place the prepared Swiss chard leaves in the airtight container or plastic bag, ensuring that they are not overcrowded. Seal the container or bag tightly to keep the Swiss chard fresh and prevent moisture loss.
- Refrigeration:
- Store the sealed container or bag of Swiss chard in the vegetable crisper drawer of your refrigerator. The crisper drawer helps maintain a consistent level of humidity, which is important for preserving the freshness and crispness of the Swiss chard leaves.
- Use Within a Week:
- Swiss chard is best enjoyed fresh, so try to use it within a week of refrigerating for the best flavor and texture. As the Swiss chard ages, it may start to wilt or lose its crispness, so it's best to use it as soon as possible for optimal taste and quality.
That's a Wrap!
And there you have it, folks—a complete guide to storing Swiss chard in a variety of ways. Whether you're refrigerating, freezing, dehydrating, freeze-drying, or fermenting, there are plenty of methods to ensure your chard stays fresh and delicious.
Not only does this help you make the most of your kitchen garden harvest or trip to the farmers' market, but it also means less waste and more nutritious meals for you and your family. Now we practice our skills and harvest your rainbow chard, and prepare it with your favorite preservation technique.
Happy gardening!
- Meg


Comments
No Comments