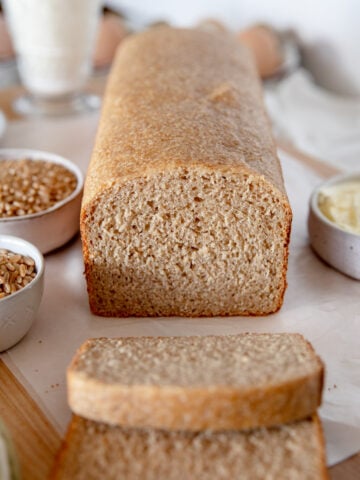
Honey Oat Bread (Bread Baker's Favorite!)
With step-by-step pictures and plenty of helpful tips, learn how to make Honey Oat Bread using a few baking ingredients like flour, oats, water, honey, yeast, salt, and milk. This simple sandwich bread has a super soft interior with an extra chewy crust. This recipe yields 2 standard loaves and comes together in just a few hours, so it’s perfect for a growing family.
Let’s make homemade sandwich bread with oats and honey! We keep this bread on a weekly rotation at in our kitchen! There’s nothing quite as satisfying as warm homemade bread and this recipe is absolute loaf perfection-- an extra large and tall loaf with an airy texture.
If you ask my kids, they'll enthusiastically tell you this is the best homemade bread for making sandwiches. And if you're new to baking daily bread, rest assured this is the perfect recipe to begin with. I promise you will finally feel like a true bread baker when you master this basic bread recipe.
This Sandwich Bread is:
- Simple to make
- Easy to prep ahead and freeze
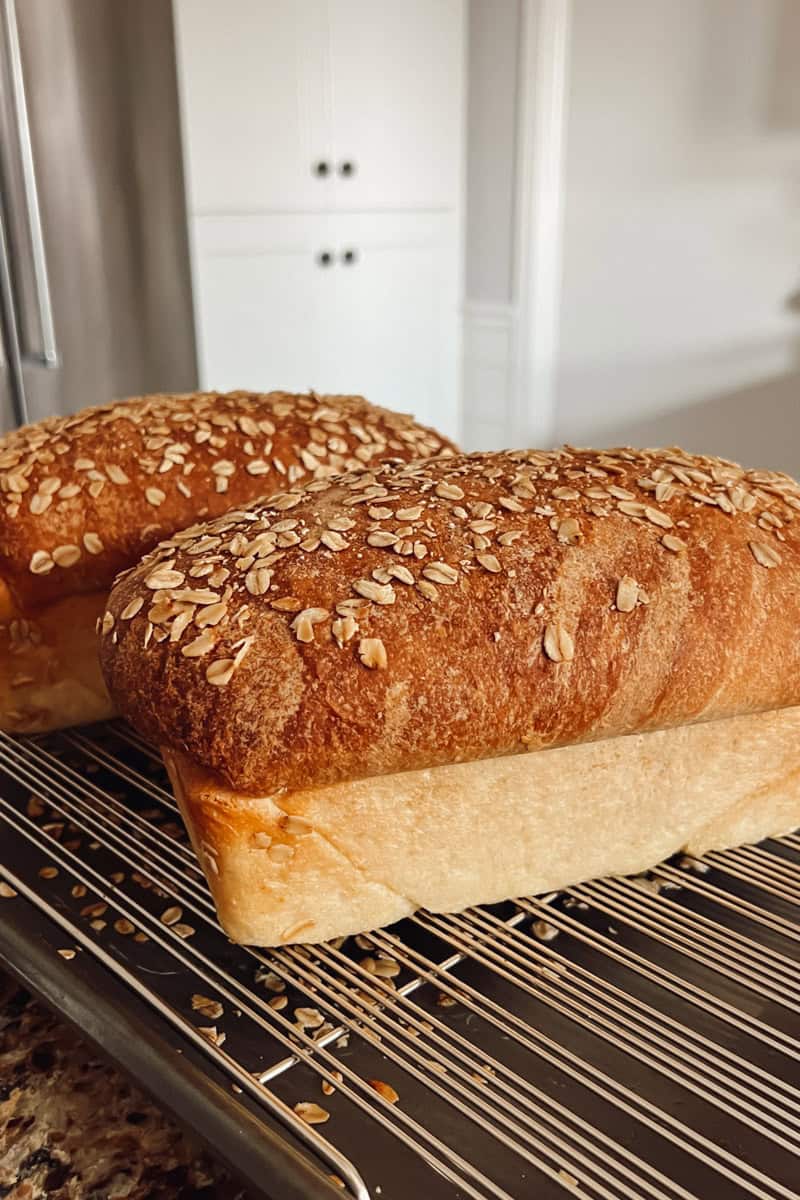
- Golden brown with a super soft crust
- Extra chewy white bread
- Perfect for sandwiches
Looking for a no yeast alternative? Here’s my Easy Sourdough Sandwich Bread! For a standard sandwich bread without oat flour, you'll love my Homemade Sandwich Bread!
Jump to:
As an amazon associate, this post contains affiliate links, which means I make a small commission at no extra cost to you. See my full disclosure here.
Ingredients

- Bread Flour I Bread flour makes a lighter and fluffier dough. Regular all-purpose flour can absolutely be used in this recipe, I recommend adding 2-3 tablespoons if the dough is feels too sticky. See note below for using fresh milled flour.
- Oat Flour or Rolled Oats | If you do not have oat flour, you can leave it out and substitute more bread flour. I am making flour by milling rolled oats in my grain mill, or you could leave the oats whole or use a food processor. See note below for milling instructions.
- Milk Whole milk helps to add flavor and richness to the dough because of the fat content. Skim milk or milk alternatives can possibly be substituted, it will just change the dough texture and I have not recipe tested it, so no guarantees.
- Butter Choose real, full fat, unsalted butter.
- Water To get maximum yeast activity and the best rising dough, use filtered water. Chlorine and other additives are specially designed to INHIBIT growth. Not ideal for growing an active yeast culture.
- Honey Quick doughs need a little help getting the yeast to grow quickly and shorten the rising times.
- Yeast Pro tip: buy yeast in bulk and store it in the freezer. It will last for such a long time!
- Salt My go-to is Redmond's Real Salt, sea salt, Himalayan sea salt or any non-iodized salt.
See recipe card for quantities.
How to Make This Bread With Fresh Milled Flour
Before I explain how to convert this recipe, first ask yourself the following question: Do I like eating bread made entirely with whole wheat flour?
If the answer is yes, then cool! You'll use approximately 4 ⅔ cups of wheat berries for this honey oat bread recipe. I like to use hard white or Khorasan, or a combination of both.
I'm not giving you an exact weight, because all wheat berries have a slightly different weight in grams to convert from cups. You can find a conversion chart in my post about How to Make Flour With a Grain Mill.
To make a lighter loaf, I strongly recommend sifting the flour or only using 30% fresh milled wheat and 70% bread flour.
How to Mill Oats for Flour
To make milled oat flour, process ⅔ cup of oats through your mill. For a more rustic flour blend, use a food processor or high speed blender. A general rule of thumb is that one cup of oats weighs 99 grams, FYI.
Instructions
For all of my dough recipes, I am always very careful when measuring the dry ingredients. Flour is scooped, not packed. Salt is measured, not pinched. Totally not my normal free-spirited style of cooking, but it is important here!
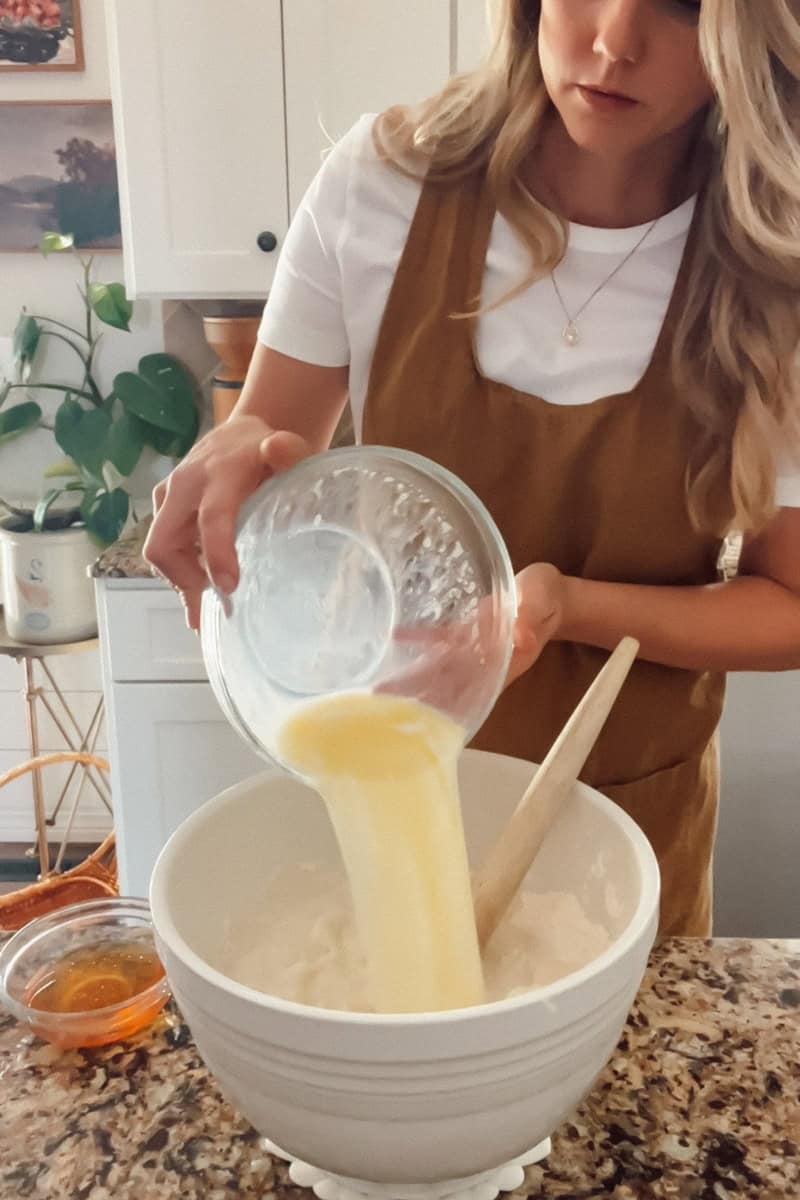
- Using a large glass measuring bowl, add the milk, water, and cubed butter. Heat it in the microwave or a saucepan until warm, but not boiling. The butter will melt, but there should be some solid pieces floating. The temperature needs to be warm enough to activate the yeast, but not so hot that it kills it. Aim for 110°F.
- In a stand mixer, combine all of the dry ingredients EXCEPT one cup of bread flour. This will be added as needed. Mix the ingredients together and then pour in the warm liquid mixture. Attach the bowl and dough hook to the stand mixer and begin kneading on about a speed two (slow and gentle).
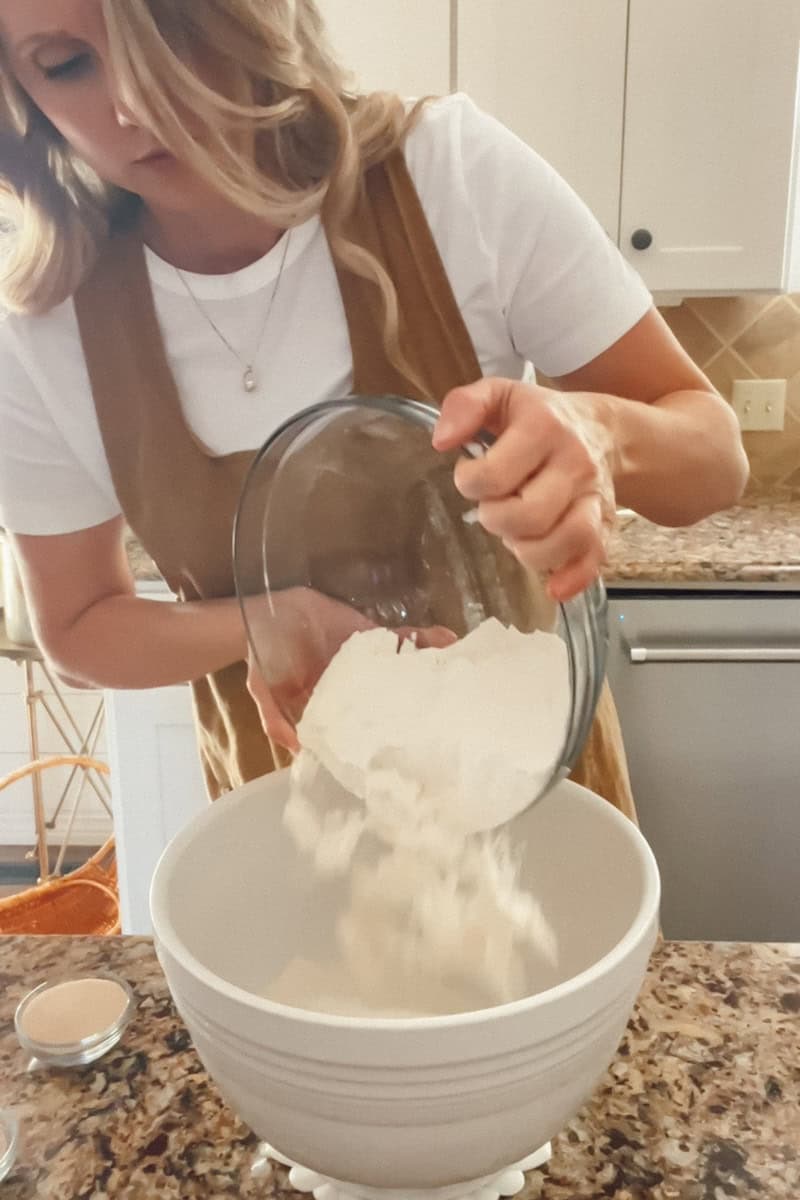
3. Continuing on a slow speed, add the remaining one cup of flour, a few tablespoons at a time until the dough forms. I usually have to add the entire cup of flour, for reference. Knead for two minutes more.
This is a wet and sticky dough, and it's important not to add too much extra flour or your loaves will be dense. The flour will soak up the extra moisture as it rises.
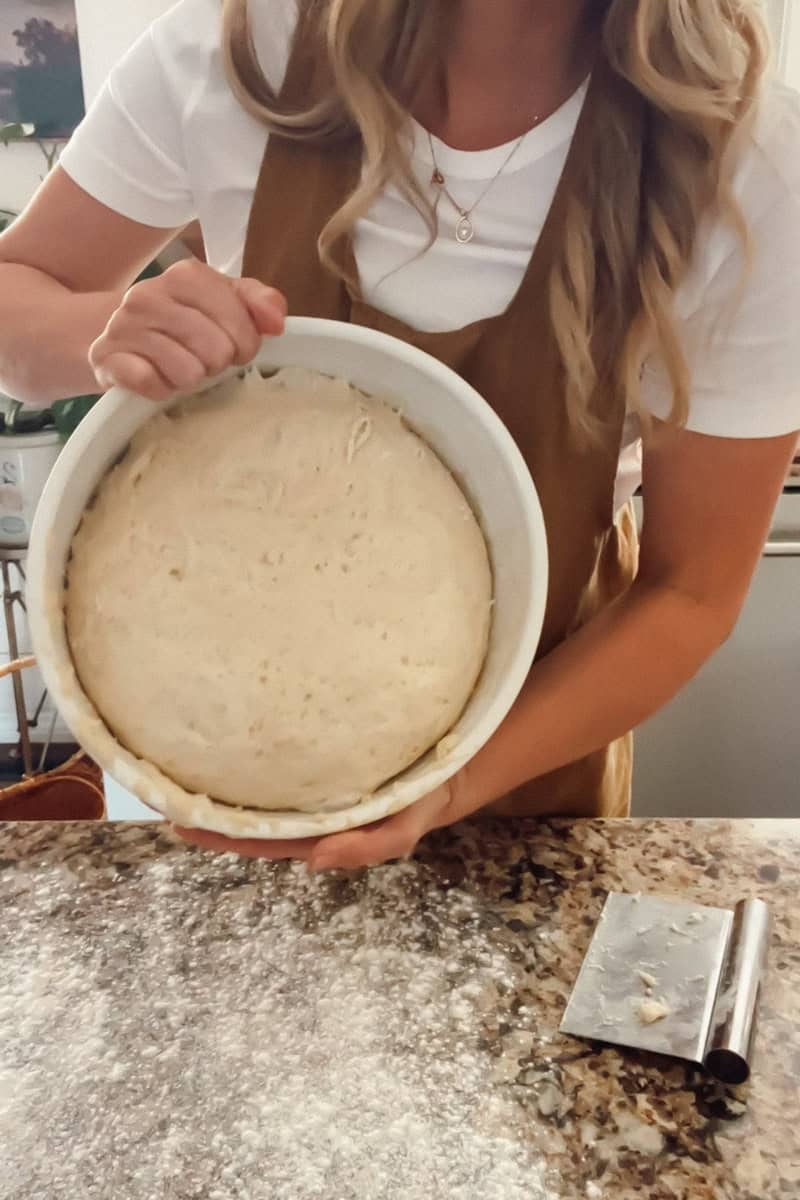
4. While the dough is kneading, bring a cup of water to a boil in the microwave and leave the door shut. This will create a warm and humid proofing box to help the dough be even fluffier.
Transfer the dough too a lightly greased large mixing bowl (or grease the mixing bowl it was made in) and cover the dough with a loose tea towel.
Quickly put the dough into the microwave and close the door. Let it rise for thirty minutes to an hour. It usually takes about 40 minutes in my kitchen.
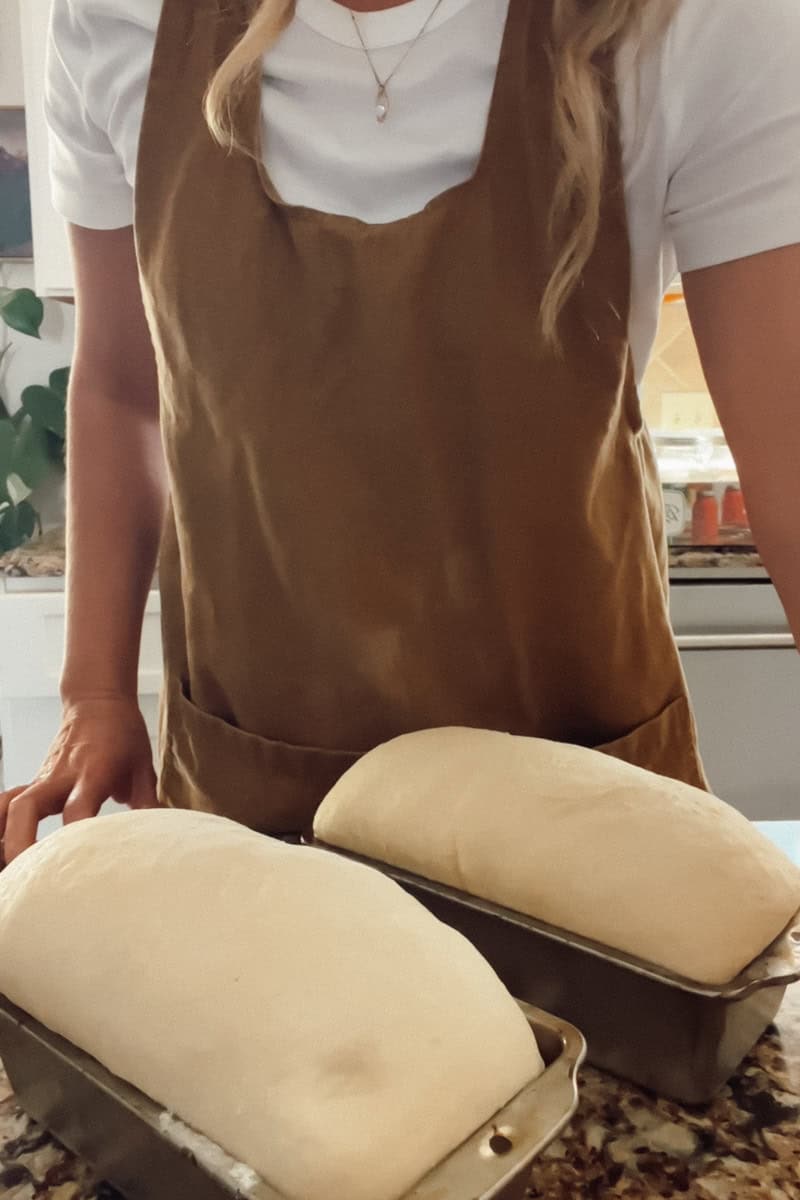
5. Spray two 4X9 inch bread pans or 1 13X4 pan with cooking spray. Turn dough onto a lightly floured surface.
Shape the loaf (or loaves) and place them in the pans. Pour 1 tablespoon of melted butter over each loaf and sprinkle the oats on top. Cover with a tea towel and let them rise for 20-30 minutes until the top of the loaf has domed over the pan.
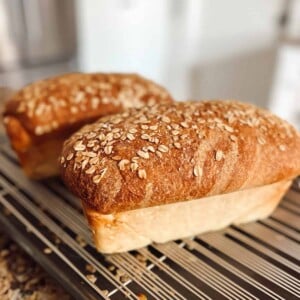
6. Preheat the oven to 350°. Bake the bread for 50 to 60 minutes, until the crust is golden brown and the sides of the loaf feel firm. The internal temperature of the loaf should be about 195°F.
7. Remove the loaf from the oven. Let the bread cool in the pan for 10 minutes and then remove it from the pan and place it on a cooling rack to cool. Let it cool completely before slicing.
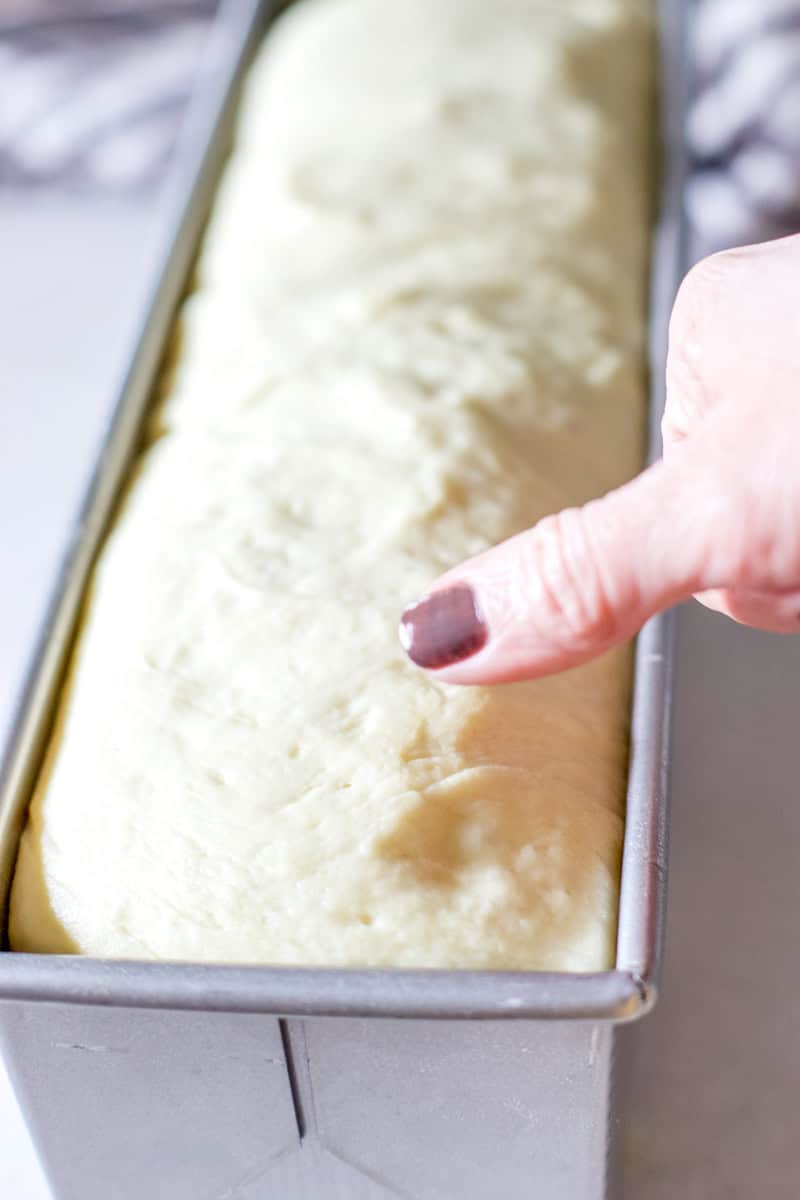
Hint: The dough is ready when you can poke a corner of the loaf and an indention remains, like this picture. See how the thumb print didn't just spring right back up? That's what you are looking for! (below)
Recipe
Honey Oat Bread
Equipment
- 2 9X5 bread pans
- large bowl or stand mixer
Ingredients
- 2 cups whole milk
- 1 cup water
- ½ cup butter
- 7 cups bread flour
- 1 cup oat flour *see note
- 6 tablespoons honey
- 2 teaspoons salt
- 9 teaspoons yeast
Optional Topping
- ¼ cup oats rolled or quick
- 2 tablespoons butter melted
Instructions
- Using a large glass measuring bowl, add the milk, water, and cubed butter. Heat it in the microwave or a saucepan until warm, but not boiling. The butter will melt, but there should be some solid pieces floating. The temperature needs to be warm enough to activate the yeast, but not so hot that it kills it. Aim for 110°F.
- In a stand mixer, combine all of the dry ingredients EXCEPT one cup of bread flour. This will be added as needed. Mix the ingredients together and then pour in the warm liquid mixture. Attach the bowl and dough hook to the stand mixer and begin kneading on about a speed two (slow and gentle).
- Continuing on a slow speed, add the remaining one cup of flour, a few tablespoons at a time until the dough begins to form. I usually have to add the entire cup of flour, for reference. This is a very sticky dough! Resist the urge to keep adding flour. Knead for two minutes more.
- While the dough is kneading, bring a cup of water to a boil in the microwave and leave the door shut. This will create a warm and humid proofing box to help the dough be even fluffier.Transfer the dough too a lightly greased large mixing bowl (or grease the mixing bowl it was made in) and cover the dough with a loose tea towel.Quickly put the dough into the microwave and close the door. Let it rise for thirty minutes to an hour. In my kitchen, 40 minutes is perfect.
- Spray two 4X9 inch bread pans or 1 13X4 pan with cooking spray. Turn dough onto a lightly floured surface.Shape the loaf (or loaves) and place them in the pans. Pour 1 tablespoon of melted butter over each loaf and sprinkle the oats on top. Cover with a tea towel and let them rise for 25-30 minutes until the top of the loaf has domed over the pan.
- Preheat the oven to 350°. Bake the bread for 50 to 60 minutes, until the crust is golden brown and the sides of the loaf feel firm. The internal temperature of the loaf should be about 195°F.
- Remove the loaf from the oven. Let the bread cool in the pan for 10 minutes and then remove it from the pan and place it on a cooling rack to cool. Let it cool completely before slicing.
Notes
Nutrition
Substitutions
- Dairy free - I have not recipe tested this bread with dairy free milk and butter alternatives, but bakers in my instagram audience have reported that they made it and it worked!
- Gluten free - Unfortunately, this can not be made gluten free.
- Whole Wheat Flour - Whole wheat flour will make a denser loaf. Add the flour slowly and allow it to incorporate fully before rising.
- Fresh Milled Flour - This recipe can be made with fresh milled flour! The loaves will be dense if you don't sift the fresh flour. See note.
Storage
Fresh bread is best enjoyed within 3 days. Store bread at room temperature in a linen bread bag, bread box or parchment bread bag. To learn the Best Way to Store Homemade Bread, read this post!

Related
Looking for other recipes like this? Try these:


Latest news on the homestead!
Here's the most recent posts from Meg:


In the ingredients list for the oat flour, it says *see note, but I’m not seeing a note. Am I missing it?
Hi Beth! You didn't miss it in the recipe card, it was a note in the body of the post that gave instructions for milling oats into oat flour. It says, "*Note about oat flour: Oat flour can be found in most grocery stores in the specialty baking section or purchased online. If you are milling oat flour at home, here's how to do it! To make milled oat flour for this recipe, process ⅔ cup of oats through your mill. For a more rustic flour blend, use a food processor or high speed blender." Thanks for bringing it to my attention! I just edited the recipe card and added it to the notes section at the bottom. Have a great day!
- Meg
I don’t own a microwave so I’m assuming the same idea in the oven will work for the hot water first rise?
It certainly will! Anywhere nice and warm with a bit of humidity will make your loaves nice and fluffy!