
How to Use Antique Butter Molds (And Where to Find Them)
Every time I pull out one of my antique butter molds, people have questions. Where did I find it? How old is it? Can you actually still use those? And probably the one I hear most: where can I find one?!
I get it. There's just something ridiculously charming about turning a plain lump of homemade butter into a little carved rooster or flower.
I've collected antique butter molds for years, and mine aren't just decorations. I still use them to mold fresh butter for our table, which means I'm pretty particular about the ones I bring home and how I clean and care for them.
If you've inherited an old wooden butter mold, spotted one tucked into the corner of an antique store, or fallen down the rabbit hole after watching one of my butter-molding videos, I'll show you what I look for, where I find mine, how I clean them, and what you should know before putting an antique mold back to work in your kitchen.
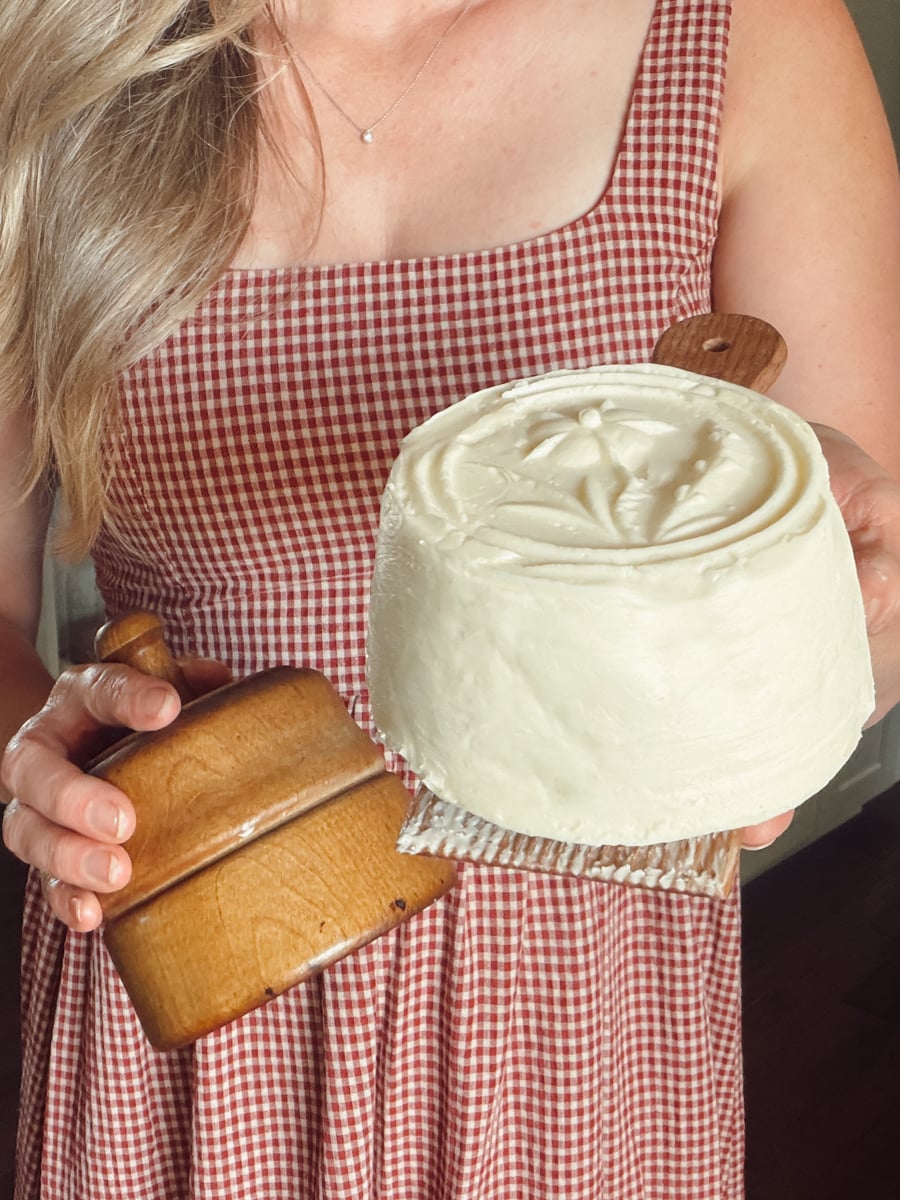
What Is an Antique Butter Mold?
An antique butter mold is a tool used to shape butter and often leaves a decorative design on its surface. But once you start collecting them, you quickly realize there wasn't just one kind.
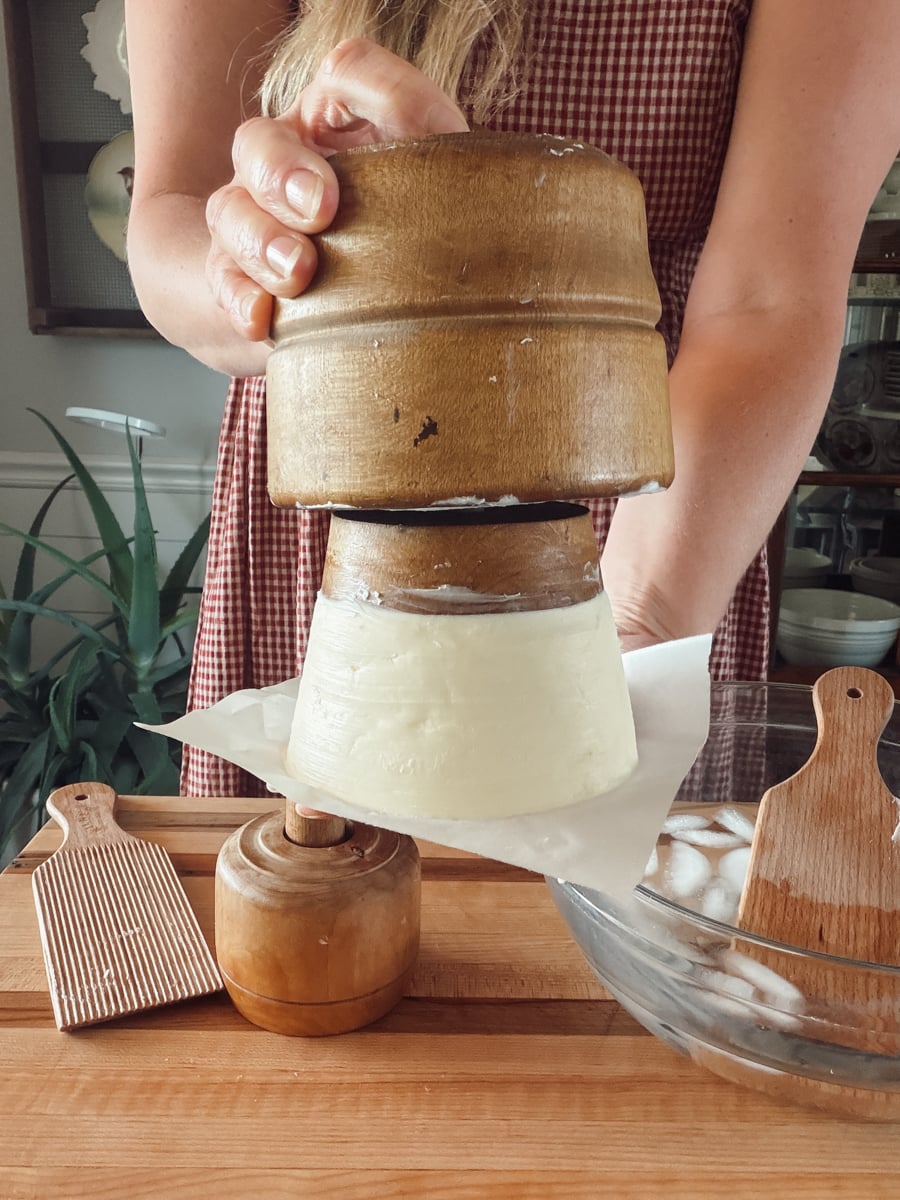
Some are simple carved stamps or prints that were pressed onto the surface of butter. Others have a wooden bell that holds the butter and a plunger with a carved stamp on the bottom. Press the plunger down and that beautiful carving becomes the top of your finished block of butter.
You'll also find rectangular molds, small molds for individual pats, and even more complicated mechanical versions.
Wooden butter molds were made from several different woods, including maple, cherry, or poplar. Others were made from glass. Some were made by their owners or local craftsmen, while others were commercially manufactured. By the late 1800s, butter molds could even be ordered from catalogs.
And the designs are one of my favorite parts.
Flowers and other plants were common, but surviving antique molds also feature wheat, stars, acorns, pineapples, cows, sheep, chickens, roosters, geometric designs and all sorts of other carvings. There are even examples with portraits and words.
Once you start looking for them, it's very easy to accidentally start a collection. Ask me how I know.
Why Did People Use Butter Molds and Stamps?
I used to think butter molds and stamps were simply a pretty way to dress up homemade butter. They certainly did that, but their history is more practical than I realized.
For families making butter at home, molds gave freshly worked butter a consistent shape and could leave a beautiful pattern on top. But decorative butter wasn't limited to the family dinner table. Butter was also an important farm product sold at market.
And those pretty carvings could have a very practical purpose. According to the DAR Museum, farmers selling butter often had their own unique designs so customers could recognize butter from a maker they liked. Basically, it was an early butter brand!
The Metropolitan Museum of Art has a beautiful example from Pennsylvania dating to around 1790. The cherry wood mold is carved with an artichoke design, and the museum notes that designs like this could be used to identify the source of butter sold at market.
So that little carved rooster or flower wasn't necessarily there just to make the butter pretty. In some cases, it helped tell buyers whose butter they were looking at.
Butter Molds Also Helped Portion Butter
Butter molds weren't only decorative. They also helped portion butter into consistent amounts. Antique molds were made in several sizes, including quarter-pound, half-pound, one-pound and even two-pound molds, along with tiny molds for individual pats. This was especially useful when butter was being sold, since the finished block could have both a consistent weight and a recognizable design.
By the late 1800s, butter molds weren't only being carved one at a time at home or by local craftsmen. They were also commercially produced. An 1897 Sears, Roebuck catalog advertised maple butter molds in several sizes, including molds with fancy carvings and a Jersey cow design.
And, naturally, now I want to find more antique Jersey cow molds. I need a whole herd, right?
I think that's part of what makes these old molds so fascinating to me. They're beautiful, but they were also working kitchen tools. Someone churned the cream, washed and worked the butter, packed it into a mold and carried that butter to a table or market.
More than a century later, I can press fresh butter into one of those same old wooden molds and use it for exactly what it was made to do.molds and use it for exactly what it was made to do.
How to Find Antique Butter Molds
I've found butter molds in all kinds of places over the years.
Some of the best places to look include:
- Antique stores
- Estate sales
- Farm auctions
- Flea markets
- Facebook Marketplace
- Online auction sites
- Family collections
Prices vary widely depending on age, condition, rarity, and design.
Don't overlook molds with minor wear. A mold that shows use often has more character than one that looks untouched.
How to Tell if a Butter Mold Is Antique
Dating an old wooden butter mold isn't always straightforward. Age, years of use, storage conditions, and even how the wood was originally worked can all affect how a mold looks today. I wouldn't assume a mold is antique simply because the wood is dark, worn, or imperfect.
When I'm looking at an old butter mold, I look for signs of genuine age and use, including hand-tool marks, wear in the places you would expect from handling, an aged surface and patina, and carving that doesn't have the perfectly uniform appearance of a modern machine-made reproduction.
The Stamp and Bell May Not Be Original to Each Other
Here's something that's easy to miss when you're shopping for antique butter molds: the pieces can be swapped.
On many plunger-style butter molds, the carved stamp and handle can be unscrewed from the wooden bell. That means the bell you see today isn't necessarily the bell that particular stamp started its life in.
I actually have a cow butter mold that I suspect is in a replacement bell.
And there's a very practical reason someone might do this. The carved stamp is the special part. If you find a beautiful old stamp you love but its bell is cracked or damaged, the handle and stamp can sometimes be moved to another properly sized bell that's still in good condition.
This also means I wouldn't rely on the bell alone to determine the age or origin of a butter mold. You're looking at several individual wooden pieces that may or may not have spent their entire lives together.
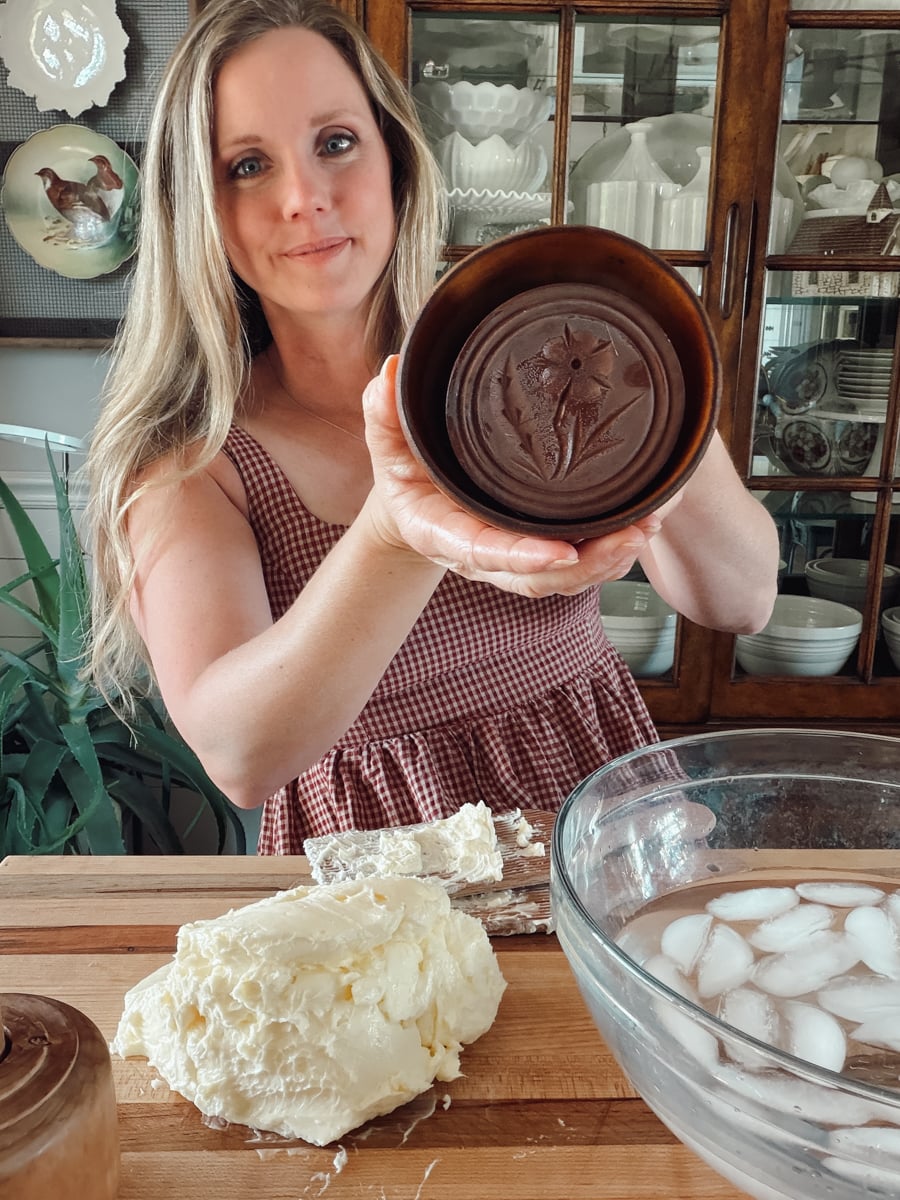
Don't Buy a Cracked Butter Mold if You Want to Use It
If your goal is to actually mold butter rather than simply display it, I skip molds with cracked or repaired bells.
I've found that once these old wooden bells crack, a repair doesn't make them reliably functional again. Packing butter firmly into the mold puts pressure on the bell, and that old crack can open right back up.
A beautiful carved stamp with a damaged bell can still be worth buying if the price is right and you know you can find a replacement bell that fits. But I wouldn't pay usable-mold prices for a cracked and repaired mold.
If you're buying your first antique butter mold specifically to use in the kitchen, look for a solid bell without cracks and a plunger that moves smoothly inside it. A little honest wear doesn't bother me at all. Structural damage does.
A Crisp Carving Isn't Just Prettier
I always get a little excited when I turn over an antique butter mold and find a really crisp carving. Part of that is because the design will make a prettier block of butter, of course. But there's also a practical reason.
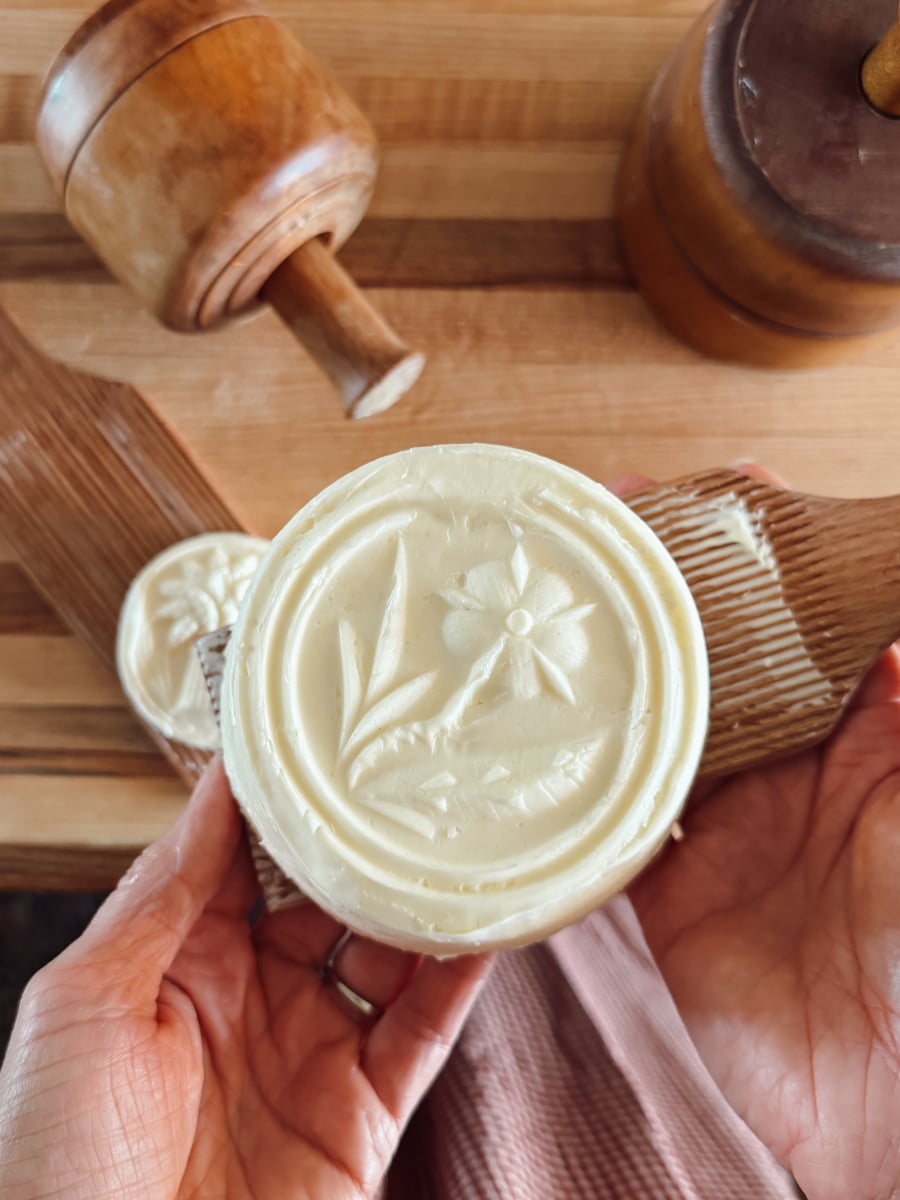
Most antique butter molds have been used and worn over many years. The tiny details in the carving can become rough, chipped, or worn down. Butter loves to grab onto those imperfections, which can make it much harder to get a clean release from the mold.
My cow mold is a perfect example of this. She's a beauty, but her pattern is worn, and my stamped butter never turns out quite as detailed and crisp as I'd like.
So when I'm shopping for a mold I actually plan to use, I look at the carving just as carefully as I look at the bell.
Some wear is completely normal, and I love seeing evidence that an old kitchen tool was actually used. But there's a difference between beautifully worn and difficult to use.
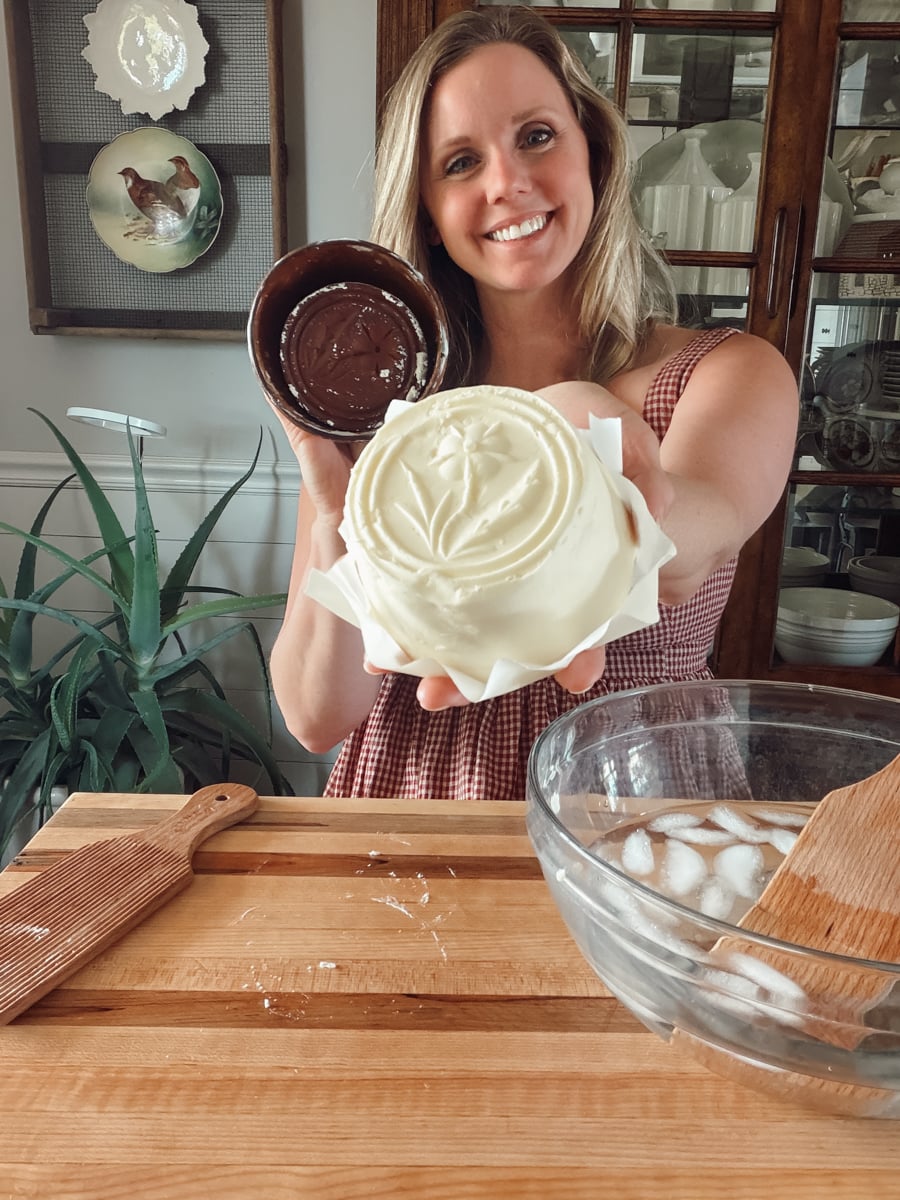
If you want those incredibly crisp flowers, roosters, or wheat patterns you see on molded butter, start with the sharpest, best-preserved carving you can find. As you can see below, my favorite flower stamp has been well-used and doesn't create a crisp pattern on my butter.
How Much Do Antique Butter Molds Cost?
Prices vary quite a bit depending on the condition, age, size, and carving. Most of the antique butter molds in my collection have cost between $15 and $45, which is a pretty reasonable range for a nice, usable mold.
I've paid as much as $55 for a mold with a primitive cow carving, and I'd expect to pay more for an unusually detailed or hard-to-find animal design. Those are always the ones that get me!
You can certainly find molds for less at farm sales, estate sales, and flea markets, while rare or especially collectible examples can sell for much more.
If you plan to actually use the mold, I wouldn't pay extra simply because it's old. I care much more about a solid, crack-free bell and a crisp, well-preserved carving. A $20 mold in great condition can make much prettier butter than a rare $100 mold that's badly worn.
Can You Still Use Antique Butter Molds?
I do, but I'm selective about which molds I actually use for food. Remember that an antique wooden mold has an unknown history, and there's no way to know everything it may have been exposed to over the last 100 years.
I only use molds with solid, sound wood that I can thoroughly clean.
Avoid molds that have:
- Active mold growth
- Cracks that cannot be cleaned
- Soft or rotting wood
- Heavy chemical finishes
- Signs of insect damage
If a mold appears unstable or damaged, it may be best kept as a display piece.
Cleaning an Antique Butter Mold Before Using It
Every antique butter mold I bring home gets a thorough cleaning before it goes on display in my kitchen, and especially before I use it for butter.
I start by gently scrubbing the mold with warm water, dish soap and a soft toothbrush. The toothbrush or toothpick is especially helpful for getting down into all of those little grooves in the carved stamp, where decades of dust and debris can collect. I rinse it well and let the wood dry completely.
Once my mold is completely clean and dry, I condition the wood with food-grade mineral oil, just as I would a wooden cutting board. I apply a light coat, allow the wood to absorb what it needs, then thoroughly wipe away any excess before storing the mold.
Keep in mind that you're dealing with an antique kitchen tool with an unknown history. I only use molds that have solid, sound wood and that I can thoroughly clean. If I find deep cracks, soft or deteriorating wood, signs of active mold or insect damage, an unknown coating or finish, or deep areas that I can't get clean, that mold gets to be pretty kitchen decor instead.
Should I Oil an Antique Butter Mold?
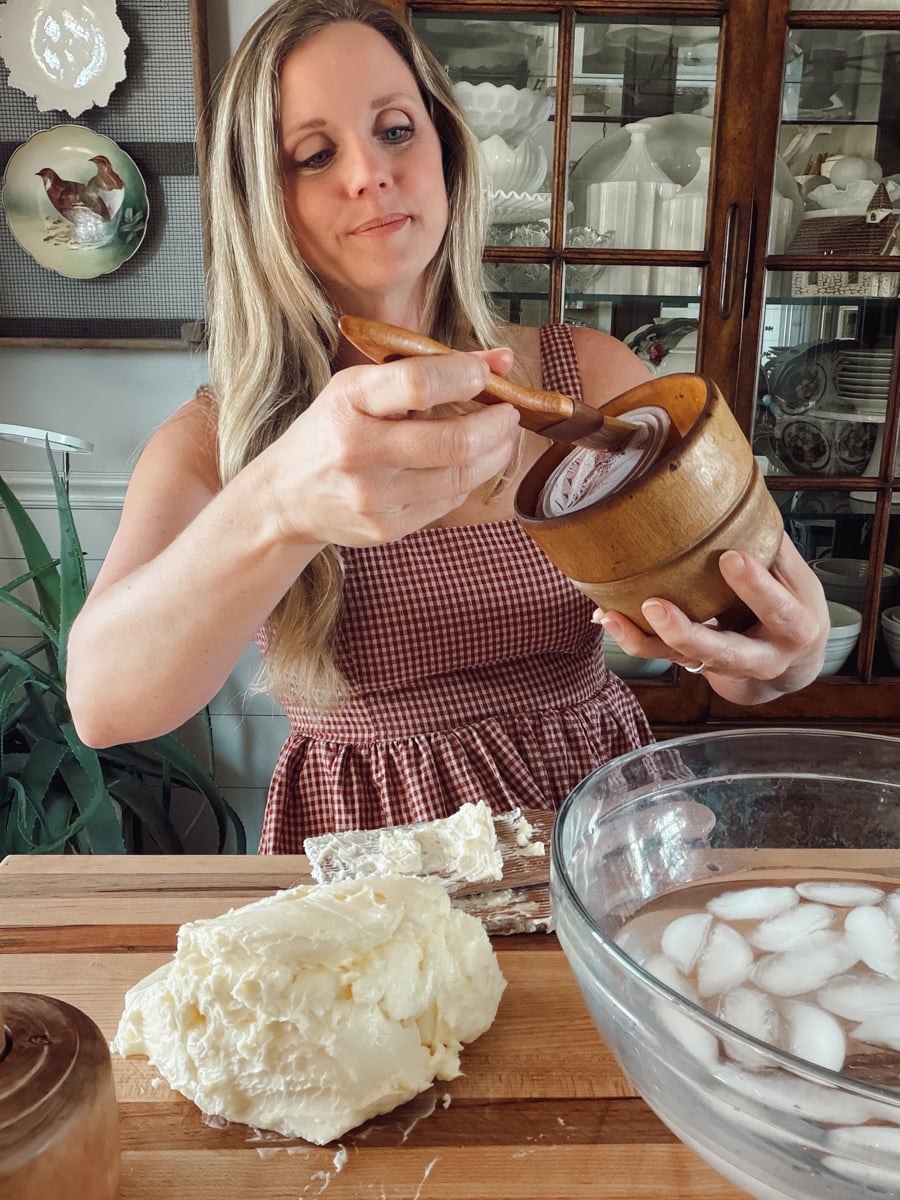
I use oil in two different ways with my butter molds. After deep cleaning an antique mold, I condition the dry wood with a food-safe mineral oil meant for wooden cutting boards. This helps freshen and protect the wood during storage.
When I'm actually molding butter, I also brush a very thin coating of neutral cooking oil over the chilled carved stamp and inside of the bell just before filling it (see picture above). This isn't meant to condition the wood. It simply helps the finished butter release cleanly from all of those tiny carved details.
I don't use regular cooking oil to condition my molds for long-term storage because some cooking oils can oxidize and become rancid over time.
The Butter Matters Just as Much as the Mold
You can prep your butter mold perfectly and still end up with a blurry design if the butter itself isn't properly prepared. This is one of the biggest things I've learned from using my antique molds: getting a crisp pattern depends just as much on the butter as it does on the mold.
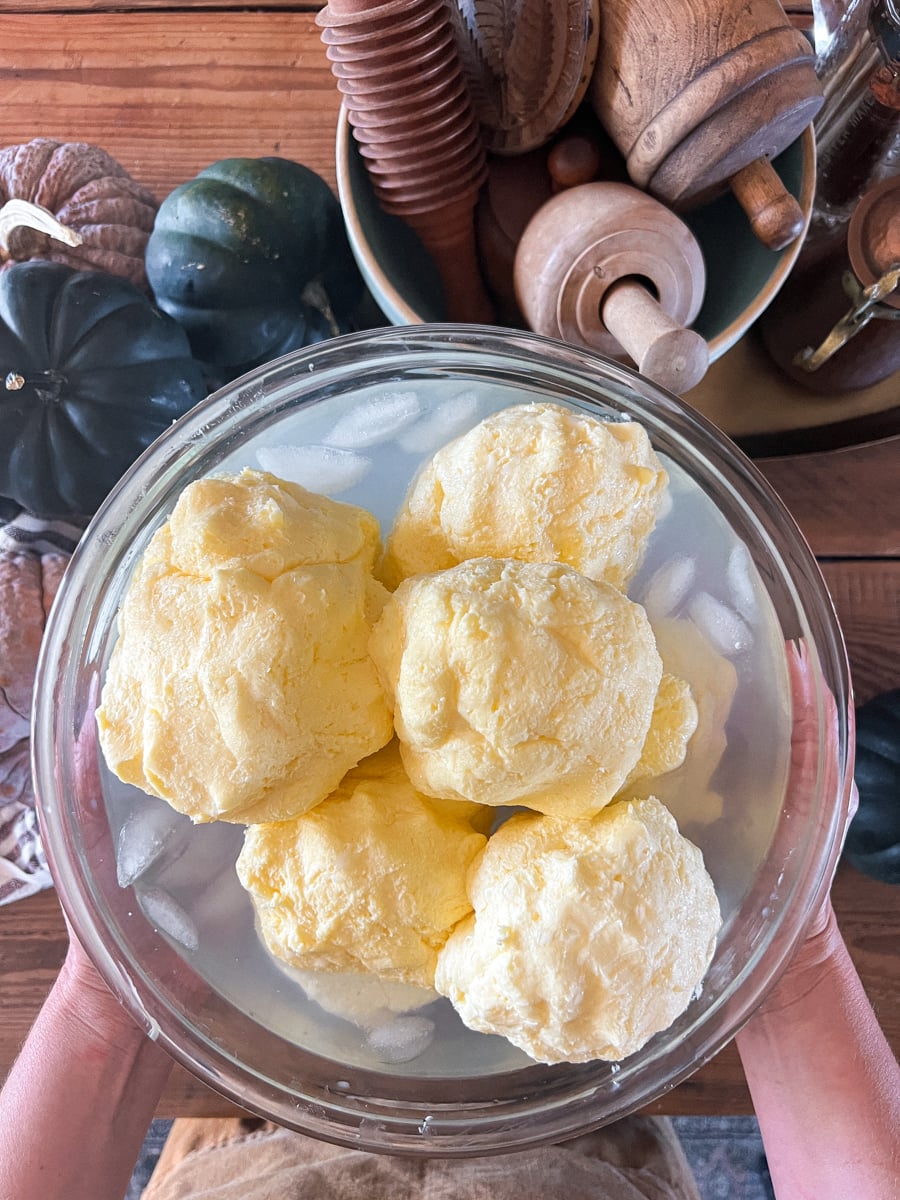
Freshly churned butter still contains quite a bit of buttermilk, so I rinse mine thoroughly in cold water until the water runs clear. Then I work and press the butter to remove as much of that remaining liquid as possible. Butter that's holding too much moisture can be soft and slippery and is much harder to mold cleanly.
Once it's been properly washed and worked, the butter should be smooth and cohesive without visible pockets of liquid.
Get the Temperature Right
Temperature makes a huge difference, too.
If the butter is too warm and soft, it will smear into the carving, stick in all those tiny details, and lose its shape as you try to release it. But you don't want it rock hard either. Butter that's too cold won't press easily into the smallest details of the carving.
I'm looking for butter that's cold and firm, but still pliable enough to pack tightly into the mold.
With freshly made butter, I usually refrigerate it for about 15 minutes before molding. Don't get too hung up on the exact time, though. Your butter may be warmer or colder than mine when you start. Go by the texture.
You should be able to press the butter firmly into the carving without it feeling greasy or smearing everywhere.
Pack It Tightly
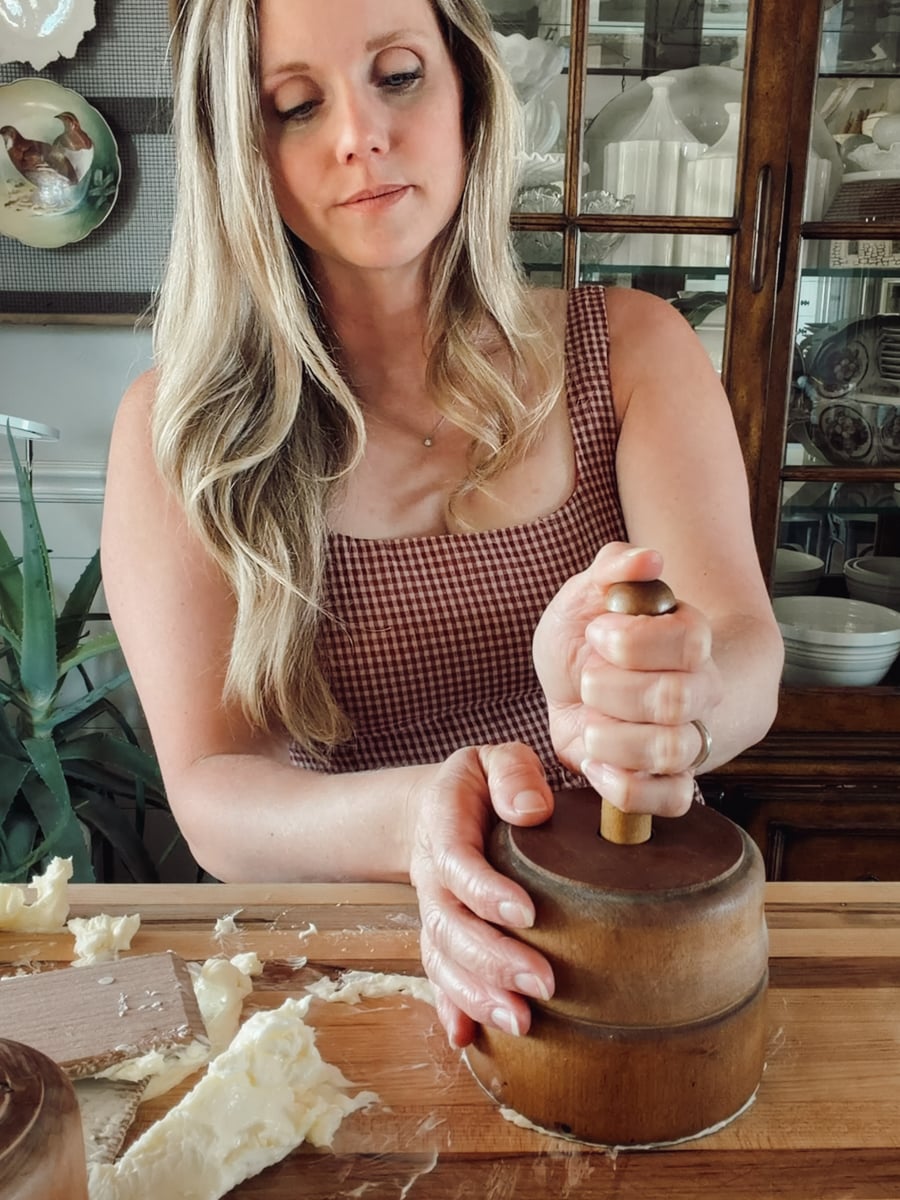
Once the consistency is right, really press the butter into the mold. This isn't the time to be delicate!
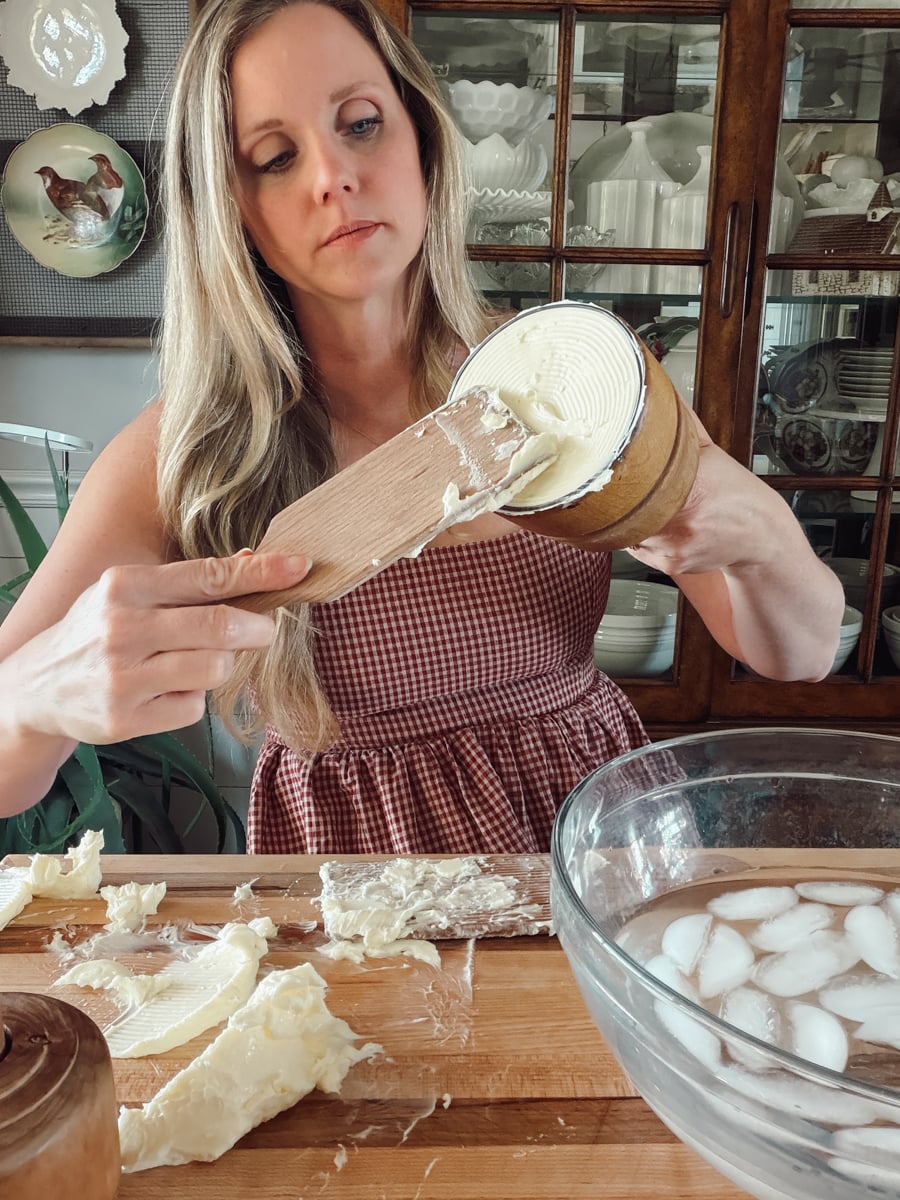
I pack it firmly against the carved stamp and into the edges of the bell, making sure there aren't any air pockets hiding against the design. Any little gap between the butter and the carving can show up as a missing piece in your finished pattern.
After the mold is completely filled, I chill the whole thing again before unmolding. That final chill firms the butter back up and helps those tiny details hold their shape when the butter releases from the wood.
Need to start with fresh butter? See my complete tutorial for How to Make Homemade Butter, including how I wash and work the butter to remove the remaining buttermilk.
How to Use an Antique Butter Mold
Using a butter mold is surprisingly simple.
- Chill the mold in the freezer for about 30 minutes.
- Use freshly made butter until firm but still workable. I always put my fresh butter in the fridge for about 15 minutes to firm it up a bit.
- Lightly dampen the mold with cold water and use a pastry brush to lightly oil the stamp and the inside of the bell.
- Pack the cold, pliable butter firmly into the mold.
- Remove any excess butter from the back.
- Refrigerate the butter-filled mold for 15 minutes to help the butter firm up. This will help it to release cleanly from the mold.
- Turn the mold onto a plate or butter board.
- Gently tap or press to release the butter.
If the butter sticks, chill it a little longer and try again.
How I Display My Antique Butter Molds
When they're not being used, antique butter molds make beautiful kitchen decor.
I display mine alongside other vintage kitchen tools as a reminder that everyday tasks were once done entirely by hand.
They're small pieces of history that tell the story of how families fed themselves for generations.
Frequently Asked Questions
Yes, I still use many of mine! I only use antique molds with solid, sound wood that I can thoroughly clean. If a mold has deep cracks, soft or deteriorating wood, active mold or insect damage, an unknown finish, or areas I can't get clean, I keep that one for display instead.
Butter usually sticks because the mold wasn't properly prepared, the butter is too warm or soft, or the carving is worn or rough enough for the butter to grab onto it. I get the cleanest release when both the butter and mold are cold, the mold is lightly dampened and oiled, and the filled mold is chilled again before unmolding.
Start with a mold that has a sharp, well-preserved carving and butter that has been thoroughly washed and worked to remove excess buttermilk. The butter should be cold and firm but still pliable. Pack it firmly into every detail of the carving to eliminate air pockets, then chill the filled mold before releasing the butter. A worn carving can still make beautiful butter, but it won't give you the same crisp detail as a well-preserved one.
Yes! You don't need to make your own butter to use an antique butter mold. Start with cold store-bought butter and let it soften just enough that you can firmly pack it into the carving without it becoming greasy or smeary. Chill the filled mold again before unmolding to help the design hold its shape.
More Old-Fashioned Butter Making
There’s something pretty satisfying about putting an old kitchen tool back to work, especially one that makes something as ordinary as butter so beautiful. And fair warning: once you bring home one antique butter mold, they have a funny way of multiplying. I’m still on the hunt for more of those animal carvings!
And if making butter from scratch has you curious about what else you can do with fresh milk and cream, you might enjoy reading How to Make Clabber next. Or maybe you'd be interested in learning Why Jerseys are the Best Homestead Cow or How to Make Fresh Cheddar Cheese Curds.
I hope your old butter mold gets to come down off the shelf and make something beautiful again!
What's New on the Homestead


Comments
No Comments