How to Bake a Perfect Loaf of Sourdough Bread: Beginner Friendly
Baking sourdough bread at home doesn't have to feel complicated or intimidating, I promise. On our Kansas homestead, sourdough is my weekly ritual: flour, water, salt, and bubbly starter. And today, I'm going to walk you through the exact steps to bake a beautiful artisan loaf that you'll be proud to slice into.
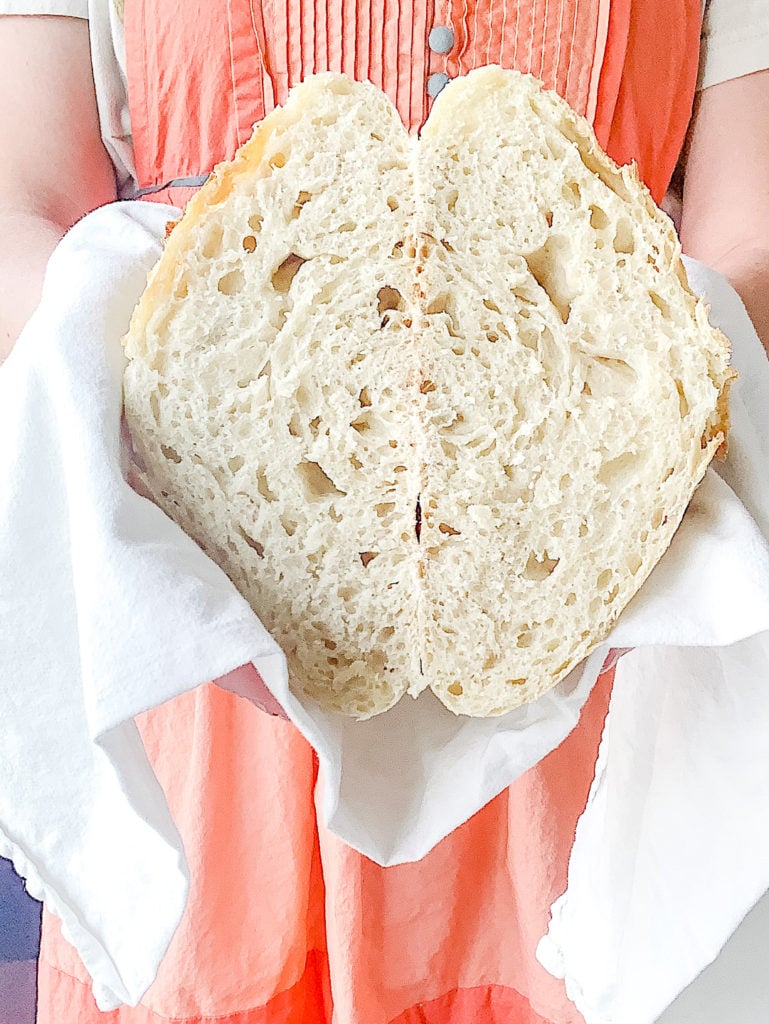
This beginner-friendly sourdough bread recipe breaks everything down into simple, doable stages. I'll give you a baking timeline, technique tips, and real-life troubleshooting I've learned from years of baking loaves my family actually eats. No stress, just a delicious loaf with a crispy crust and soft, airy crumb.
What you'll learn in this guide:
- How to mix, knead (well, it's actually called stretch and fold), ferment, shape, and bake your loaf of sourdough loaf
- When the dough is ready to move to the next step (visual cues are everything!)
- The tools that make baking easier, as well as budget-friendly alternatives
- Optional adjustments for whole wheat or fresh-milled flour
- How to fix common issues like flat loaves or gummy centers
➡️ New to sourdough? You’re in the perfect place.
Start by making your own Sourdough Starter (it's easier than you think!). Once it's happy and bubbly, try Sourdough Discard Crackers or Sourdough Focaccia to build confidence.
You've got this, friend. Let's bake some sourdough!

Jump to:
- Sourdough at a Glance
- What is a Sourdough Starter?
- When is my starter ready to be used?
- The Float Test (optional)
- Ingredients
- Helpful equipment
- How to Make Sourdough Bread
- Recipe Notes
- Tips for Using Fresh-Milled Flour in This Recipe
- Best Grain Choices for Sourdough
- Pro Tip
- Troubleshooting Sourdough: Quick Diagnosis + Easy Fixes
- You Did It! 🥖✨
- Recipe
- Comments
Sourdough at a Glance
Sourdough bread is naturally fermented bread made with flour, water, and a wild-yeast sourdough starter instead of commercial yeast. That long, slow fermentation creates incredible flavor, a more nutritious loaf, and better digestibility for many people.
Why You'll Love Sourdough
- No commercial yeast
- Crispy crust, soft chewy crumb
- Made from start-to-finish with just 3 ingredients
- Beginner-friendly and adaptable to your baking schedule
- Uses wild yeast that you can grow right on your countertop!
What is a Sourdough Starter?
A sourdough starter is a living culture of wild yeast and beneficial bacteria that helps your dough rise. When it's happy and active, it grows bubbly and doubles in size after feeding, which is your sign that it’s ready to bake with!
➡️ If you don't have one yet, I'll show you exactly how to make it: How to Make a Sourdough Starter.
When is my starter ready to be used?
If your starter doubles (or even triples!) in volume within 4-8 hours after after a feeding, it's ready to bake. Ideally, I like to use my starter when it has reached it's peak and is bubbly, airy, and has doubled in size. This gives you the tastiest bread with a soft, open crumb.
I always place a rubber band or pen mark around my jar after feeding. This gives me a visual way to track the starter's rise and know exactly when it's doubled and is ready to go.
If your starter isn't doubling within that 4-8 hour window, don't stress! Just spend a few days giving it extra love by feeding and discarding every 12 hours. After 2-3 days your starter should perk back up and become happy and active again!
The Float Test (optional)
Some bakers like to check starter readiness by using the "float test." Simply drop a small spoonful of starter into a glass of room-temperature water. If it floats, the starter has enough trapped air to help your dough rise.
However, this test isn't always completely reliable. A starter can float and still be under-fermented, or it might sink while being perfectly active. So if it passes, great! If not, trust the other visual cues first: bubbly, airy, doubled in size, smells yeasty and pleasant.
Ingredients
- Bread flour - or substitute all-purpose, whole wheat or fresh milled. See note below.
- Salt - choose non-iodized salt
- Sourdough starter - active and at peak activity
- Water - 105-110 degrees F is the perfect temperature
Helpful equipment
As an amazon associate, this post contains affiliate links, which means I make a small commission at no extra cost to you. See my full disclosure here.
- a kitchen scale : This is linked to the one I use. It's simple and cheap.
- large mixing bowl
- mixing bowl: always warm your bowl before adding ingredients by filling with hot water and letting it sit for 5 minutes before pouring it out.
- swedish whisk: game changer for mixing dough!
- dough scraper
- proofing basket with liner
- parchment paper
- razor blade
- dutch oven: I use both le crueset ($$$) and lodge cast iron ($)
- sourdough bundle: this is very cost effective and what I currently use

How to Make Sourdough Bread
Making the Dough
- Make the autolyse: In a warm large mixing bowl, combine 1 ½ cups of lukewarm water and 475 grams of all-purpose flour. Use your hands or a Swedish whisk to stir the mixture together. It will be sticky and messy, this is okay! Try to form it into a ball as best as possible. Cover the dough bowl with a tea towel and set a timer for one hour. This jump-starts gluten development and makes the dough easier to work with later.
- Make the dough: Using a kitchen scale, add 100 grams of active sourdough starter and 11 grams of salt to the autolyse. Time to get those hands messy! Fold in the starter and salt by pulling and pushing the dough towards the center, covering and pulling the starter throughout the mixture. A word of caution: do not overwork the dough. Dough should start feeling slightly smoother, but very sticky. I usually try to accomplish this step in less than ten kneading repetitions. Cover with a tea towel and set a timer for thirty minutes.
- Stretch and fold #1 (strengthen the dough) - With wet hands, grab one side of the dough, stretch it up, and fold it over itself. Give the dough a quarter turn and repeat 3 more times. Cover and rest 30 minutes.
- Stretch and fold #2, 3 & 4 - Repeat the series of folds again every thirty minutes until 4 cycles have been completed. Cover and let the dough rise at room temperature 1-4 hours for bulk ferment. Bulk ferment is done when the dough has risen by 50-70%, and the surface looks smoother and slightly domed.
Proofing, Fermenting & Baking
- Rest, proof & ferment: After the last stretch & fold, place the dough ball on the counter top and gently pull it towards you. Do this several times from each direction, adding tension and a round dome shape to the loaf. It should feel like a smooth, tight loaf with a bit of bounce. Let the loaf sit on the counter for ten minutes before transferring to a floured proofing basket.
- Final proof (2 options!) - Place the dough seam-side up in a generously floured proofing basket or towel-lined bowl. You are ready to bake when the dough jiggles like set Jell-O when you shake the basket. If you do the poke test, press your thumb into the dough and it should slowly spring back, but leave a slight dent.
- Method 1 - Same-day baking: Proof for 45-90 minutes in a warm spot.
- Method 2 - Cold proof (recommended): rest 20-30 minutes at room temp, then refrigerate over night.
- Preheat the oven - Place your dutch oven (both pieces) into the oven. Preheat to 500°F for at least 45-60 minutes. A hot oven and hot Dutch oven will give you the springiest loaf! When you're ready to bake, reduce heat to 450°F.
- Preheat the oven - Place your dutch oven (both pieces) into the oven. Preheat to 500°F for at least 45-60 minutes. A hot oven and hot Dutch oven will give you the springiest loaf! When you're ready to bake, reduce heat to 450°F. Bake 35 minutes covered (lid on). Remove lid, bake another 10-15 minutes. The bread is ready when the internal temperature of the loaf reaches 195°F.
Recipe Notes
- If the dough spreads out flat → it was underproofed or too warm/hydrated.
- If it rips weird when scoring → the dough was overproofed.
- If oven spring is weak → try a longer preheat and stronger shaping next time.
Sample Sourdough Baking Schedule
Adjust times to fit your life — sourdough is flexible!
Day 1 — Morning
- 7:00 am – Feed sourdough starter
- 9:00 am – Starter is at peak → mix dough (flour + water), autolyse 60 minutes
- 9:30 am – Add starter + salt, begin stretch and folds
- 9:30–11:30 am – Stretch and fold every 30 minutes (3–4 rounds total)
- 11:30 am – Bulk ferment for 3-5 hours until risen 50-70%.
- 2:30 pm - Shape, place dough in proofing basket, rest 30 minutes, cover and refrigerate overnight
Day 2 — Morning
- 8:00 am – Preheat Dutch oven to 500°F (30–45 minutes)
- 9:00 am – Reduce heat to 450°F. Score dough and bake for 35 minutes covered or 10-15 minutes uncovered
- 10:00 am – Cool 1 hour before slicing
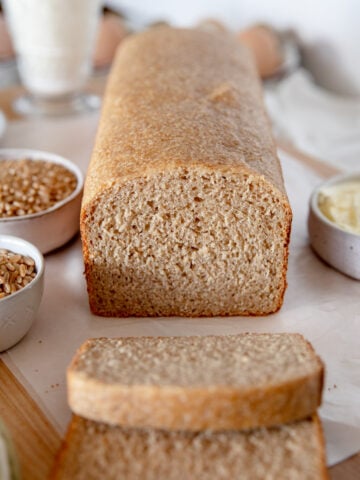
Tips for Using Fresh-Milled Flour in This Recipe
If you're like me and love using flour you milled in your own kitchen, welcome to the club! Fresh-milled flour adds incredible flavor, but it also absorbs moisture differently than bagged flour from the store. That means 455 grams of bread flour does not behave with the same as 455 grams of fresh milled flour.
Here's how to make it work beautifully:
- ✅ Substitute 20% of the flour with fresh-milled with zero adjustments needed
- ➡️ That's about 90 grams fresh-milled + the remaining 365 grams of bread flour
Any higher fresh-milled percentages and you'll start to notice:
- a denser crumb
- reduced rise
- dough that feels tighter and less stretchy
Best Grain Choices for Sourdough
I love to use:
- Hard white wheat - my go-to for the softest crumb
- Khorasan (Kamut) - rich, golden dough and a buttery flavor
- Einkorn - perfect when you want a more tender, delicate loaf (but expect a stickier dough)
Hydration Matters
Fresh-milled flour has thirsty little sponge energy. If you go above 20%, add 10-20 grams of extra water (about 1-2 tablespoons) to help hydration. Feel the dough as you mix and let your hands be the guide!
Troubleshooting Sourdough: Quick Diagnosis + Easy Fixes
Starter Isn't Active Enough
- What You'll See
- Flat, dense loaves
- Dough doesn't rise much during bulk ferment
- Crumb looks tight or gummy
- Why it happens
- Starter wasn't used at peak activity, wasn't bubble or doubled enough
- How to fix it
- Feed starter on a consisten schedule (at least every 12 hours) for 3-4 days
- Keep it warm (75-80°F is the perfect temperature)
- Mark the jar after feeding so you can easily tell when it's doubled
Too Much or Too Little Water
- What You'll See
- Too sticky → spreads flat like a pancake
- Too dry → stiff dough that tears while stretching
- Why it Happens
- Flour hydration varies a LOT. Eyeballing it = chaos
- How to Fix It
- Weigh everything (your kitchen scale is cheap insurance!)
- Add water gradually if the dough feels tight
- Sprinkle flour, don't just dump, if dough is overly sticky
- ✔️ NOTE: the dough should feel soft, stretchy and a little tacky - not like glue or play-doh.
Over-Fermented Dough
- What You'll See
- Dough collapses or feels soupy
- Loaf spreads sideways, not up
- Strong sour smell
- Why it Happens
- Bulk ferment when too long (um, maybe I got distracted in the garden!)
- How to Fix It
- Shape gently and bake anyway, it will still be delicious!
- Use for: croutons, bread crumbs, grilled cheese
- Next time: shorten the rise or ferment in a cooler spot
Too Much Whole Wheat or Fresh-Milled Flour
- What You'll See
- Dense texture
- Dough feels touch + less extensible
- Smaller rise in oven
- Why it Happens
- Bran cuts gluten strands → weaker structure
- How to Fix It
- Keep fresh-milled flour or whole wheat at 20% or less for light + lofty loaves
- If going higher, increase hydration and expect a more rustic crumb
- Fresh-milled = amazing flavor, just different handling
- You can absolutely bake 100% whole-grain sourdough - it's just a different loaf with a deliciously rustic texture.
You Did It! 🥖✨
Look at you, baking real sourdough bread like it's no big thing. Whether this was your first loaf or your fiftieth, every bake teaches you something new. Sourdough is a journey, and you are well on your way!
I'd love to see your sourdough creations - tag me @ninnescahhomestead or drop a comment below and tell me what you baked!
Ready for round two? Try one of my other homemade favorites next!
- How to Make a Sourdough Starter
- Simple Sourdough Focaccia
- Sourdough Coffee Cake
- Cheesy Sourdough Starter Discard Crackers
- Easy Sourdough Crackers
- Sourdough Cinnamon Crunch Bagels
- Sourdough Banana Bread
- 20-Minute Breakfast: Sourdough Crepes
- Sourdough Pizza Crust
- Sourdough Pizza Bread
- Sourdough Pancakes
- Sourdough Batard
- Sourdough Baguette
- Sourdough Bagels
- Sourdough English Muffins
- Sourdough Croutons
If you make this recipe, please leave a comment below! This provides helpful feedback to both me and other readers. For more delicious recipes from scratch and homesteading tips, follow me on instagram @NinnescahHomestead
Recipe

Easy Sourdough Bread
Equipment
- Mixing bowl
- scale
- banneton
- dutch oven
Ingredients
- 475 grams bread Flour or substitute all-purpose, whole wheat or fresh milled (see note below)
- 350 grams water 105-110℉
- 100 grams sourdough starter active
- 11 grams salt non-iodized
Instructions
Make the dough
- Make the autolyse: In a warmed large mixing bowl, combine 1 ½ scant cups of lukewarm water and 475 grams of all-purpose flour. Use your hands or a Swedish whisk to stir the mixture together. It will be sticky and messy, this is okay! Try to form it into a ball as best as possible. Cover the dough bowl with a tea towel and set a timer for one hour. This jump-starts gluten development and makes the dough easier to work with later.
- Make the dough: Using a kitchen scale, add 100 grams of active sourdough starter and 11 grams of salt to the autolyse. Time to get those hands messy! Fold in the starter and salt by pulling and pushing the dough towards the center, covering and pulling the starter throughout the mixture. A word of caution: do not overwork the dough. Dough should start feeling slightly smoother, but very sticky. I usually try to accomplish this step in less than ten kneading repetitions. Cover with a tea towel and set a timer for thirty minutes.
- Stretch and fold #1 (strengthen the dough) - With wet hands, grab one side of the dough, stretch it up, and fold it over itself. Give the dough a quarter turn and repeat 3 more times. Cover and rest 30 minutes.
- Stretch and fold #2, 3 & 4 - Repeat the series of folds again every thirty minutes until 4 cycles have been completed. Cover and let the dough rise at room temperature 1-4 hours for bulk ferment. Bulk ferment is done when:- Dough has risen by 50-70%- Surface looks smoother and slightly domed- A gentle poke springs back slowly (not instantly)Tip: If your kitchen is cooler than 72°F, bulk may take longer. Be patient, temperature is the boss!
Proof, Ferment & Bake
- Rest, proof & ferment: After the last stretch & fold, place the dough ball on the counter top and gently pull it towards you. Do this several times from each direction, adding tension and a round dome shape to the loaf. It should feel like a smooth, tight loaf with a bit of bounce. Let the loaf sit on the counter for ten minutes before transferring to a floured proofing basket.
- Final proof (2 options!) - Place the dough seam-side up in a generously floured proofing basket or towel-lined bowl.Method 1 - Same-day baking: Proof for 45-90 minutes in a warm spot.Method 2 - Cold proof (recommended): rest 20-30 minutes at room temp, then refrigerate over night.You are ready to bake when the dough jiggles like set Jell-O when you shake the basket. If you do the poke test, press your thumb into the dough and it should slowly spring back, but leave a slight dent.
- Preheat the oven - Place your dutch oven (both pieces) into the oven. Preheat to 500°F for at least 45-60 minutes. A hot oven and hot Dutch oven will give you the springiest loaf! When you're ready to bake, reduce heat to 450°F.
- Preheat the oven - Place your dutch oven (both pieces) into the oven. Preheat to 500°F for at least 45-60 minutes. A hot oven and hot Dutch oven will give you the springiest loaf! When you're ready to bake, reduce heat to 450°F.Bake 35 minutes covered (lid on).Remove lid, bake another 10-15 minutes.It's done baking when the crust is a deep golden brown, and the internal temperature hits 195-200°F. It will also sound hollow when tapped on the bottom.
Notes
- If the dough spreads out flat → it was underproofed or too warm/hydrated.
- If it rips weird when scoring → the dough was overproofed.
- If oven spring is weak → try a longer preheat and stronger shaping next time.
Nutrition


This recipe saved me! I was trying to hard to make some and was messing up with the ratios! Love Meg and all of her recipes! I can’t wait to try more!!! <3
This is a PERFECT beginner recipe that produces delicious sourdough every time!
I am so glad you loved this sourdough recipe! Happy baking!
This was the first recipe I tried when I first started making sourdough. It's very beginner friendly and delicious!
Thank you for sharing, Anna! It makes me so happy to hear new bakers loving this recipe! Have a wonderful day!
Hi Meg! Love your Sourdough recipe and tips. My first time making Sourdough starter and bread and the recipe and blog were detailed so I could feel confident baking this bread from scratch. Videos were very helpful
Barbara, thank you so much for the kind review! I am so glad this recipe helped you make your first sourdough starter. I can't wait to see what you make in the future!
I’ve been wanting to make sourdough bread for some time now but it always seemed intimidating and a lot of work. Until I found this recipe! My starter came out beautiful and is getting stronger every day. I’m excited to keep going and start customizing some fun flavors! Thanks Meg!
And now we bake! I'm so glad you are joining me in this little baking obsession! Have a happy day, Lori!
Meg has a way with perfecting a recipe and process! definitely listen to her recommendations & if you have certain flours you want to try or use she will try to help you out on things that have helped her. The bread is fantastic!
Tianna, thank you for your kind words! I'm so glad you are loving the sourdough recipes and have found ways to adapt them to your family's needs.
Hi! I am on day 3 of the starter, and have been feeding it with while wheat flour. I rememberd you mention in an Instagram story that you feed your starter with all purpose flour, so should I do that from here on out? Thanks!
The 'by the book' answer is to feed it whole wheat flour in the beginning, but yes, I do feed mine all-purpose now. If you are seeing bubbles and activity, you can switch over and shouldn't run into any problems!
I did it!! Your directions are perfect!!
Do you have a suggestion for a sourdough starter kit or what you actually need to make your own sourdough starter?
Hi Maggie!
If you are brand new to sourdough, I wouldn't spend any money just yet. Make your own starter, I have a recipe you can use, and use tools you already have until you get the hang of it. I do recommend buying an inexpensive digital kitchen scale, a dutch oven with a lid, and possibly a banneton basket. When I started baking sourdough bread, I searched "sourdough kit" on amazon and purchased a kit that included a basket with liner, dutch whisk, scoring blade and dough scraper. They've held up well and I'm still using most of those things today!
- Meg