Rustic Sourdough Batard
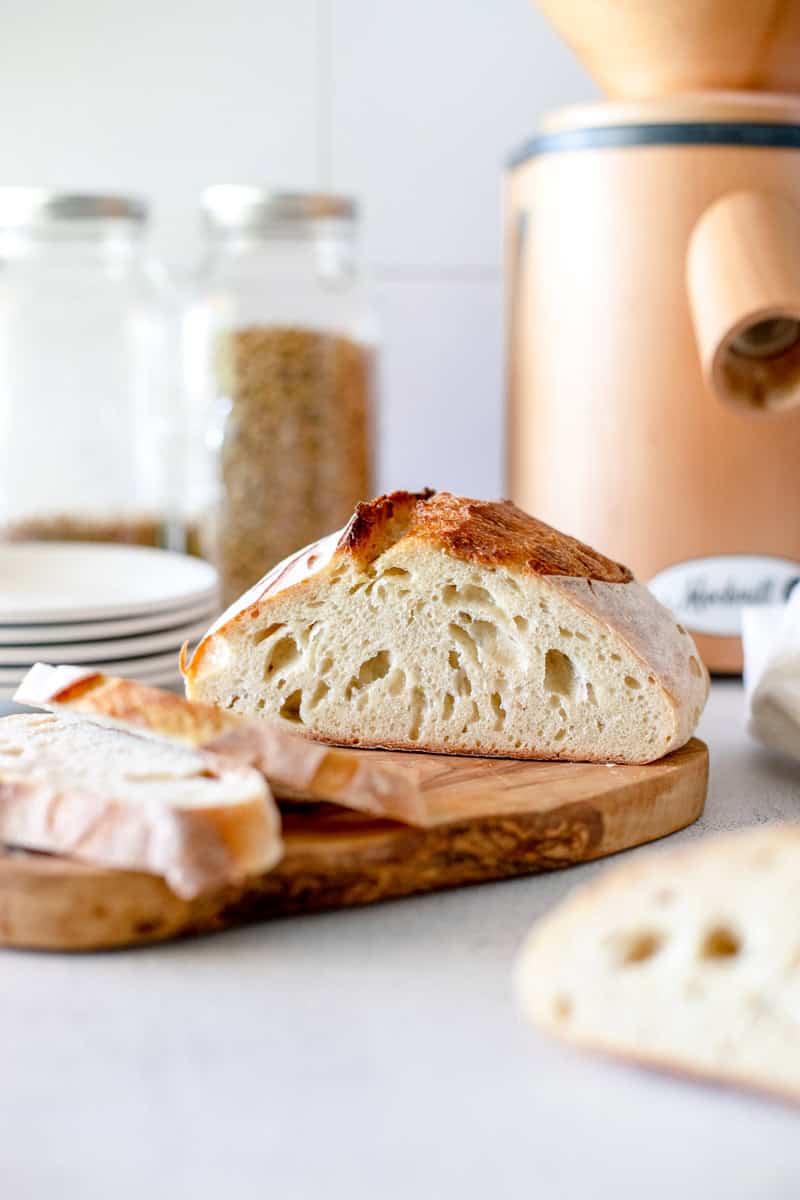
There's nothing quite like the smell of freshly baked bread, especially when it's a crusty and flavorful French sourdough bâtard. This delicious batard bread recipe, with its characteristic oblong shape and artisanal appearance, is a staple in French bakeries and a favorite among bread lovers around the world.
Making a French sourdough batard at home may seem daunting, but it's actually a simple and rewarding process that yields delicious results. With just a few high-quality ingredients and some patience, you can create a loaf that's crispy on the outside, soft and chewy on the inside, and bursting with tangy sourdough flavor. A bâtard bread has a crunchy crust, chewy texture and is a delicious artisan bread.
In this recipe, I'll guide you through the steps to make your own oval shape French sourdough loaf of bread from scratch, including tips for ingredient selection, equipment, and technique. Whether you're an experienced bread baker or a first-time sourdough maker, this recipe is sure to impress!
If you feel like you need to pump the breaks and learn a little more about the basics of sourdough before trying this recipe, go for it! Read How to Make a Sourdough Starter and then Simple Loaf of Sourdough to start with the basics of sourdough baking. I recommend starting with Sourdough Discard Crackers, and then make a Sourdough Focaccia. Then come back to this batard bread recipe later!
Jump to:
- Ingredients for sourdough batard bread recipe
- Instructions for sourdough batard bread recipe
- Recipe Notes
- Tips for baking perfect sourdough:
- Flour Substitutions
- Troubleshooting this sourdough batard recipe:
- How to store a sourdough batard:
- How to reheat a sourdough batard:
- Helpful tools for making this sourdough batard recipe
- Related
- Looking for more sourdough recipes like this? Try these:
- Recipe
- Troubleshooting
- Storage tips
- Comments
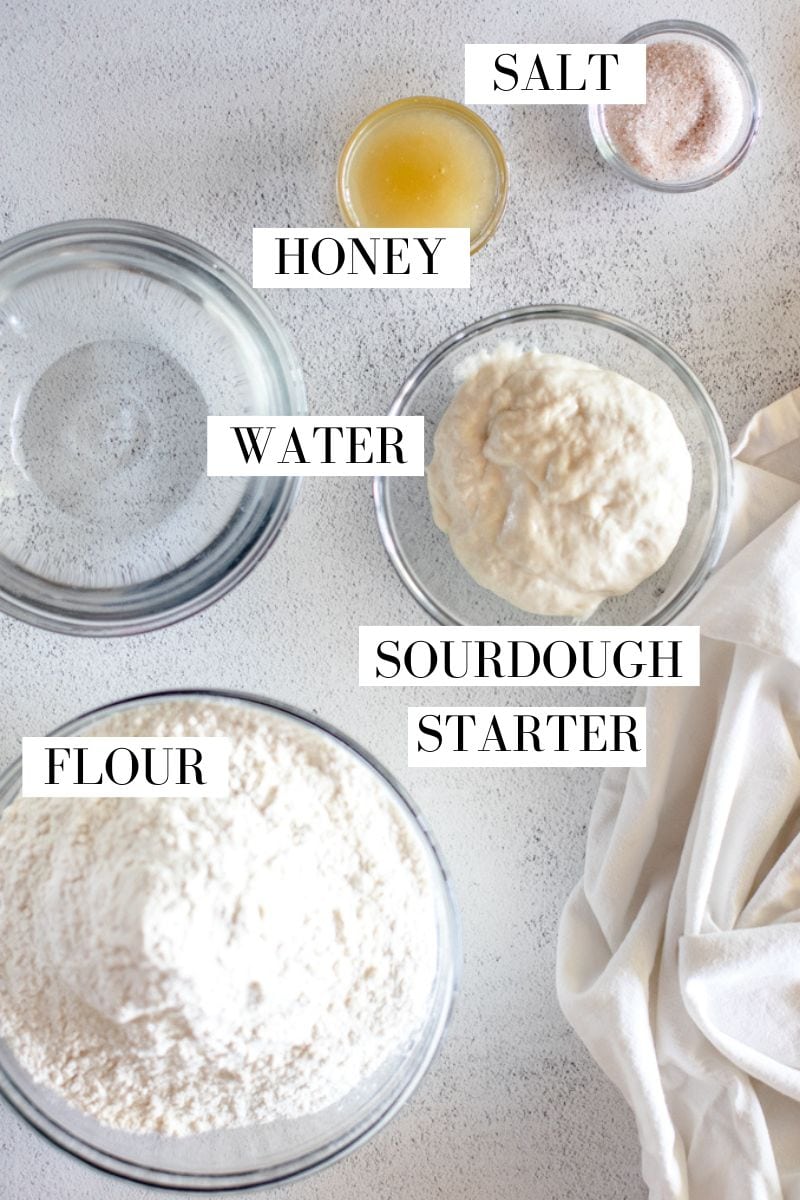
Ingredients for sourdough batard bread recipe
- 455 grams bread flour
- 340 grams (1 ½ cup) warm water (about 110°F)
- 100 grams sourdough starter
- 11 grams salt
- 1 tablespoon honey
Instructions for sourdough batard bread recipe
- Autolyse (hydrate the flour)- In a large mixing bowl, stir together the flour and water until no dry spots remain. The dough will look rough and shaggy-- that's perfect!
- Why - This jump-starts gluten development adn makes the dough easier to work with later.
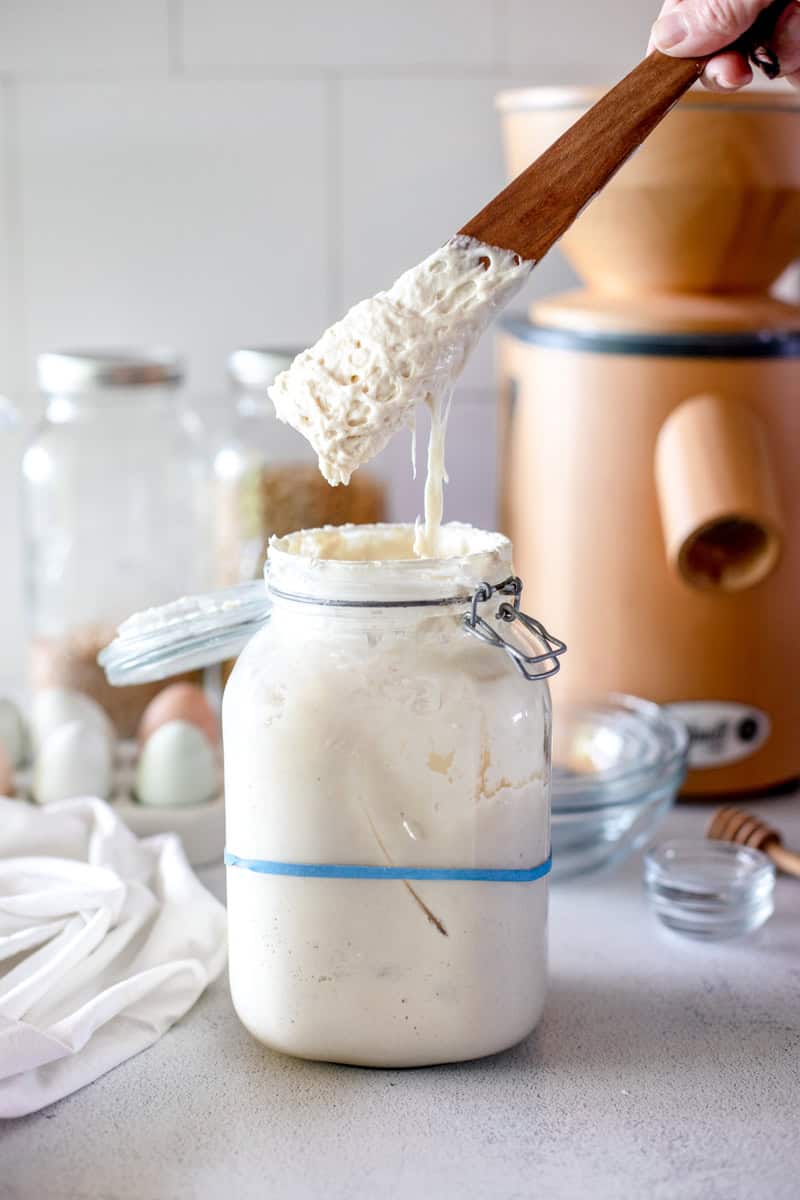
- Mix in the starter and honey. Add your active and bubbly starter and use your hands to pinch and fold it into the dough. Sprinkle the salt over the dough, and keep mixing until they fully disappear into the dough. Cover with a clean towel and let rest 30 minutes.
- Visual cue - Dough should start feeling slightly smoother, but very sticky.
- Stretch and fold #1 (strengthen the dough) - With wet hands, grab one side of the dough, stretch it up, and fold it over itself. Give the dough a quarter turn and repeat 3 more times. Cover and rest 30 minutes.
- You're building structure here - the dough should feel more elastic after each fold.
- Stretch and fold #2, 3 & 4 - Repeat the series of folds again every thirty minutes until 4 cycles have been completed. Cover and let the dough rise at room temperature 1-3 hours for bulk ferment.
- Bulk ferment is done when:
- Dough has risen by 50-70%
- Surface looks smoother and slightly domed
- A gentle poke springs back slowly (not instantly)
- Tip: If your kitchen is cooler than 72°F, bulk may take longer. Be patient, temperature is the boss!
- Bulk ferment is done when:
- Shape into a batard - Lightly oil or flour your countertop. Gently turn out the dough, but don't punch it down - protect those bubbles! Fold the top third of the dough toward the center, then the bottom third up over that. Roll it gently to create tension and shape an oval loaf. Pinch the seam closed.
- It should feel like a smooth, tight loaf with a bit of bounce.
- Final proof (2 options!) - Place the dough seam-side up in a generously floured proofing basket or towel-lined bowl.
- Method 1 - Same-day baking: Proof for 45-90 minutes in a warm spot.
- Method 2 - Cold proof (recommended): rest 20-30 minutes at room temp, then refrigerate over night.
- You are ready to bake when the dough jiggles like set Jell-O when you shake the basket. If you do the poke test, press your thumb into the dough and it should slowly spring back, but leave a slight dent.
- Preheat the oven - Place your dutch oven (both pieces) into the oven. Preheat to 500°F for at least 45-60 minutes. A hot oven and hot Dutch oven will give you the springiest loaf! When you're ready to bake, reduce heat to 450°F.
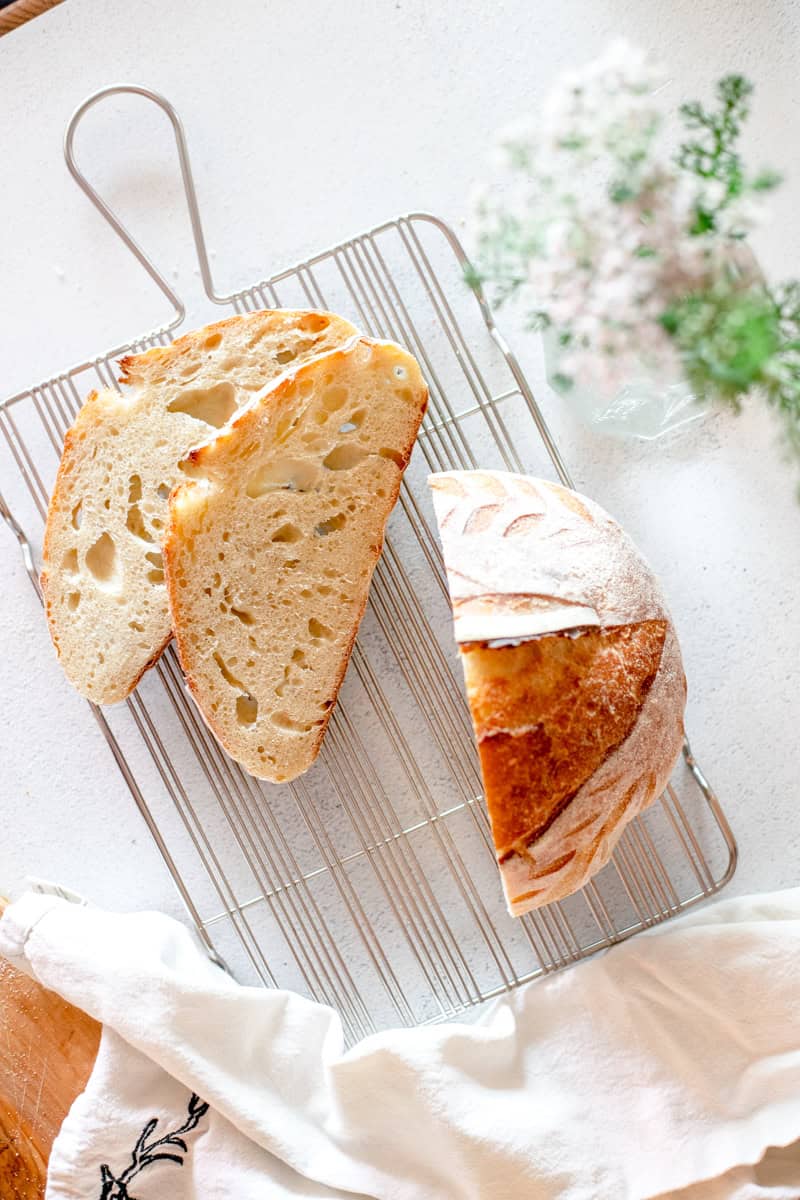
- Score the loaf - Turn the dough out onto parchment paper, seam-side down. Dust with flour (I love using rice flour), then score a light decorative pattern (if you want to!) and then a deep slash down the loaf. This tells the dough where to expand.
- Bake - Carefully lower the loaf (still on the parchment paper) into the Dutch oven and cover with the lid.
- Bake 35 minutes covered (lid on).
- Remove lid, bake another 10-15 minutes.
- It's done baking when the crust is a deep golden brown, and the internal temperature hits 195-200°F. It will also sound hollow when tapped on the bottom.
Recipe Notes
- If the dough spreads out flat → it was underproofed or too warm/hydrated.
- If it rips weird when scoring → the dough was overproofed.
- If oven spring is weak → try a longer preheat and stronger shaping next time.


Tips for baking perfect sourdough:
- Use a kitchen scale to measure your ingredients accurately. Baking is a precise science, and even small variations in ingredients can affect the outcome of your bread.
- Don't overwork the dough, especially in this sourdough batard bread recipe. Sourdough bread benefits from a long fermentation time, which develops flavor and structure. However, if you overwork the dough, you can break down the gluten and compromise the texture of the bread.
- Use a Dutch oven or baking stone for baking. A Dutch oven or baking stone creates a steamy environment in the oven, which helps the bread rise and develop a crispy crust.
- Be patient. Sourdough bread takes time to make, but the end result is worth it. Don't rush the fermentation process or the proofing time, as this can affect the flavor and texture of the bread. In no time, you'll be an expert at making this sourdough batard bread recipe!
Flour Substitutions
You can totally switch up the flour in this recipe — use all-purpose for that classic soft, fluffy loaf, or work in some fresh-milled whole grain flour for extra flavor and nutrition. Just keep in mind that whole grain flours (especially fresh milled!) are extra thirsty, so you may need a tiny splash more to keep the dough soft and stretchy.
If your dough feels stiff, add a bit more water… if it’s sticky, let it rest a few minutes and it’ll usually sort itself out. Hydration is flexible — trust your hands and you’ll do great.
- Whole wheat flour: Replace up to 50% of the all-purpose flour with whole wheat flour to add a nutty flavor and boost the nutritional content of the bread.
- Fresh milled flour: My sweet spot is about 25% whole wheat or fresh-milled flour to 75% all-purpose — anything more than that and you’ll start to notice a tighter crumb and a loaf that doesn’t rise quite as high.
- Rye flour: Replace up to 20% of the bread flour with rye flour to add a distinct flavor and create a denser, chewier texture.
- Spelt flour: Replace up to 20% of the bread flour with spelt flour to add a slightly sweet and nutty flavor and improve the overall texture of the bread.

Troubleshooting this sourdough batard recipe:
- If your bread is too dense or doesn't rise enough, it may be due to under-fermentation. Make sure your sourdough starter is active and healthy, and give the dough enough time to ferment.
- If the bread is too sour, it may be due to over-fermentation. You can try shortening the fermentation time or using less sourdough starter in your recipe.
- If the crust is too hard or thick, it may be due to baking the bread at too high of a temperature. Try lowering the oven temperature or covering the bread with foil during the final stages of baking. You can also place a trivet in the bottom of the Dutch oven to prevent a burnt crust.
- If the bread is too sticky or wet, it may be due to using too much water in your recipe or not kneading the dough enough. You can try reducing the amount of water in your recipe or kneading the dough more thoroughly.
- If the bread is too dry or crumbly, it may be due to over-baking or using too little water in your recipe. Try reducing the baking time or increasing the amount of water.
How to store a sourdough batard:
- Store the bread at room temperature in a paper bag or wrapped in a clean dish towel. Avoid storing it in plastic, as this can cause the crust to become soft and lose its crispy texture.
- If you don't plan to eat the bread within a day or two, you can freeze it. Slice the bread and wrap it tightly in plastic wrap, then store it in a resealable freezer bag. Frozen sourdough bread will last for up to three months.
How to reheat a sourdough batard:
- To reheat a whole loaf, preheat your oven to 350°F (180°C). Wrap the bread in aluminum foil and place it in the oven for 10-15 minutes, or until heated through.
- To reheat individual slices, you can use a toaster or a toaster oven. Toast the bread on a low setting to avoid burning the crust.
- For a quick and easy way to enjoy leftover bread, you can slice it and use it to make toast, grilled sandwiches, or bread pudding.
Helpful tools for making this sourdough batard recipe
As an amazon associate, this post contains affiliate links, which means I make a small commission at no extra cost to you. See my full disclosure here.
- Large bowl
- Digital kitchen scale
- Dough scraper
- Dutch oven
- square sided plastic container
- oval loaf batard basket
- rice flour
Related
Looking for more sourdough recipes like this? Try these:
If this sourdough batard bread recipe interests you, I have some more easy recipes for you to try! Once you learn How to Make a Sourdough Starter, it's time to get baking! I recommend starting with How to Bake a Perfect Loaf of Sourdough. This is an artisan loaf that is straightforward to make and always delicious! Hint: it's the exact same recipe as this one, except for the shape can be oval or round and it doesn't call for honey!
Once you have mastered the artisan loaf, I'd move on to perfecting your own style of focaccia. This is my Simple Sourdough Focaccia recipe, and it can be used as a base recipe for many different variations! You'd also would love to have a sourdough pizza night using this Sourdough Pizza Crust . I predict a family pizza night in your near future!
For gut-friendly breakfasts, try this popular discard recipe for Sourdough Coffee Cake or 20-Minute Breakfast: Sourdough Crepes. As I'm writing this, I just made a batch of Sourdough Pancakes for my kids who just started summer break this week.
Last but not least, you've got to try this Cheesy Sourdough Starter Discard Crackers recipe! It's SO SO SO good and a great way to use up extra sourdough starter discard.
If you make this recipe, please leave a comment below! This provides helpful feedback to both me and other readers. For more delicious recipes from scratch and homesteading tips, follow me on instagram @NinnescahHomestead
Recipe

How to Make Sourdough Batard Bread: Easy french recipe
Equipment
- large bowl
- Digital kitchen scale
- Dough scraper
- batard proofing basket
- dutch oven
- square sided plastic container
- oval loaf batard basket
- rice flour
Ingredients
- 455 grams all-purpose flour
- 1 ½ cups water
- 12 grams salt
- 1 tablespoon honey
- 100 grams sourdough starter active
Instructions
- Autolyse (hydrate the flour)- In a large mixing bowl, stir together the flour and water until no dry spots remain. The dough will look rough and shaggy-- that's perfect! Why - This jump-starts gluten development adn makes the dough easier to work with later.
- Mix in the starter and honey. Add your active and bubbly starter and use your hands to pinch and fold it into the dough. Sprinkle the salt over the dough, and keep mixing until they fully disappear into the dough. Cover with a clean towel and let rest 30 minutes.Visual cue - Dough should start feeling slightly smoother, but very sticky.
- Stretch and fold #1 (strengthen the dough) - With wet hands, grab one side of the dough, stretch it up, and fold it over itself. Give the dough a quarter turn and repeat 3 more times. Cover and rest 30 minutes.You're building structure here - the dough should feel more elastic after each fold.
- Stretch and fold #2, 3 & 4 - Repeat the series of folds again every thirty minutes until 4 cycles have been completed. Cover and let the dough rise at room temperature 1-3 hours for bulk ferment.Bulk ferment is done when:Dough has risen by 50-70%Surface looks smoother and slightly domedA gentle poke springs back slowly (not instantly)Tip: If your kitchen is cooler than 72°F, bulk may take longer. Be patient, temperature is the boss!
- Shape into a batard - Lightly oil or flour your countertop. Gently turn out the dough, but don't punch it down - protect those bubbles! Fold the top third of the dough toward the center, then the bottom third up over that. Roll it gently to create tension and shape an oval loaf. Pinch the seam closed.It should feel like a smooth, tight loaf with a bit of bounce.
- Final proof (2 options!) - Place the dough seam-side up in a generously floured proofing basket or towel-lined bowl.Method 1 - Same-day baking: Proof for 45-90 minutes in a warm spot.Method 2 - Cold proof (recommended): rest 20-30 minutes at room temp, then refrigerate over night.You are ready to bake when the dough jiggles like set Jell-O when you shake the basket. If you do the poke test, press your thumb into the dough and it should slowly spring back, but leave a slight dent.
- Preheat the oven - Place your dutch oven (both pieces) into the oven. Preheat to 500°F for at least 45-60 minutes. A hot oven and hot Dutch oven will give you the springiest loaf! When you're ready to bake, reduce heat to 450°F.
- Score the loaf - Turn the dough out onto parchment paper, seam-side down. Dust with flour (I love using rice flour), then score a light decorative pattern (if you want to!) and then a deep slash down the loaf. This tells the dough where to expand.
- Bake - Carefully lower the loaf (still on the parchment paper) into the Dutch oven and cover with the lid.Bake 35 minutes covered (lid on).Remove lid, bake another 10-15 minutes.It's done baking when the crust is a deep golden brown, and the internal temperature hits 195-200°F. It will also sound hollow when tapped on the bottom.
Notes
- Use a kitchen scale to measure your ingredients accurately. Baking is a precise science, and even small variations in ingredients can affect the outcome of your bread.
- Don't overwork the dough. Sourdough bread benefits from a long fermentation time, which develops flavor and structure. However, if you overwork the dough, you can break down the gluten and compromise the texture of the bread.
- Use a Dutch oven or baking stone for baking. A Dutch oven or baking stone creates a steamy environment in the oven, which helps the bread rise and develop a crispy crust.
- Be patient. Sourdough bread takes time to make, but the end result is worth it. Don't rush the fermentation process or the proofing time, as this can affect the flavor and texture of the bread.
Troubleshooting
-
- If your bread is too dense or doesn't rise enough, it may be due to under-fermentation. Make sure your sourdough starter is active and healthy, and give the dough enough time to ferment.
-
- If the bread is too sour, it may be due to over-fermentation. You can try shortening the fermentation time or using less sourdough starter in your recipe.
-
- If the crust is too hard or thick, it may be due to baking the bread at too high of a temperature. Try lowering the oven temperature or covering the bread with foil during the final stages of baking.
-
- If the bread is too sticky or wet, it may be due to using too much water in your recipe or not kneading the dough enough. You can try reducing the amount of water in your recipe or kneading the dough more thoroughly.
-
- If the bread is too dry or crumbly, it may be due to over-baking or using too little water in your recipe. Try reducing the baking time or increasing the amount of water.
Storage tips
- Store the bread at room temperature in a paper bag or wrapped in a clean dish towel. Avoid storing it in plastic, as this can cause the crust to become soft and lose its crispy texture.
- If you don't plan to eat the bread within a day or two, you can freeze it. Slice the bread and wrap it tightly in plastic wrap, then store it in a resealable freezer bag. Frozen sourdough bread will last for up to three months.


Sourdough is one of my favorite types of bread! It is so much more gentle on the digestive tract! Thank you for posting so many sourdough recipes. This batard bread was so soft with a nice crisp outside!
I'm so glad you liked it! Thank you for taking the time to leave a comment and rating. I really appreciate the feedback! Have a wonderful day!