Organic Chicken Treats - Pea Sprouting Seeds
Picture this: a flock of contented chickens, clucking and pecking away in their coop, while enjoying a delicious and nutritious treat. Now, imagine if you could provide your feathered friends with a treat that not only satisfies their taste buds but also boosts their health and vitality. Well, look no further than the power of pea sprouting seeds!
Sprouting peas can be a game-changer when it comes to enhancing your chickens' diet and overall well-being. In this blog post, we'll dive into the world of pea sprouting, exploring the simple yet remarkable process of transforming humble peas into a nutrient-packed delight for your beloved flock. Get ready to unlock the secrets of sprouting peas and discover how to create irresistible and healthy chicken treats that will have your feathered companions clucking with joy!
Benefits of Sprouted Peas for Chickens
Sprouted peas may be tiny, but they offer BIG benefits for our feathered friends! Peas sprouts pack a nutritious punch that supports their overall health and well-being. Packed with vitamins, essential amino acids, minerals, and protein, peas are a nutritional powerhouse that can significantly enhance a chicken's diet. Chickens may be omnivores, but pea and bean sprouts are a fantastic source of plant-based protein!
However, the benefits don't stop there. During the sprouting process, enzymes are activated, unlocking even greater nutrient availability. This means that chickens can absorb and utilize the nutrients more effectively, ensuring optimal nourishment.
Moreover, sprouted peas are easier to digest, as the sprouting process breaks down complex compounds, making them more palatable and gentle on the digestive system. By incorporating sprouted peas into their diet, chickens can experience improved digestion, enhanced nutrient absorption, and ultimately, a boost in their overall health and vitality.
Jump to:
Helpful tools for sprouting
Don't overcomplicate this process! We are going to use the jar method, which is super easy. All we need are simple household items such as a large glass jar covered with cheesecloth, sprouting lid or a mesh strainer. In my opinion, these are the easiest sprouts to make!

As an amazon associate, this post contains affiliate links, which means I make a small commission at no extra cost to you. See my full disclosure here.
+ Organic Sprouting Peas | I get my pea sprouting seeds from Scratch & Peck Feeds. They are Certified Organic, Non-GMO Project Verified, and grown in North America.
+ A wide mouth jar | My favorite size is a quart. This makes the perfect amount of sprouts for my flock to snack on free choice. Any sprouting jar will work!
+ Breathable lid | Keep it simple and use a cheesecloth with a rubber band, or use a sprouting lid.
+ A bowl | It needs to be just big enough to invert the jar during the sprouting process.
Step-by-Step Guide: Pea Sprouting Seeds
Sprouting is a natural process that transforms seeds, like peas, into young, tender plants. It involves soaking the seeds in water and allowing them to germinate, triggering the growth of sprouts. During sprouting, the seed's dormant state is awakened, leading to the development of a tiny root and shoot.
This process activates enzymes, breaks down complex compounds, and increases nutrient availability. Sprouting not only enhances the nutritional profile of seeds but also makes them easier to digest, making them a valuable addition to both human and animal diets!
1. Soaking the peas
2. Rinsing and draining
3. Sprouting the peas
4. Harvesting the sprouts.

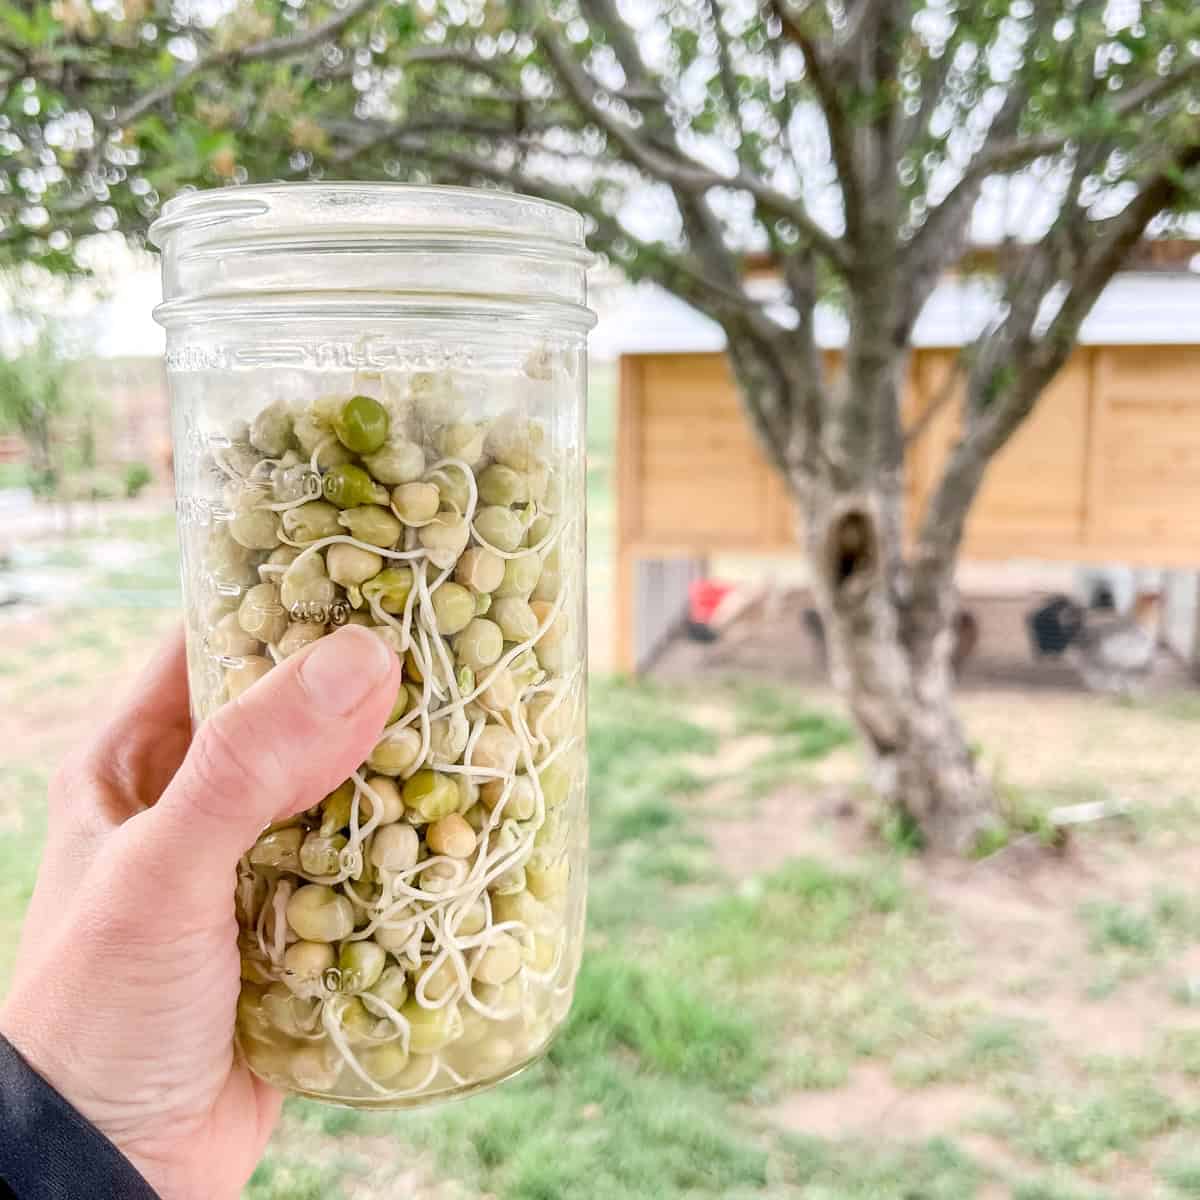
Add a cup of seeds to a quart mason jar and fill it with water and add a breathable lid. I prefer to use a sprouting lid, but a cheesecloth would be fine, too. Put the jar of soaked seeds somewhere either dark or with indirect sunlight and let it sit for 12 hours.

Now that the initial soak is complete, it's time to begin a series of rinsing and draining. Drain water from the mason jar by either using the sprouting lid, cheesecloth or mesh strainer with drainage holes. Rinse the peas and drain the water. Invert jar with the sprouting lid on in a bowl. This allows the excess water to drain out the bottom. Let it sit for 12 more hours.

Repeat this process of sprouting the green pea seeds by continuing the rinsing and draining every 12 hours. The room temperature and time of year will affect the sprouting times. In a warm kitchen, the roots can begin to develop in as few as 48 hours. In a cooler environment, it might take several days for the pea shoots to form.

The green pea sprouts are ready when the roots have sprouted and are at least one quarter of an inch long. Give the seeds a final rinse with cool water and take them out to your hens!
I sprinkle the sprouts on the ground in the coop and usually stand their gawking as I watch them go wild as they devour their young pea sprouts snack! Why is everything chickens do so stinking cute? I probably have more photos on my camera roll of chickens than anything else.


How to store sprouted peas
Storing sprouted peas is a breeze, and the secret lies in the refrigerator. Once your sprouts are rinsed and ready to go, follow these simple steps to keep them fresh:
First, make sure your sprouted peas are well-rinsed to remove any debris or excess water. You want them clean and ready for storage. Give them a good drain to get rid of any lingering moisture that could lead to spoilage.
Next, find a suitable container. Look for an airtight one or a resealable plastic bag or a wide mouth mason jar with lid. Cleanliness is key, so ensure your chosen container is dry and free from any lingering odors. To maintain the sprouts' freshness, line the container with a layer of dry paper towels. These handy towels will absorb any extra moisture, keeping your sprouts crisp and ready to enjoy.
Carefully transfer your sprouted peas into the container, spreading them out in an even layer. Be gentle to avoid damaging or crushing the delicate sprouts. You want them to stay intact and appetizing. Seal the container tightly or zip up the resealable bag, making sure to minimize air exposure. Pop the container into the refrigerator, ideally in the vegetable or crisper drawer where it's cool and just right for food storage. Following these tips will help stretch the shelf life of your sprouts up to two weeks!

Helpful tips
Remember to check on your sprouts occasionally. Look out for any signs of spoilage, like sliminess, discoloration, or strange odors. If you spot anything off, discard those sprouts right away. And if the paper towel becomes damp, swap them out for fresh ones. For the best taste and quality, it's recommended to consume your sprouted peas within 3-5 days. By following these simple steps, you'll be able to store your sprouted peas successfully in the refrigerator, keeping them delicious and nutritious for your flock!
Ready to try sprouting green peas?
Now you have all the tools you need to start your own journey of sprouting peas for your feathered companions! Remember that you're not just providing them with a tasty treat, but also nourishing their health and happiness. By incorporating sprouted peas into their diet, you're unlocking a world of benefits, from increased nutrient availability to improved digestion. So go ahead, sprout those peas and witness the joy that fills your chicken coop!
Don't be afraid to get creative with how you incorporate sprouted peas into your chicken treats—mix them with feed, create homemade pea-based snacks, or add them to vegetable mixes for an extra nutritious boost. We also like to just sprinkle them on the ground and let watch the hens peck!
Now it's your turn! I'd love to hear about your experiences with sprouting peas for your chickens. Share your stories or tips in the comments below. Let's create a community of sprouting enthusiasts who are dedicated to the well-being of their flock So, grab those pea sprouting seeds, get sprouting, and watch your chickens enjoy the benefits of these healthy treats!

About Scratch & Peck Organic Chicken Feed
Shop Scratch & Peck Feeds and be sure to use the code NinnescahHomestead15 for a discount on your first order! Finding Organic Non-GMO chicken feed in my area was impossible, but having it quickly shipped to my house is a breeze.
My layers are currently eating 16% Layer Mash that I ferment to help stretch my feed bill and boost the nutrition. Our 10-week-old chicks are loving the Grower Mash, but we've also loved the Chick Starter Crumbles and Grower Crumbles. The crumbles are a great option for easy feeding, while the mash is perfect for fermenting. If you have any questions, don't hesitate to reach out!
FAQ about sprouting chicken feed
This question arises because not all types of chicken feed are suitable for sprouting. Some feeds contain additives or are processed in a way that may hinder sprouting or pose potential health risks to chickens. It's recommended to use specific sprouting or whole grains suitable for chickens to ensure their safety and nutritional benefits.
The duration of sprouting can vary depending on the type of feed and personal preference. In general, sprouting for 2-3 days is common to reach the desired stage where the sprouts are young and tender, offering optimal nutritional value. However, it's essential to monitor the sprouting process, ensuring the sprouts don't become excessively long or develop mold.
More chicken posts you'll love!
If you are the type of person who likes sprouting peas for your flock, I'm guessing this DIY flock block would be a fun project for you! I also have a step-by-step post explaining how to Sprout Chicken Grain. It's easier than you'd think! I've linked a few of my most popular chicken-inspired posts below! Have fun browsing!
Get my Free Guide for Raising Chicks E-Book and learn everything you need to know to get started on your backyard chicken journey!


Comments
No Comments