Cheddar Cheese Curds
Fresh cheddar cheese curds are one of the easiest and most rewarding homemade cheese recipes for beginners. Made with milk, culture, rennet, and salt, these fresh cheese curds are soft, buttery, squeaky, and perfect for snacking. Learn how to make homemade cheddar cheese curds step-by-step, including tips for getting that classic squeaky texture.
Equipment
- cheese cloth
- large cheese mold
- large stock pot
- slotted spoon
- thermometer
Ingredients
- 2 gallons milk raw or pasteurized (NOT ultra pasteurized)
- ⅛ teaspoon mesophilic starter culture
- ½ cup water cool and filtered
- ½ teaspoon Rennet liquid veal rennet is preferred
- ½ teaspoon annatto optional for orange color
- ½ teaspoon calcium chloride only necessary if using refrigerated or pasteurized milk
- 2 tablespoons cheese salt
Instructions
How to Make Homemade Cheddar Cheese Curds
- Pour 2 gallons of milk into a large stainless steel pot and slowly heat it to 88°F. If you’re using fresh raw milk, skip the heating and just filter it straight in from the cow — it’s already the perfect temp. Stir gently as it warms so the heat distributes evenly.
- Once the milk is at temperature, sprinkle ⅛ teaspoon of mesophilic starter over the surface. Let it sit for 5 minutes to rehydrate, then give it a gentle 30-second stir. Keep the milk at 88°F and let it ripen for 1 hour.
- Dilute ½ teaspoon liquid rennet and annatto (if you want orange colored cheese), plus calcium chloride(you only need this if you’re using refrigerated or pasteurized milk) in ½ cup of room temperature, non-chlorinated water. Pour it into the milk while stirring gently in an up & down motion for about 30 seconds so it’s evenly mixed. Now let it rest, undisturbed, for 45 minutes to 1 hour until it sets. Check for a clean break, then slip a knife in and if the curd separates neatly, you’re ready for the next step.
Cut, Heat & Strain the Curds
- Take a long knife and cut the curds into ½-inch cubes. Let them sit for about 10 minutes so they can firm up a bit before heating.
- Over the next 30 minutes, slowly heat the curds to 100°F (39°C), stirring gently to keep the warm curds from clumping. Once you hit 100°F, hold that temp for another 10 minutes with occasional stirring. You’ll notice the curds shrinking and firming up and they'll begin to sink to the bottom of the pot, and that’s exactly what you want.
- When the curds are firm and springy, pour off the whey. I like to line a mesh strainer or colander with cheesecloth and dump the curds in, saving the whey in case I need it later. Let them strain for about 20 minutes.
Cheddaring & Pressing
- This the beginning of the cheddaring phase, aka what that makes cheddar, well… cheddar. Take your drained curd mass and slice it into slabs. Stack them in your pot or on a board, then flip the stack every 20 minutes for about 2 hours. The texture will change as you go — the curds will get firmer, smoother, and a little more elastic.
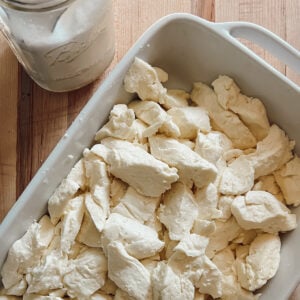
- Once cheddaring process is done, cut those slabs into ½ inch-sized pieces. Sprinkle on 2 tablespoons of cheese salt and toss to coat evenly.
- Spread the curds on a cheesecloth-lined mesh rack and let them rest at room temperature for about 2-24 hours. This helps them firm up and develop a little more flavor.
Notes
Nutrition
Calories: 189kcalCarbohydrates: 15gProtein: 10gFat: 10gSaturated Fat: 6gPolyunsaturated Fat: 0.3gMonounsaturated Fat: 2gCholesterol: 38mgSodium: 701mgPotassium: 473mgSugar: 15gVitamin A: 511IUCalcium: 389mgIron: 0.01mg
Tried this recipe?Share it with us @NinnescahHomestead